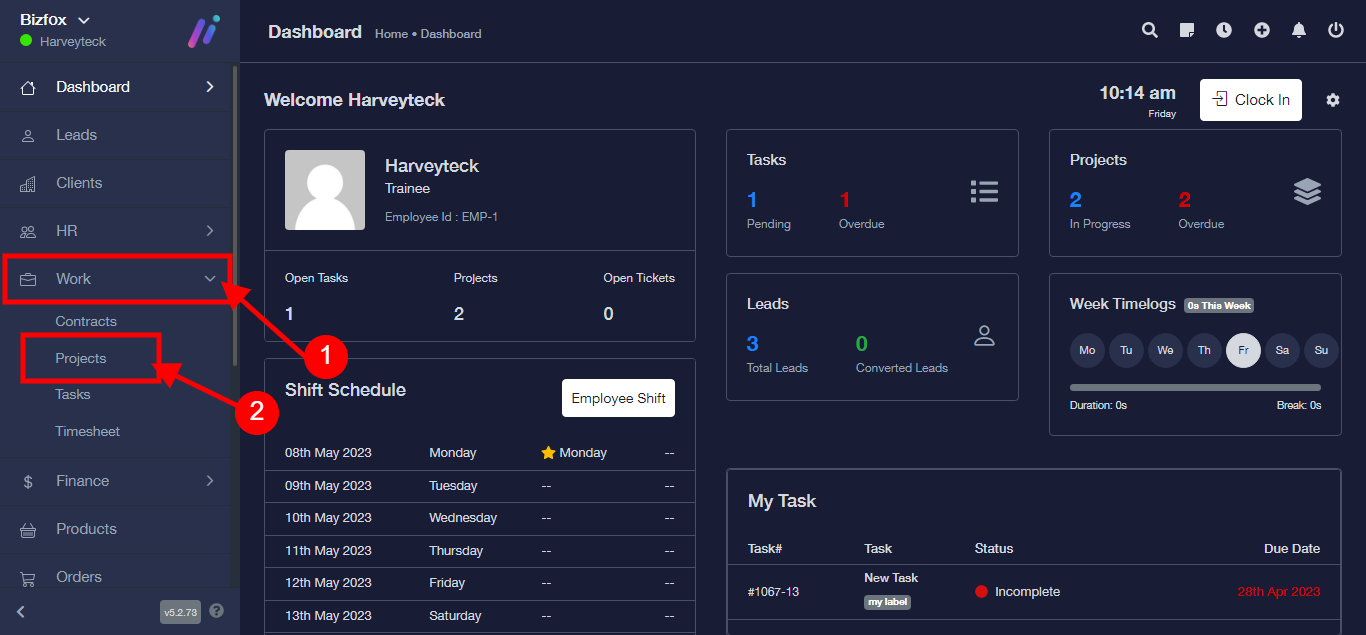
Step 1: After you’ve logged into your Business manager account, it leads you to the dashboard and there you get to see the left nav-bar and a table. On the left-nav bar click on “WORK” dropdown, It takes you to “PROJECT” Click on “PROJECT”
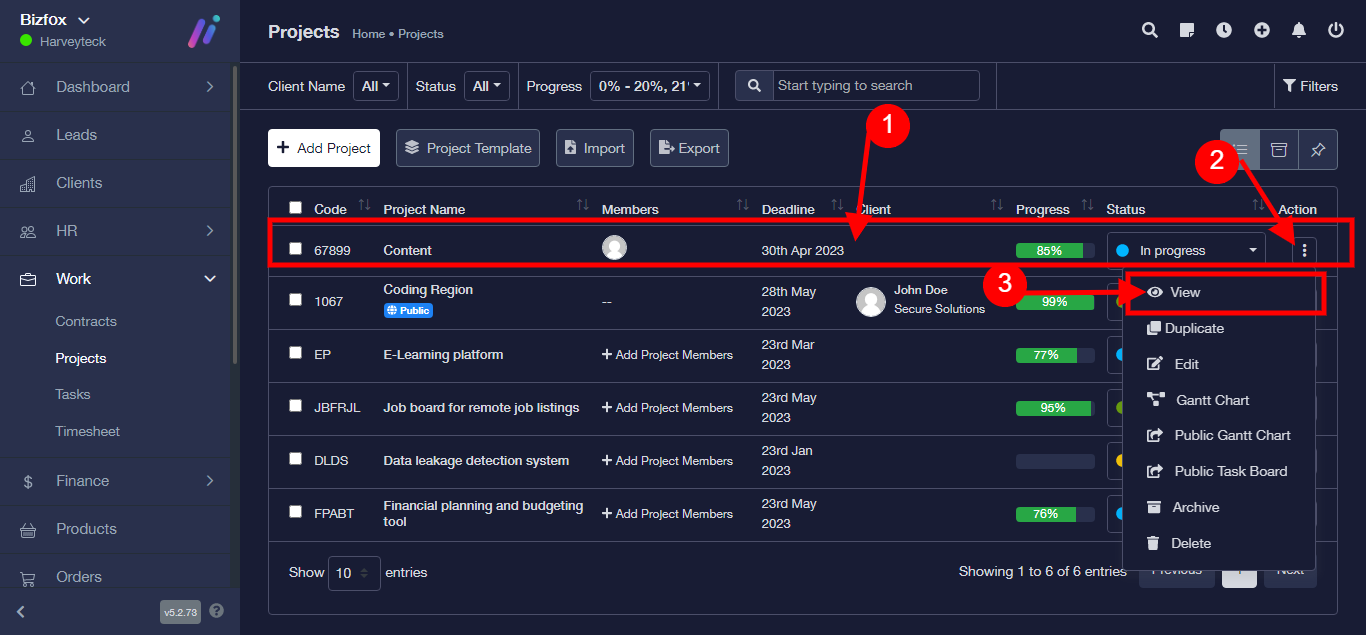
Step 2:
1) Select an already existing project
2) Click on the three toggle button
3) Select View
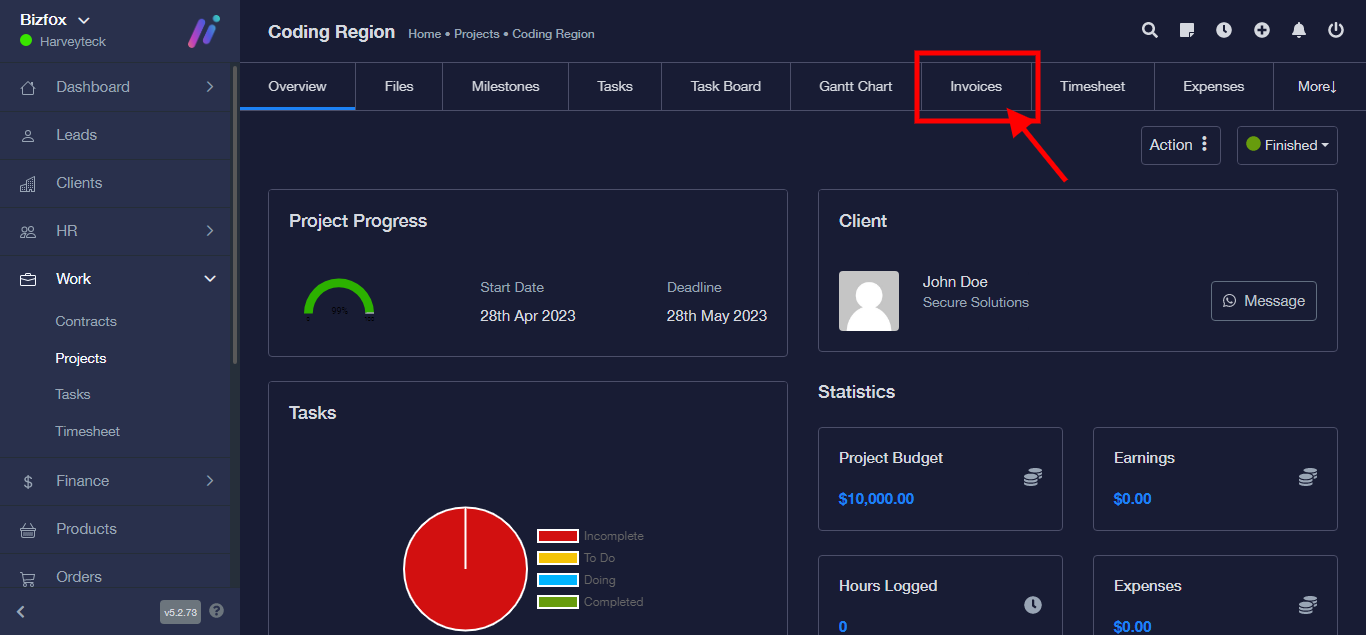
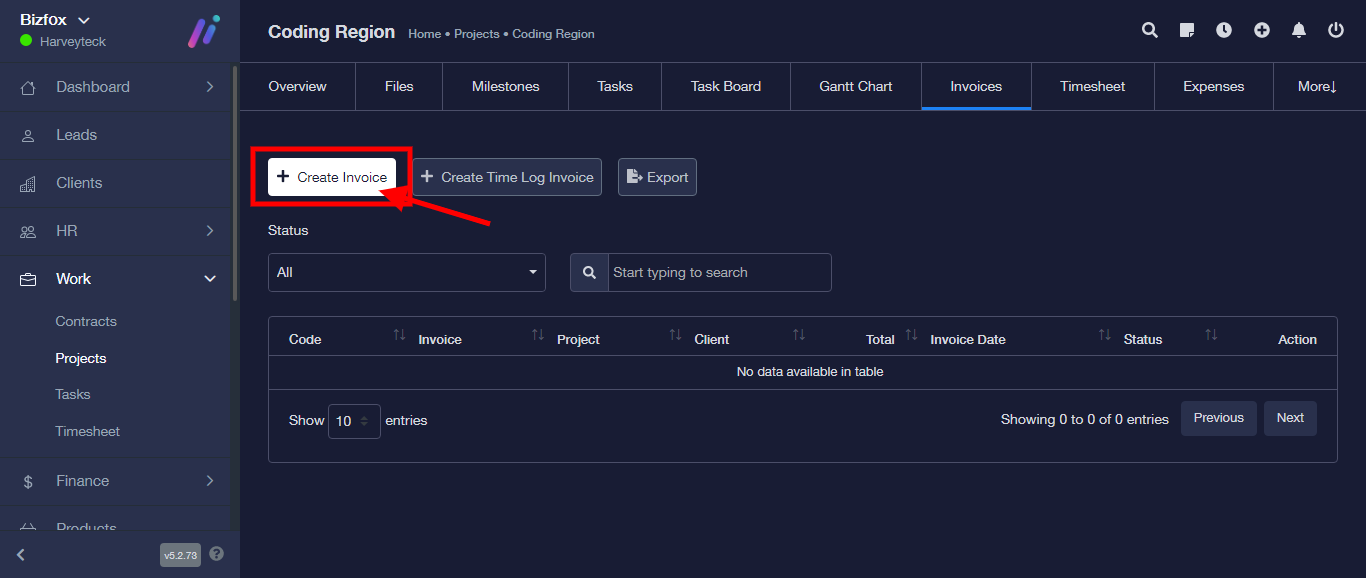
Step 3: Click on the “Invoices” Tab
Step 4: Click on “Create Invoices”
Step 5: Enter “Invoice Number”
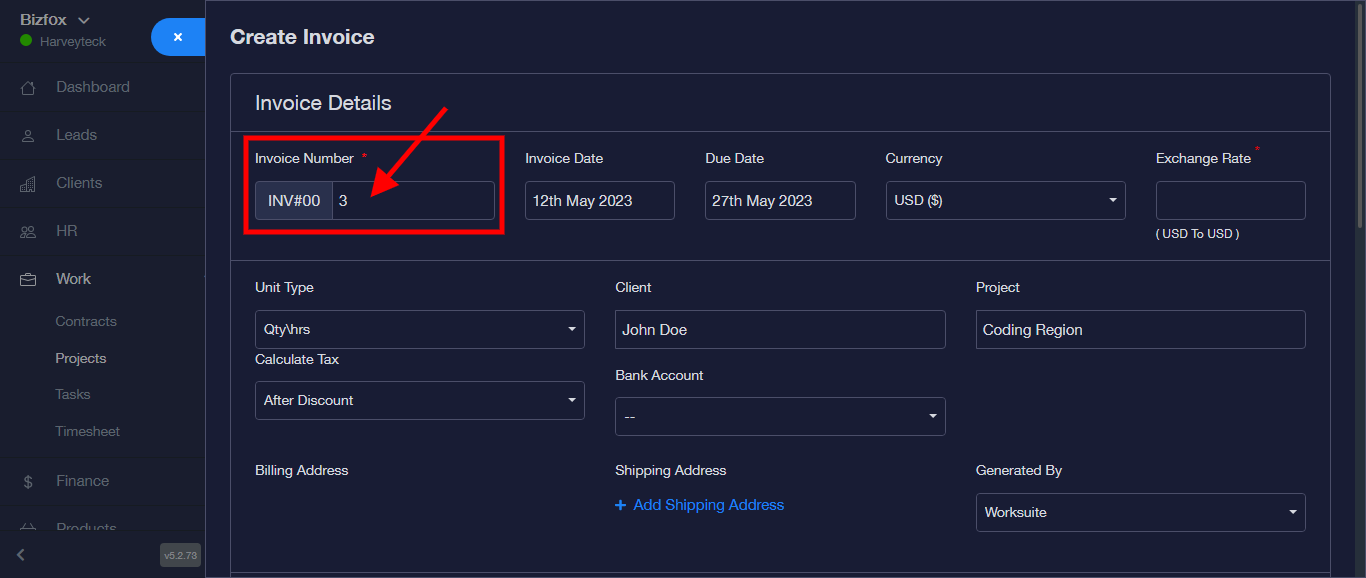
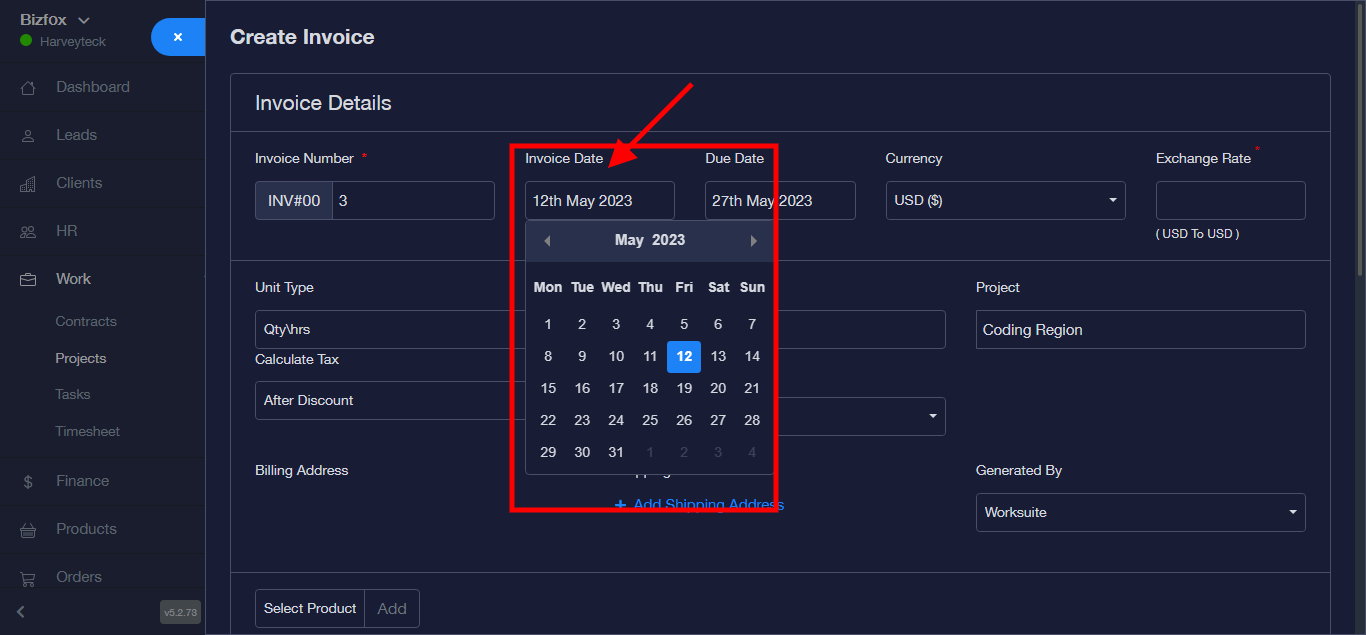
Step 6: Enter “Invoice Date”
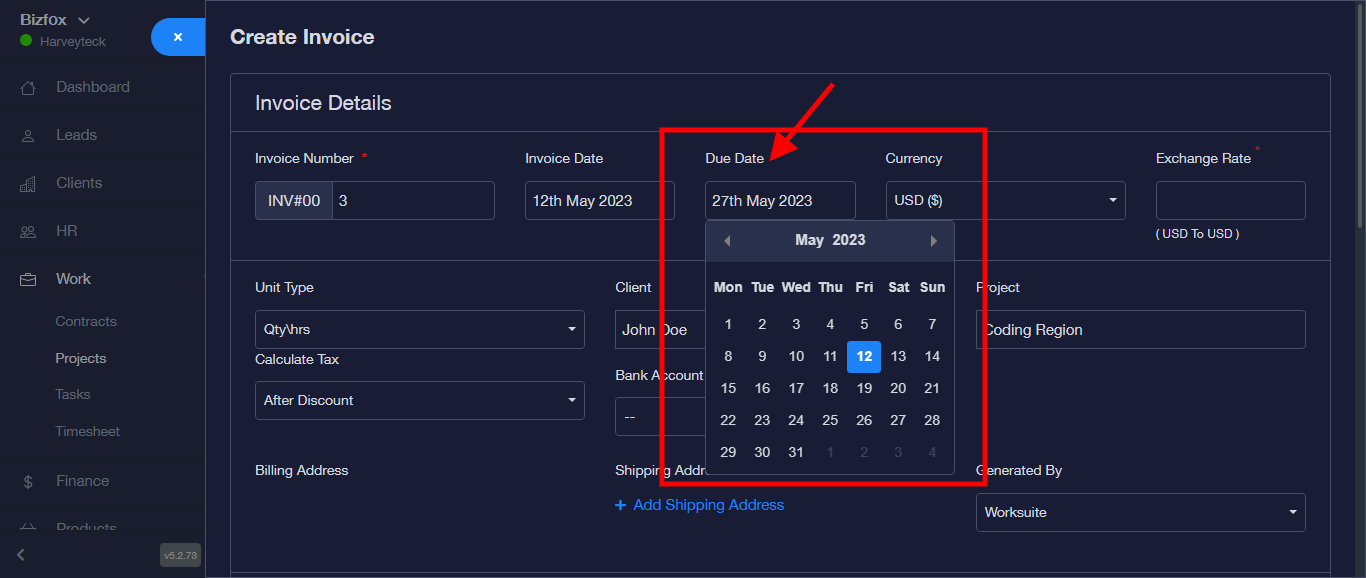
Step 7: Enter “Due Date”
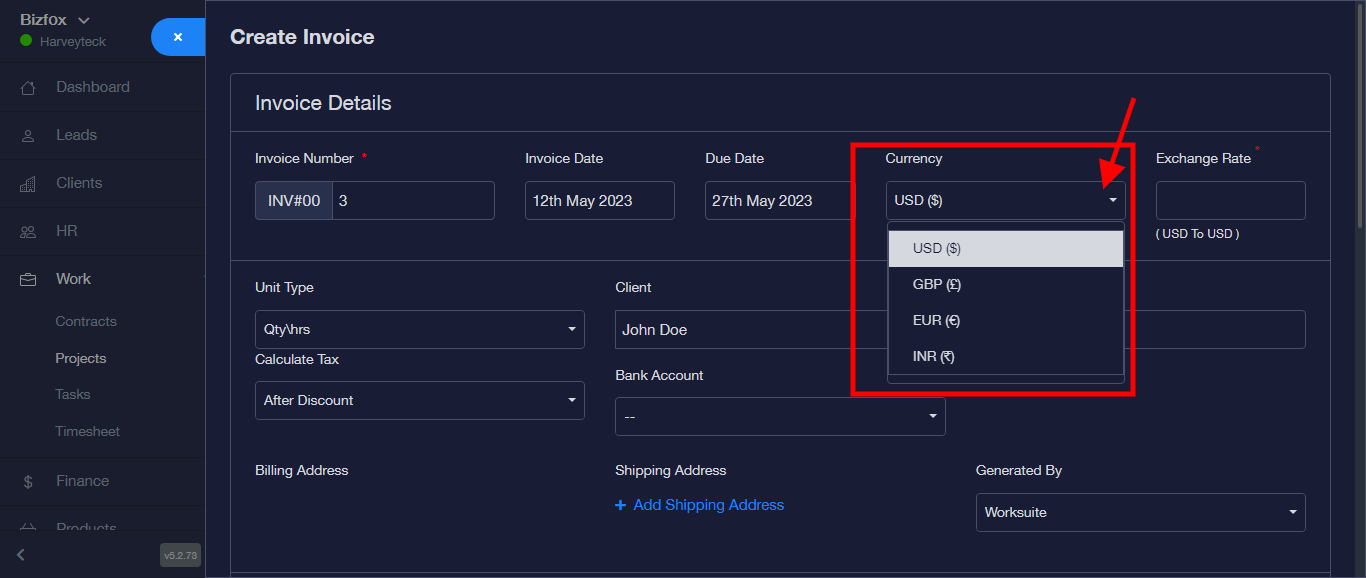
Step 8: Enter “Currency”
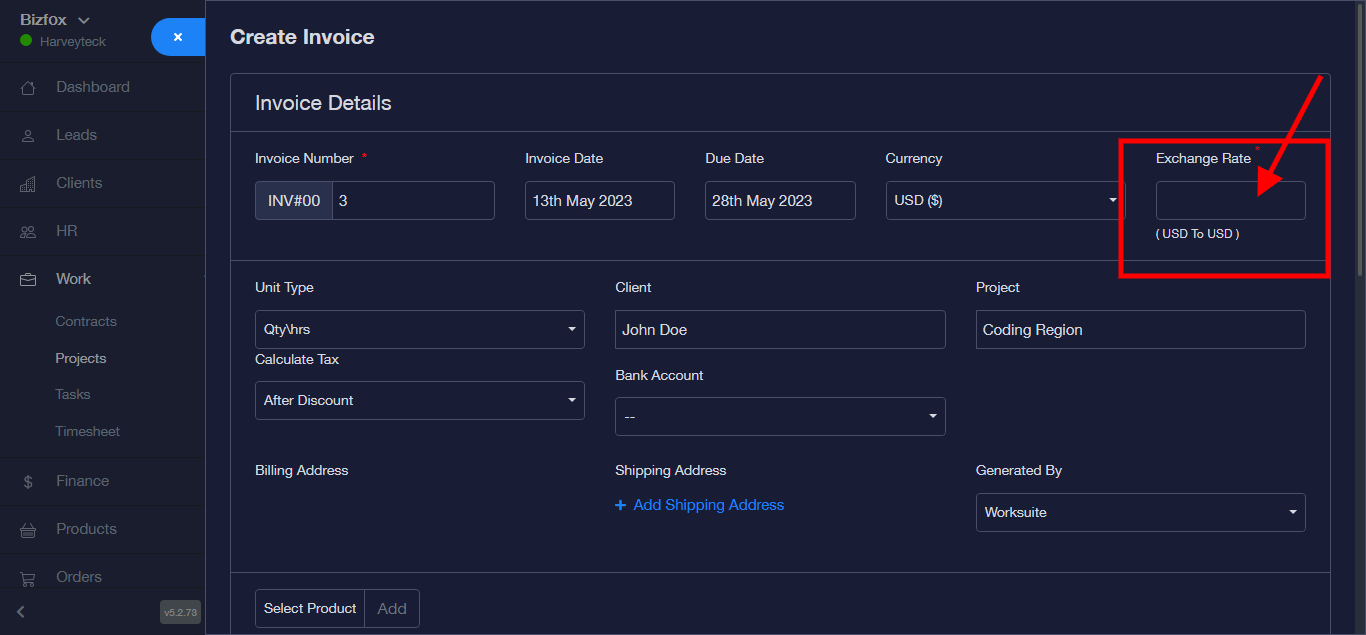
N/B: Exchange rate is automatically generated, depending on what you choose in “Step 8—Currency”
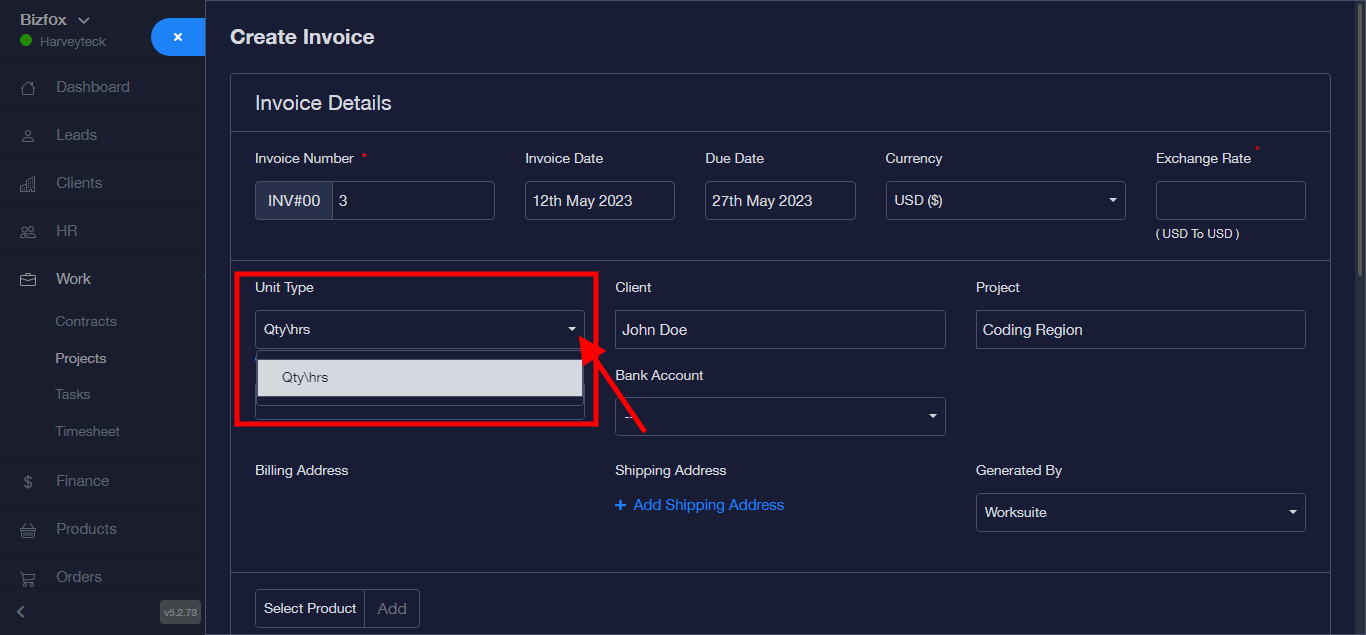
Step 10: Enter “Unit Type” from the dropdown
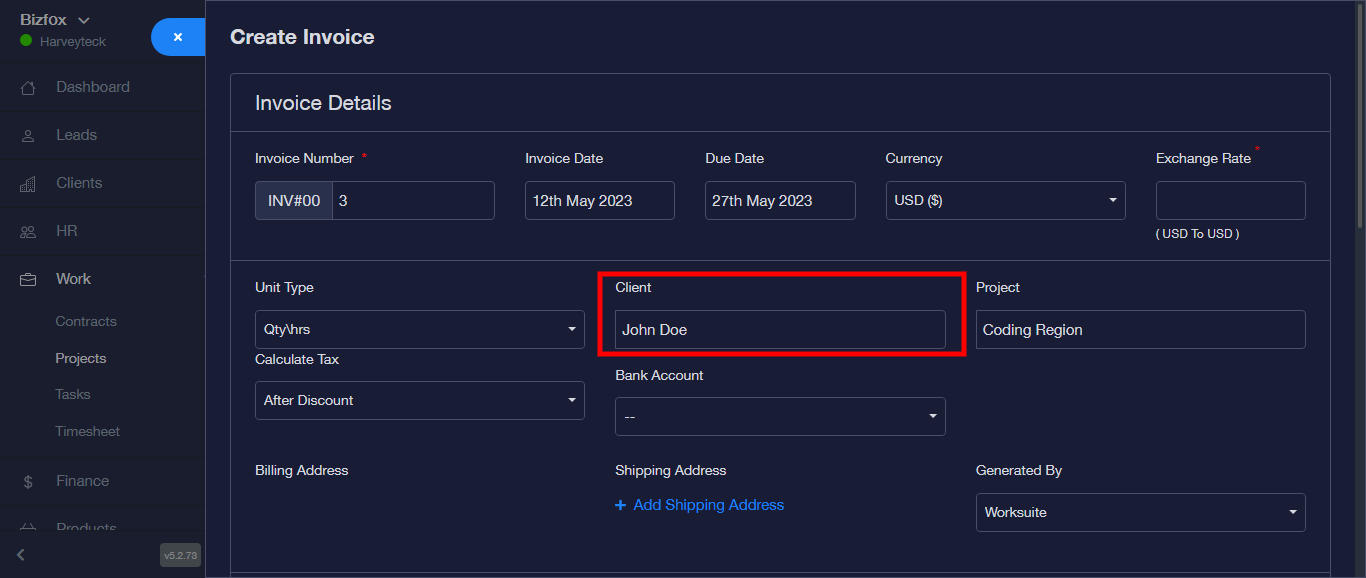
Step 11: Client detail is automatically generated as a result of the particular project selected.
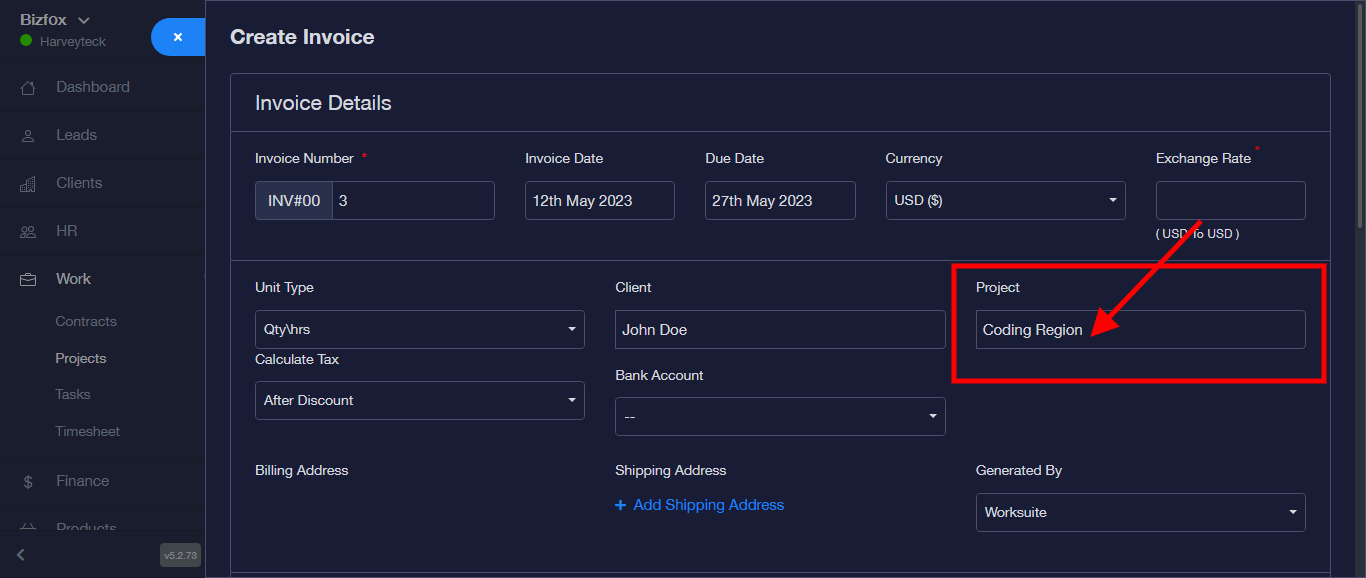
Step 12: Project detail is automatically generated as a result of the particular project selected.
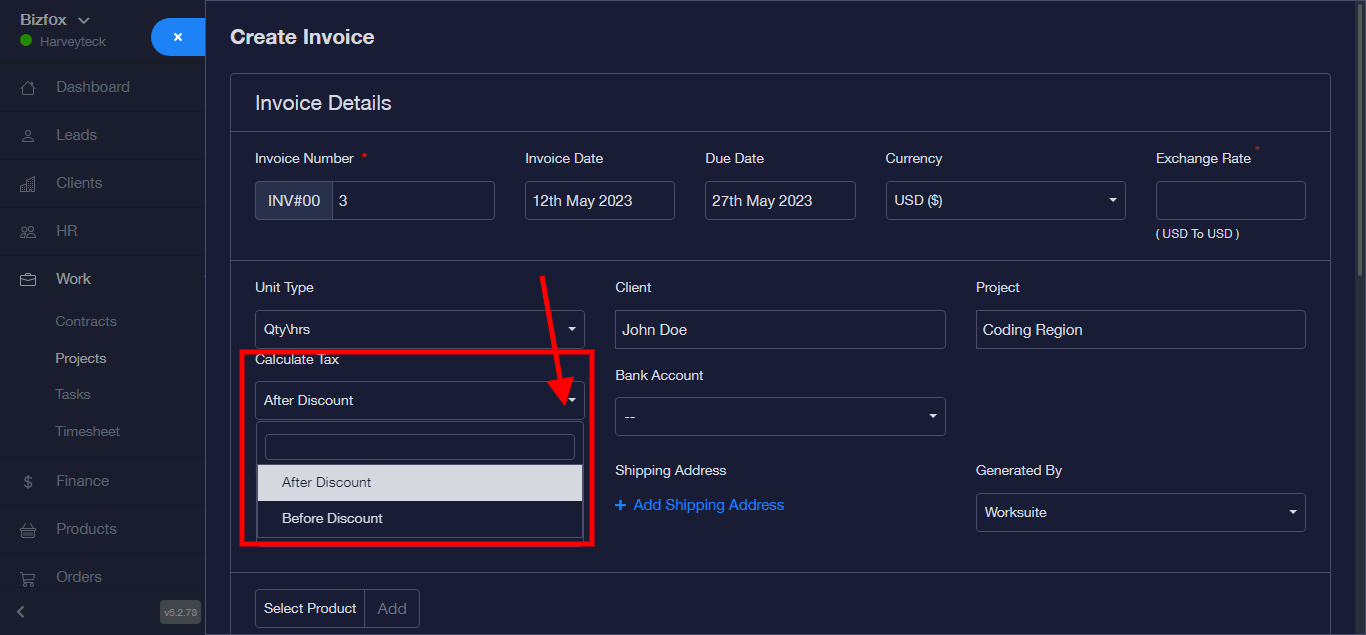
Step 13: Select “Calculated Tax” from the dropdown
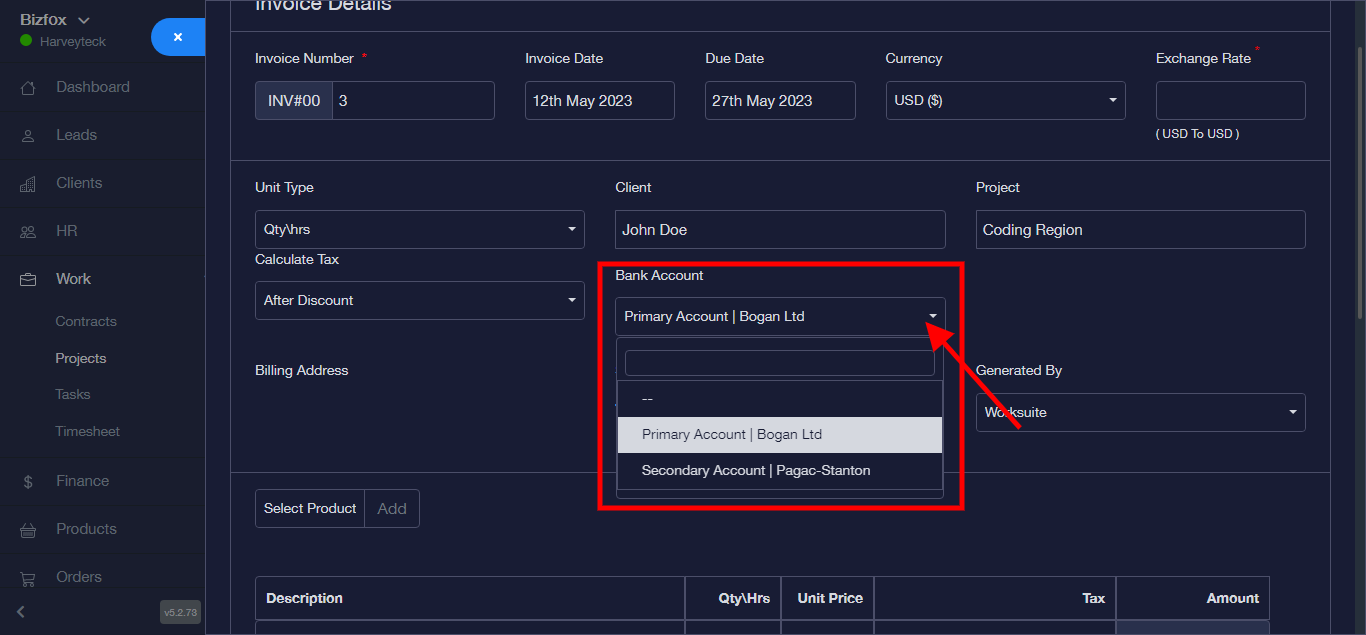
Step 14: Select “Bank Account” from the dropdown
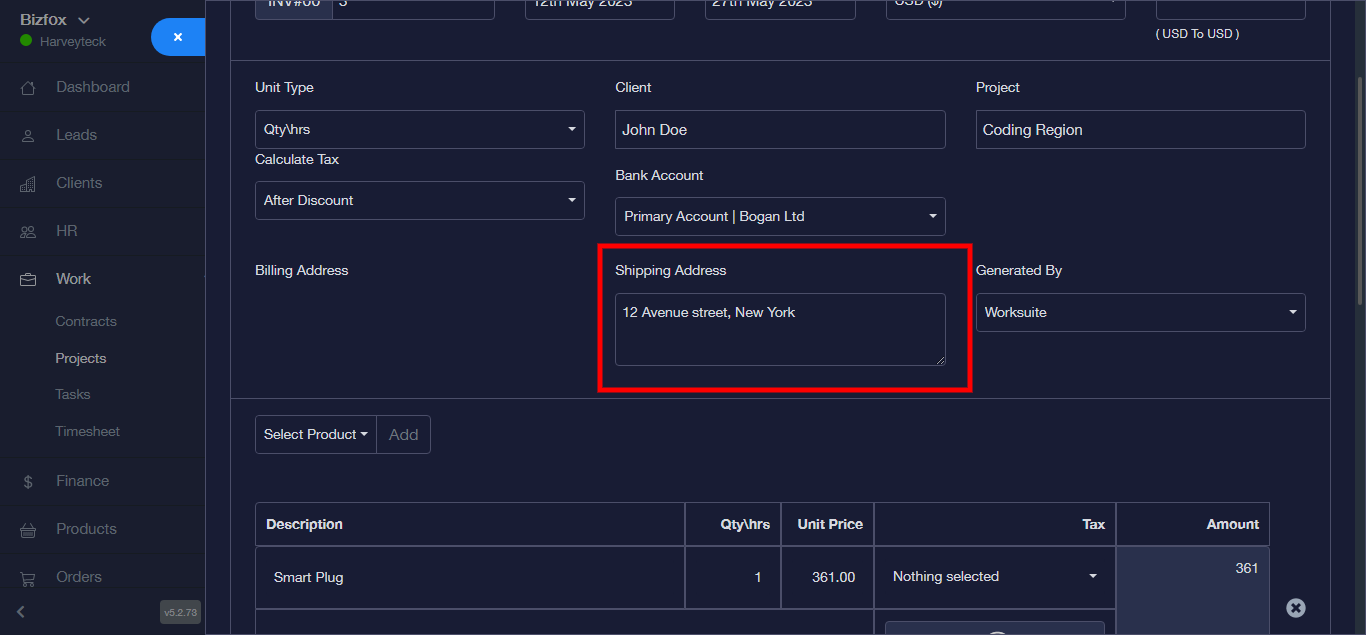
Step 15: Select “Shipping Address” from the dropdown
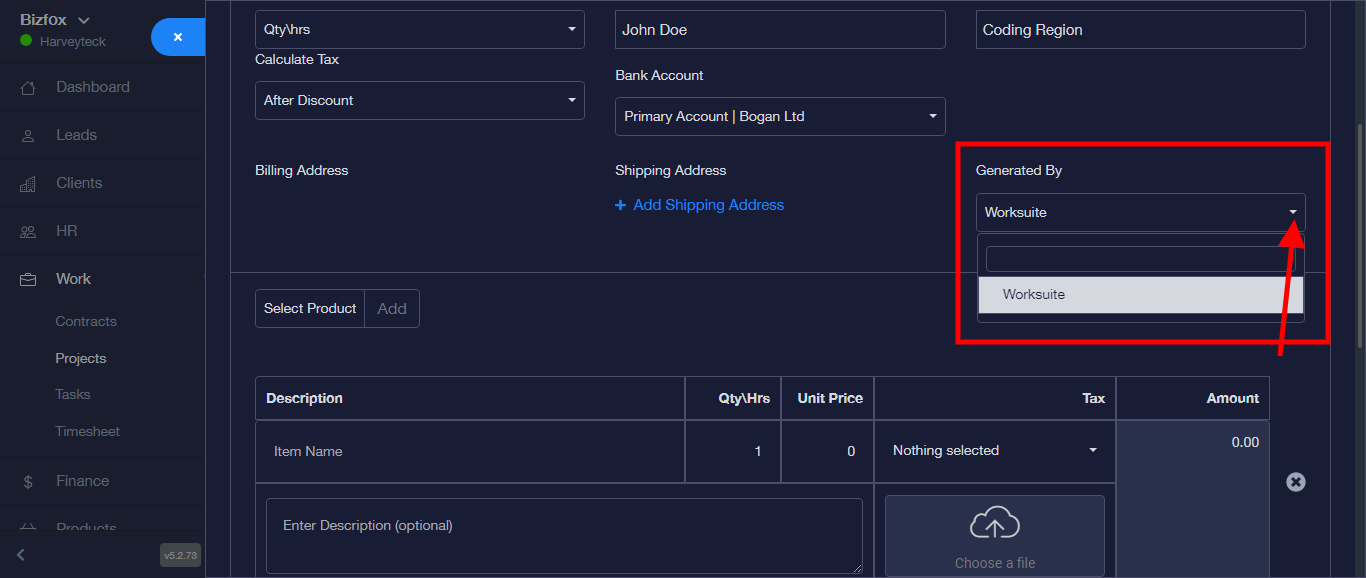
Step 15: Select a Vendor from the dropdown
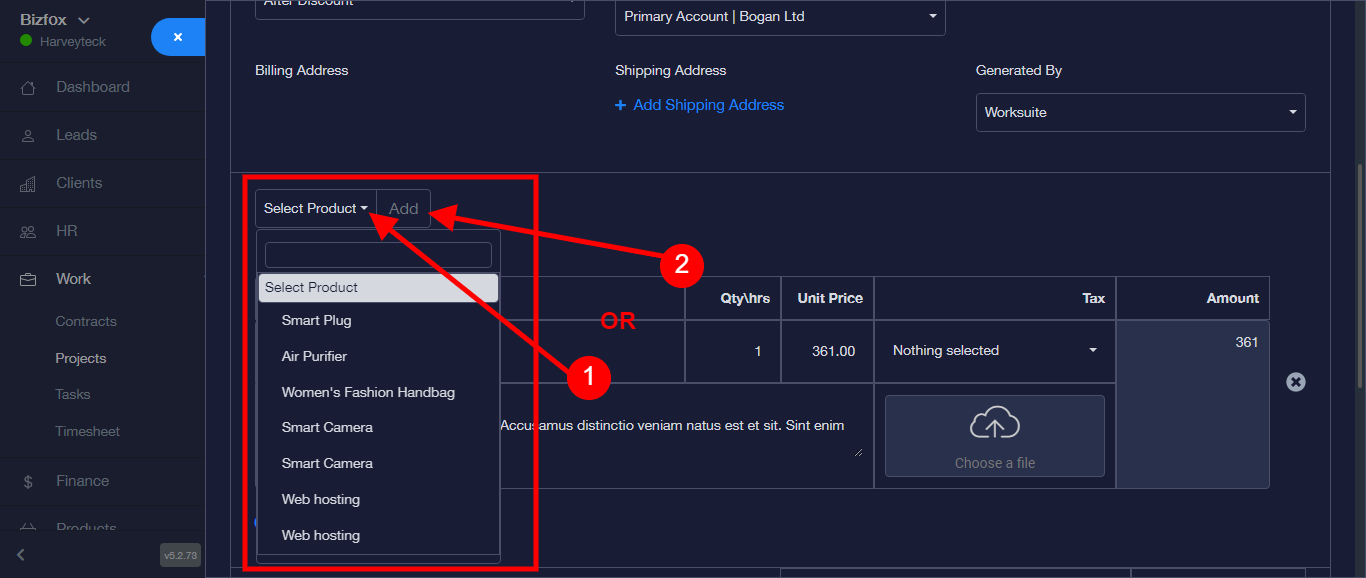
Step 16: Click on “Select Product” to pick a product or more from the dropdown or Click on the “Add” button to add new product
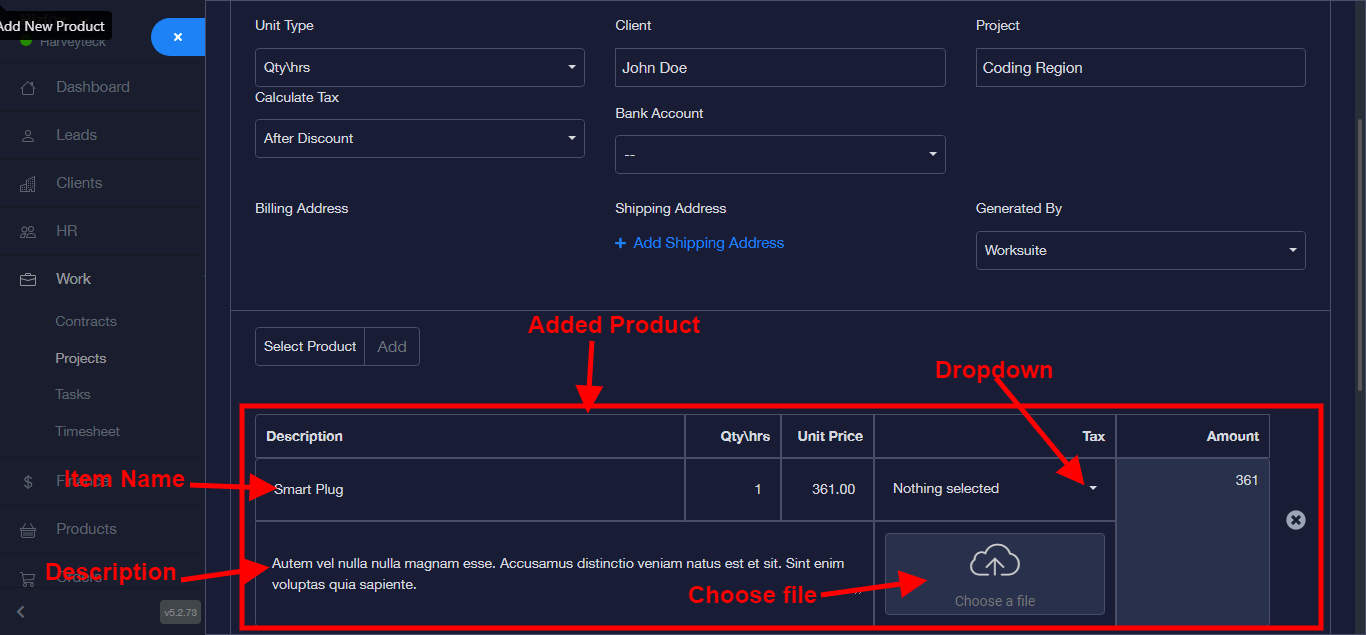
Step 17: Product has been added successfully.
N/B: Kindly note that each tab can be edited manually: i.e.
- The description/Item name tab
- The Qty/hrs tab
- The unit Price tab
- The Tax tab (this can be selected from the dropdown)
- Choose a file from your PC
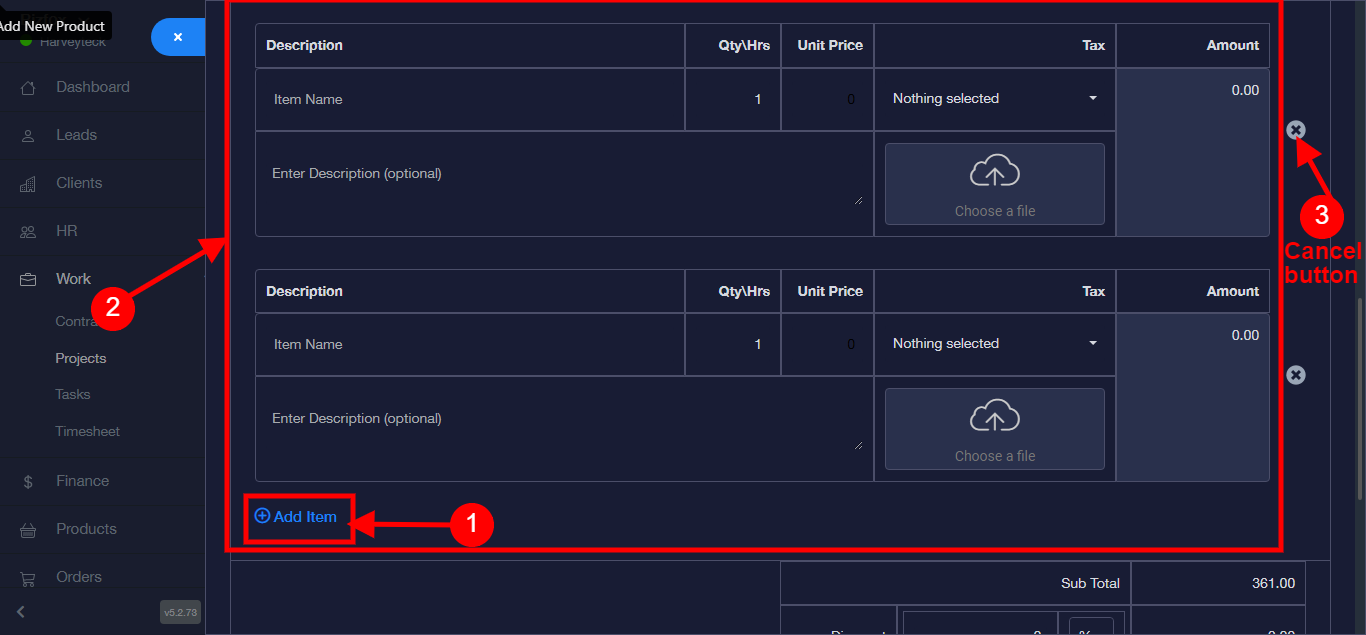
OR
Click on “Add Item” to add multiple products and edit.
N/B: Click on the cancel button to delete product
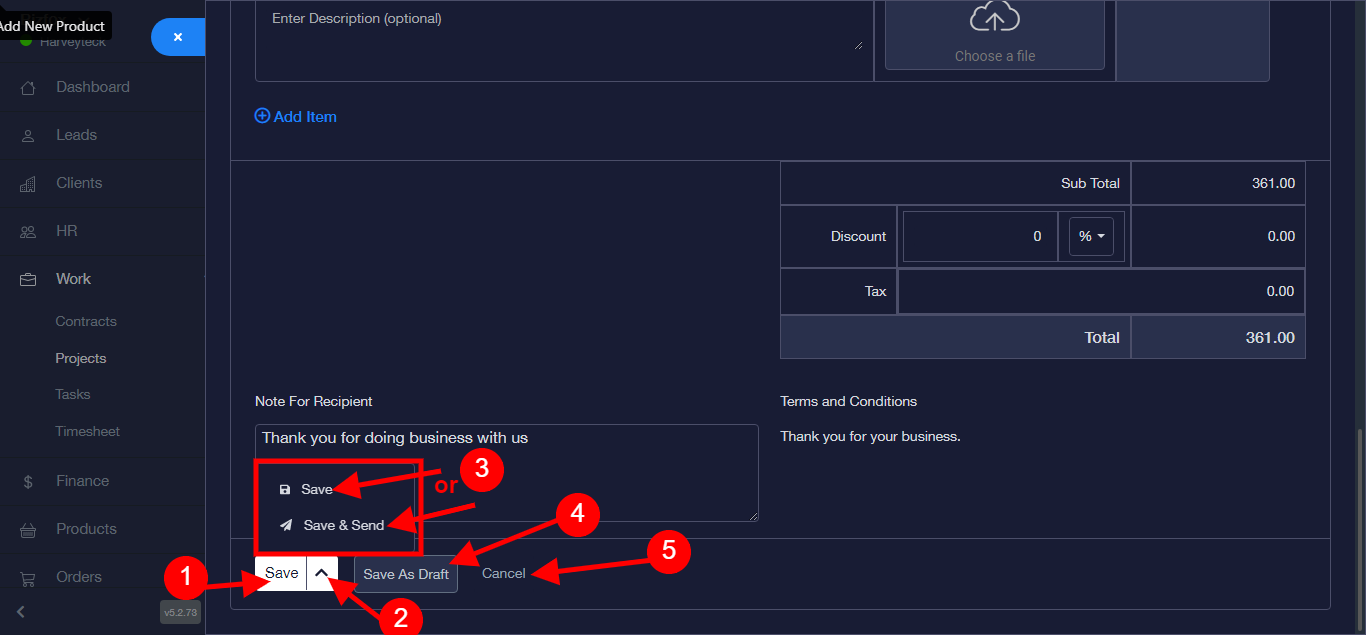
Step 18:
- Click on “Discount” tab to edit discounted figure
- Discount can be in “Percentage % or Amount” and can be selected from the dropdown
- Fill the Recipient note.
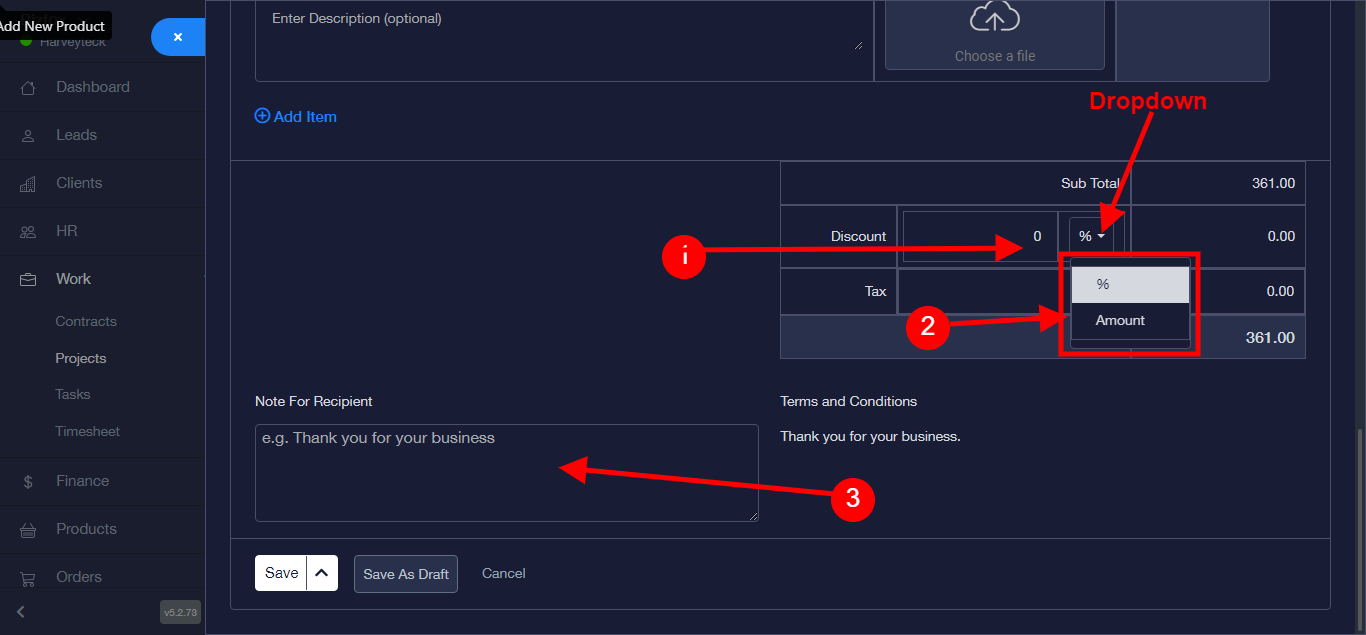
Step 19: This step comes with different options:
- Click “SAVE” to save invoice and Invoice will be Added Successfully.
- Click on the dropdown to either “SAVE” or “SAVE and SEND”
- Click “SAVE AS DRAFT” to save invoice as draft
- Click “CANCEL” to cancel the process