
To use client finder first, go to the dashboard of Iceleraite. Then click on the menu called client finder at the left-sidebar of the dashboard

Getting Started On Using The Client Finder
Log in to your iCeleraite account.
STEP 1: Click on ‘ClientFinder’ menu on the side menu bar of your dashboard

You will be taken to the client finder dashboard

How To Search For Clients Without Using The Filter Option
You can search for clients by just entering your preferred location and keyword.
HINT: Simplify Your Search for Clients in Cities!
For the best results with our Client Finder app, we recommend focusing your search on cities specifically. By entering the name of a city, you’ll narrow down the results and find the clients you’re looking for more efficiently. Avoid using states, counties, landmarks, or any other location references that extend beyond the city level.
Why search by city only? Here are a few reasons:
1. Precision: Cities provide a more precise location to match your needs, ensuring you find clients in the desired urban area.
2. Relevance: Searching by city ensures the results closely align with your intended location, minimizing irrelevant matches.
3. Streamlined Experience: By sticking to cities, you’ll save time and effort, as our app focuses specifically on connecting you with clients within urban boundaries.
Remember, the more specific and accurate your search, the better your chances of finding the right clients. So, let’s keep it simple. Type in the name of the city you’re targeting, and let our Client Finder app do the rest!
From all of us at Agency iCeleraite, we wish you Happy searching and connecting with clients in your chosen cities!
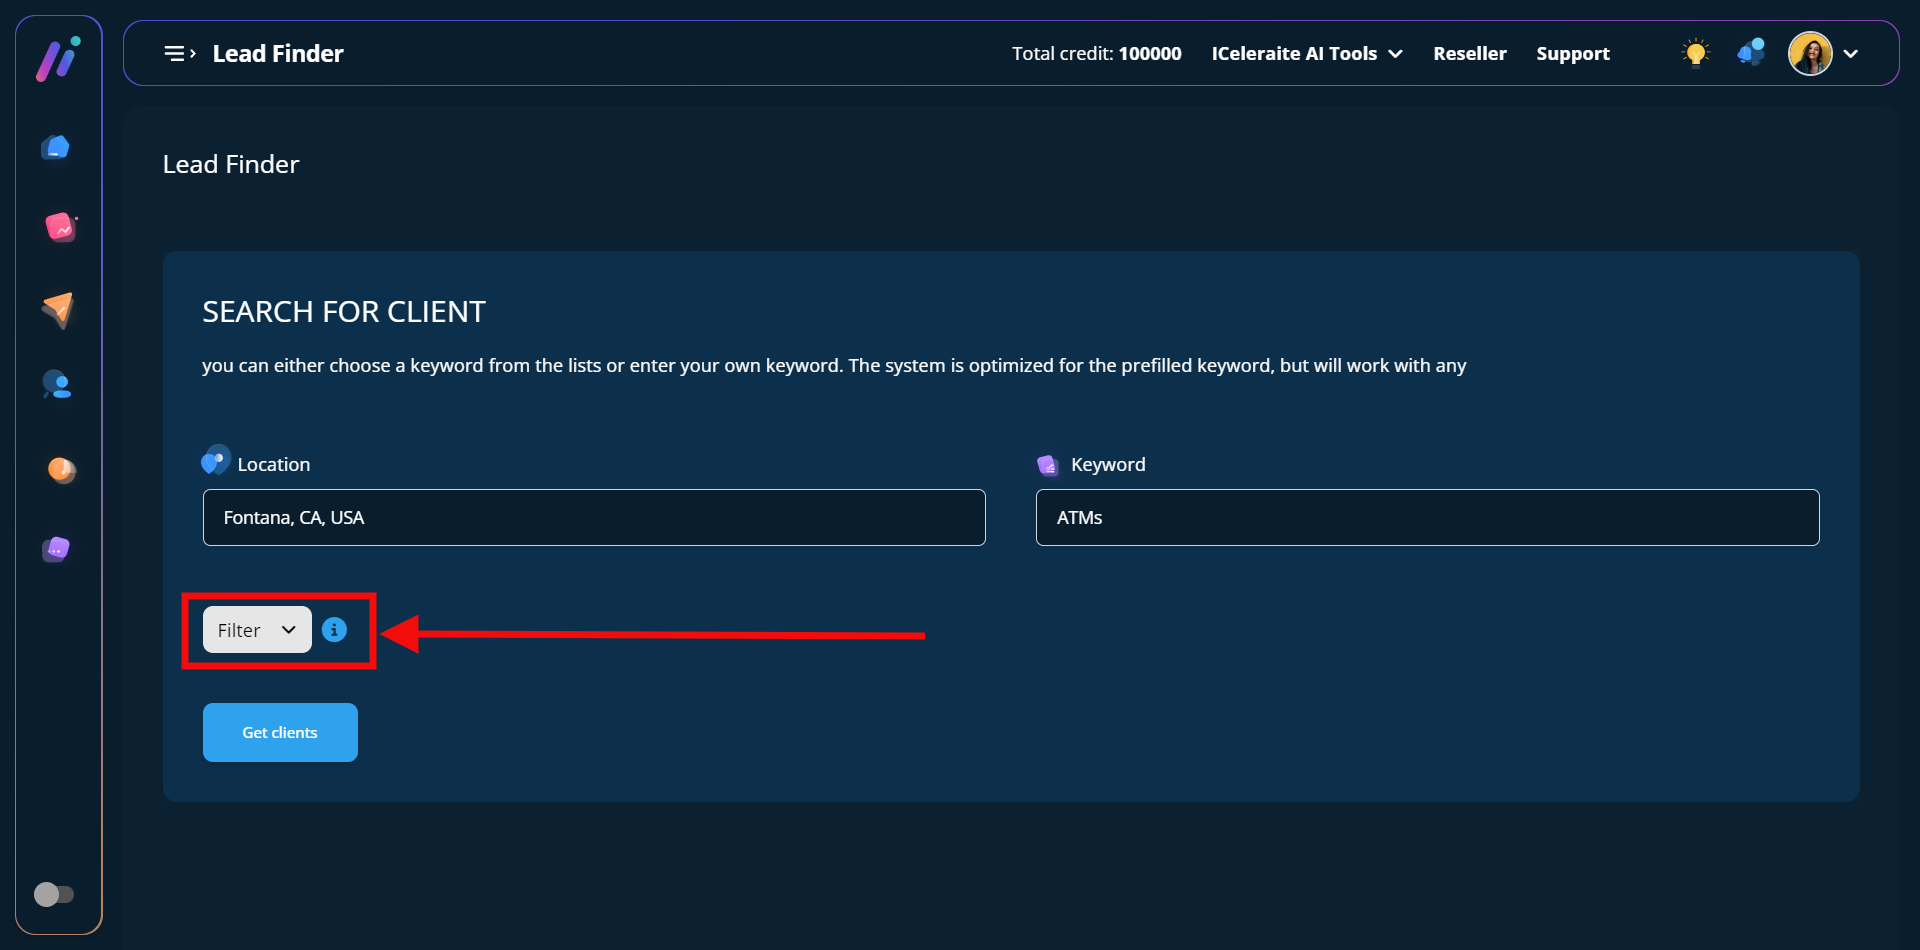
STEP 1: To search for clients, you will have to enter the preferred location you will like to search in as well as your keyword niche

and go ahead to click the ” get clients” button.
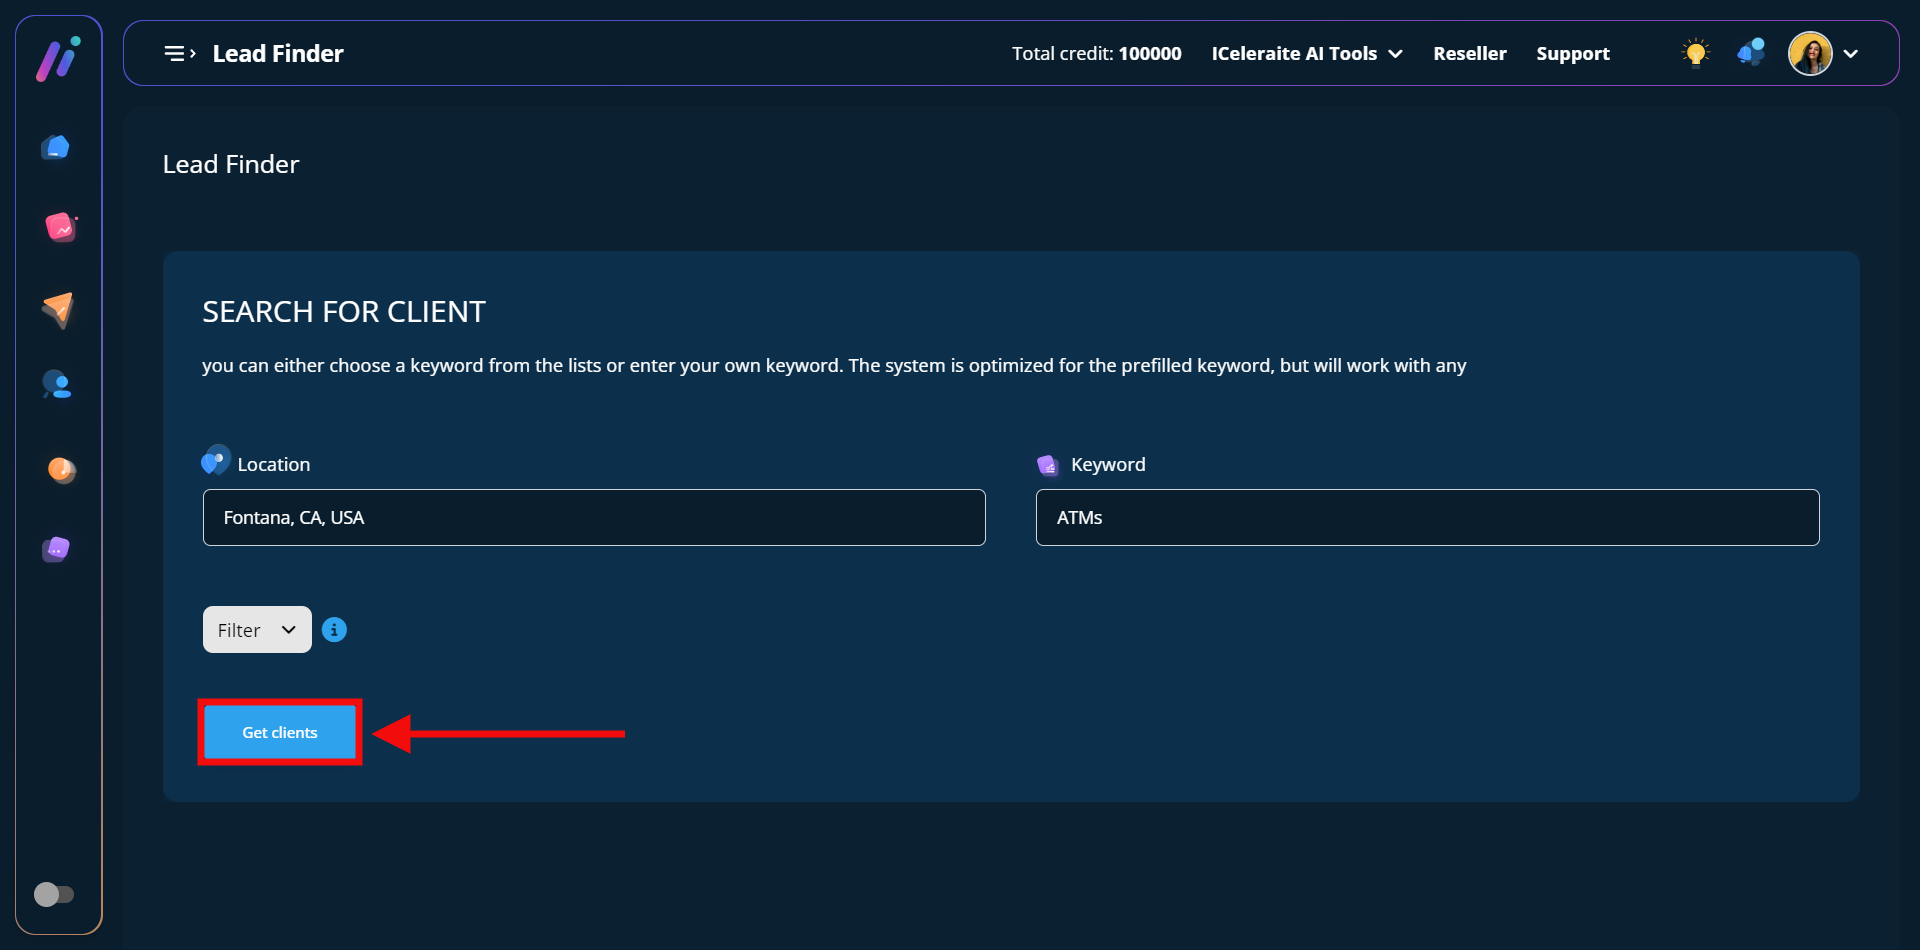
As you can see in the screenshot above I have successfully entered my preferred location and keyword, the next thing I will have to do is to click the “get clients” button.
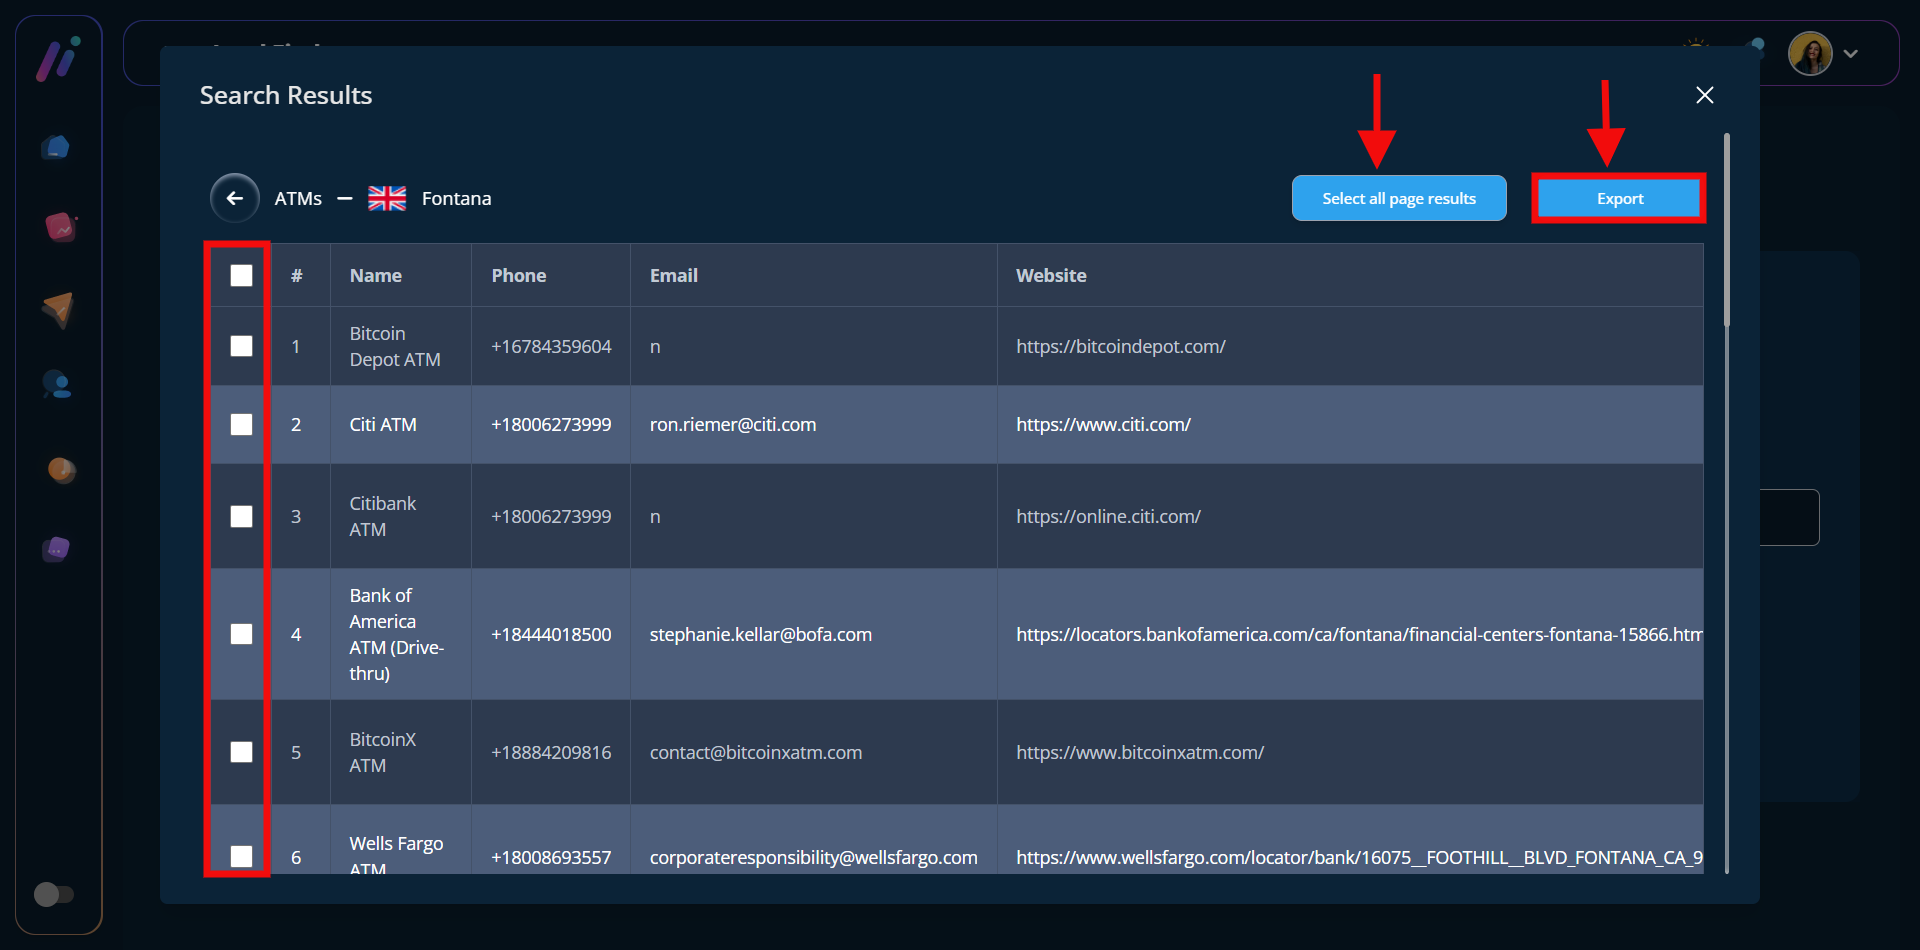
STEP 2: You will see a pop-up displaying the search results which include; name, phone, email, website, etc and you will find the horizontal, vertical scroll bar, select box, and pagination to see more of the search result details.
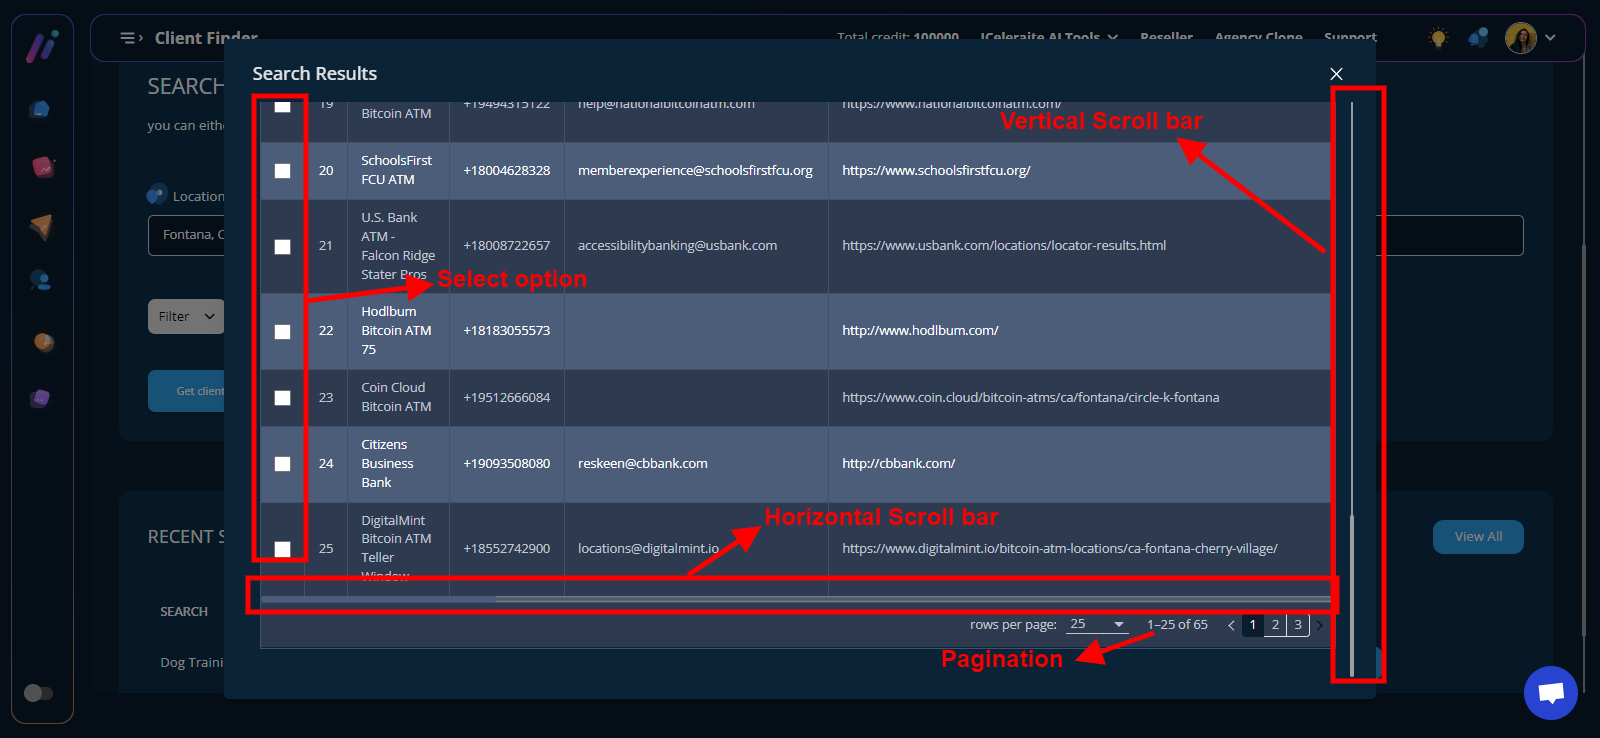
When you want to export the client details, you can decide to either select all page results or select your preferred results using the checkbox at the left hand then click on the “export” button.
STEP 3: After clicking on the“export” button, you will see a pop-up with the option to export your selected client(s) to an already existing tag or to create a new tag perhaps you wish to export the selected client(s) to a different tag.
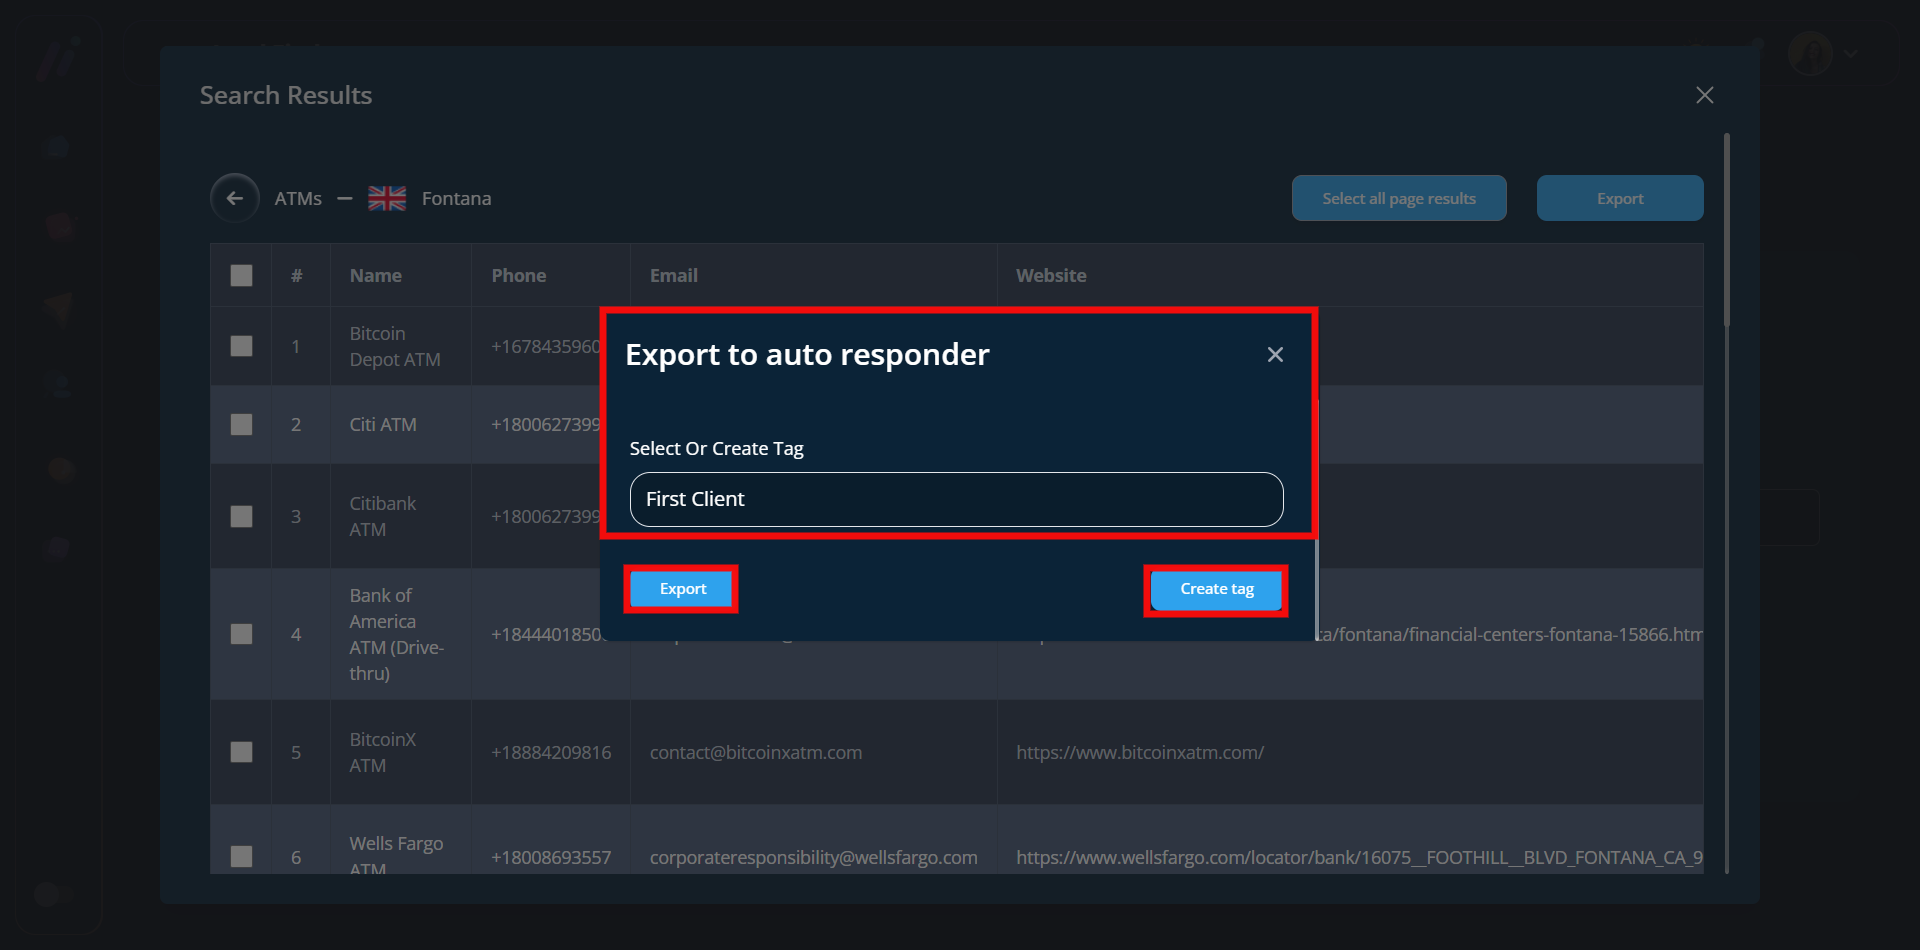
Once you’ve selected your preferred tag the next thing you have to do is click the “export” button and you will see a successful message as shown below in the screenshot.
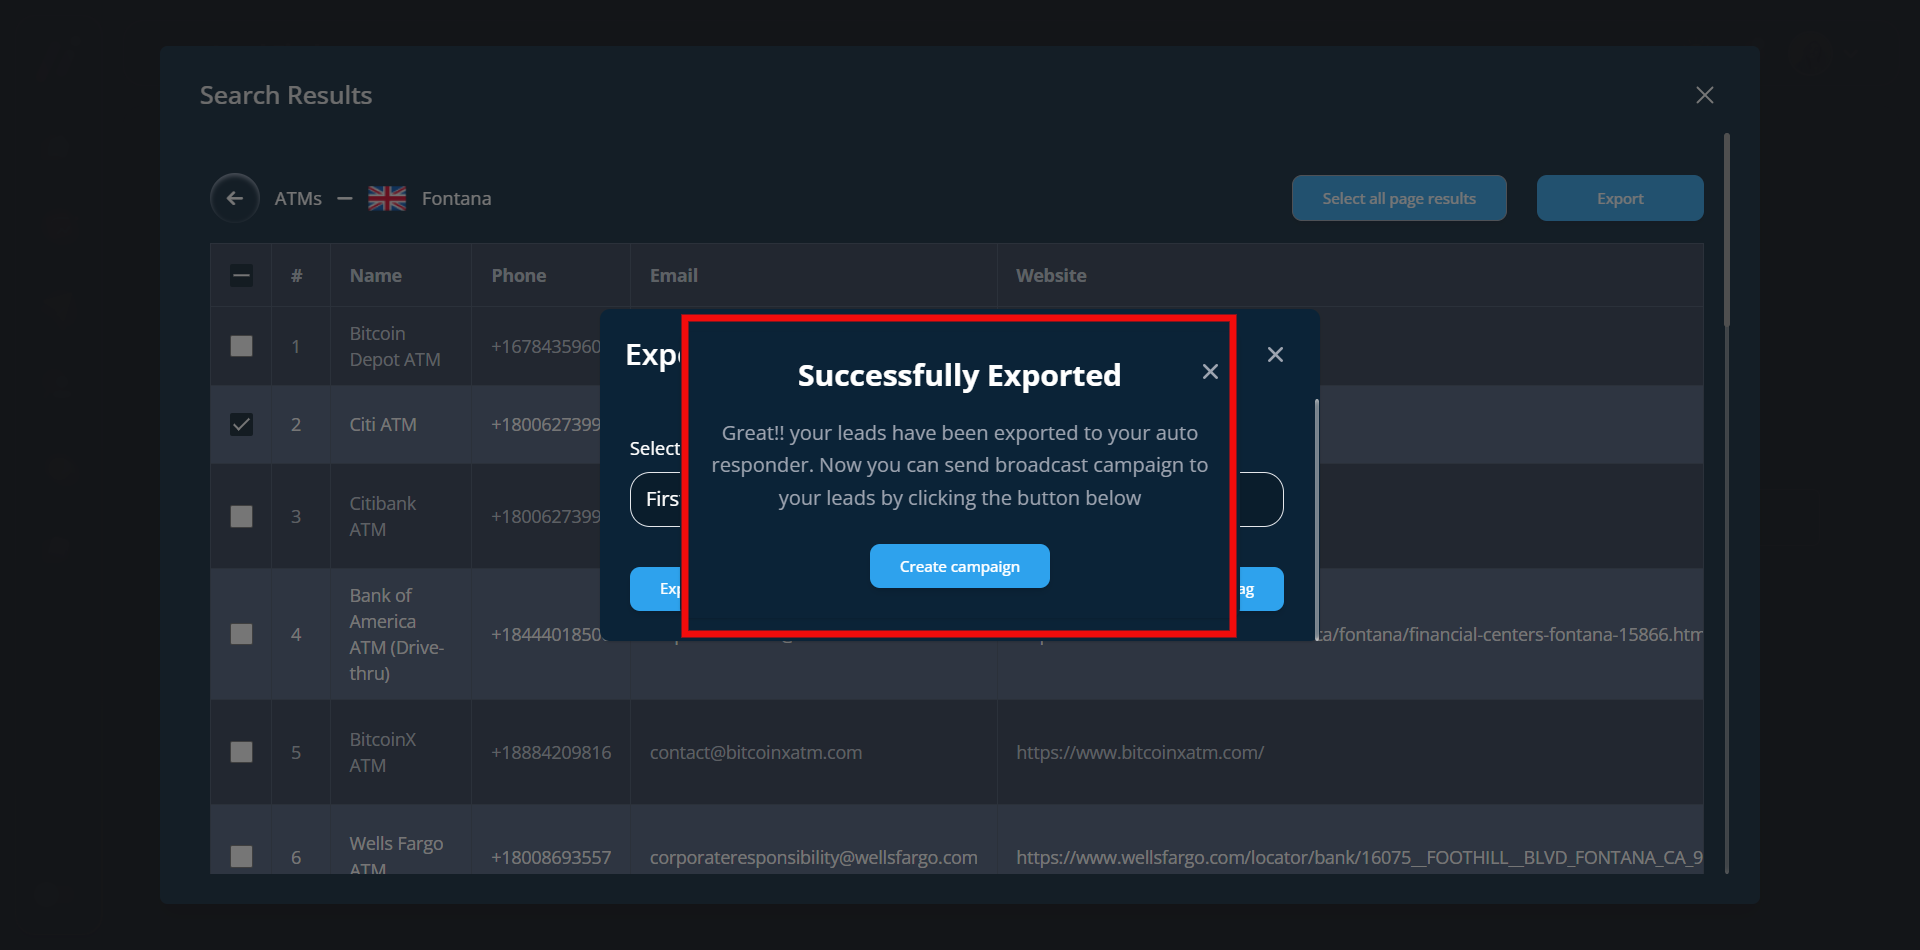
Note: You can decide to create a campaign or exit the page.
How To Search For Clients Using The Filter Option
You can search for clients by just entering your preferred location and keyword and also using the filter option to further customize your search results.
STEP 1: After entering your preferred location and keyword, go ahead to click on the filter option as shown in the screenshot below;
STEP 2: You will see a dropdown with options to “hide clients” without particular information you can either toggle the button to turn it off or on and also another option that allows you to “choose what you want to see” You can decide to show or hide the information.
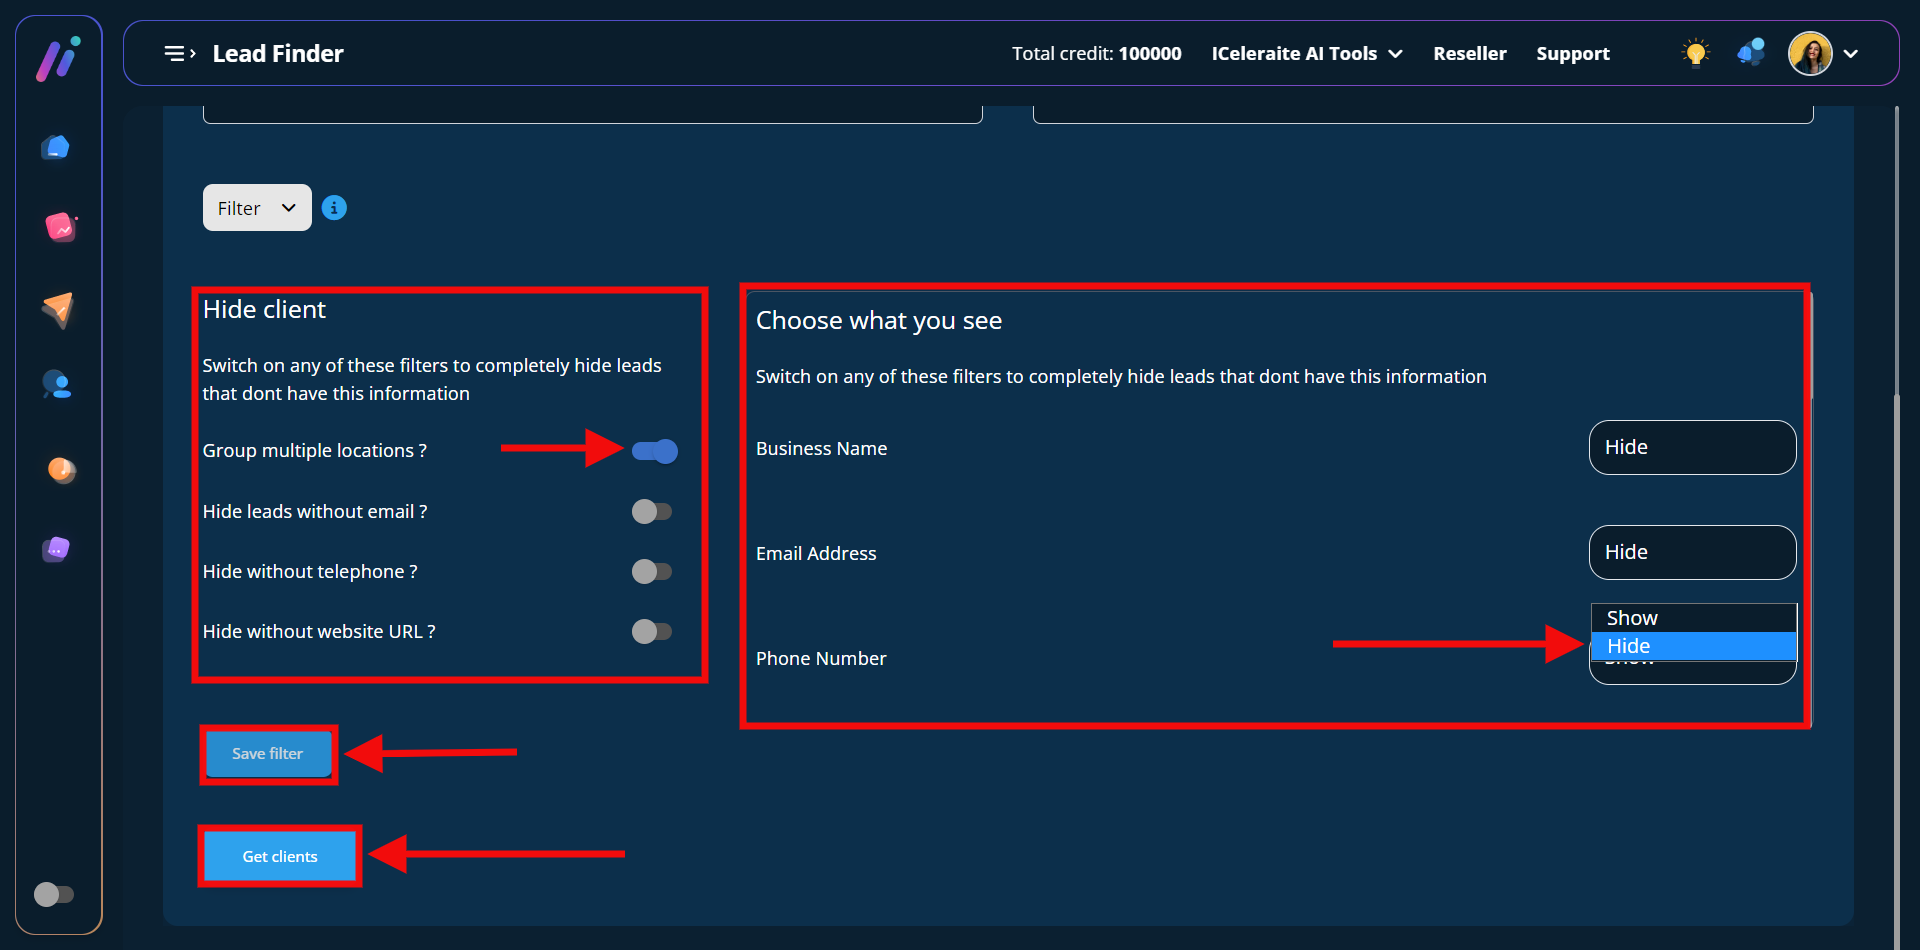
Note: After selecting the preferred options you want your search results to have, you can go ahead and click the “save filter” button and then the “get clients” button