STEP 1: After logging into your Business managers account. First thing that appears is the dashboard, the dashboard has a left side nav-bar.
STEP 2: Next is to click on client, it will then direct you to the client dashboard.
STEP 3: Click on the action button of any client.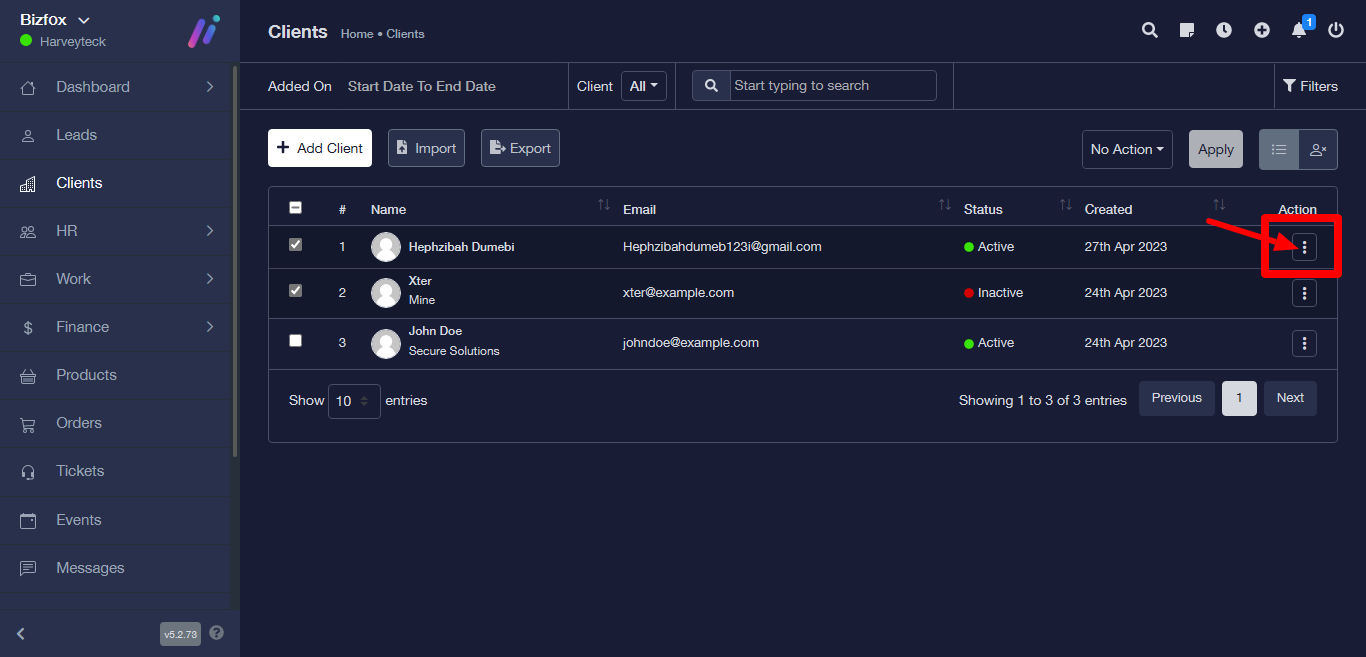
STEP 4: A dropdown option will appear, click on the view button.
STEP 5: You will be directed to the selected client profile information dashboard.
STEP 6: Click on project at the top bar next.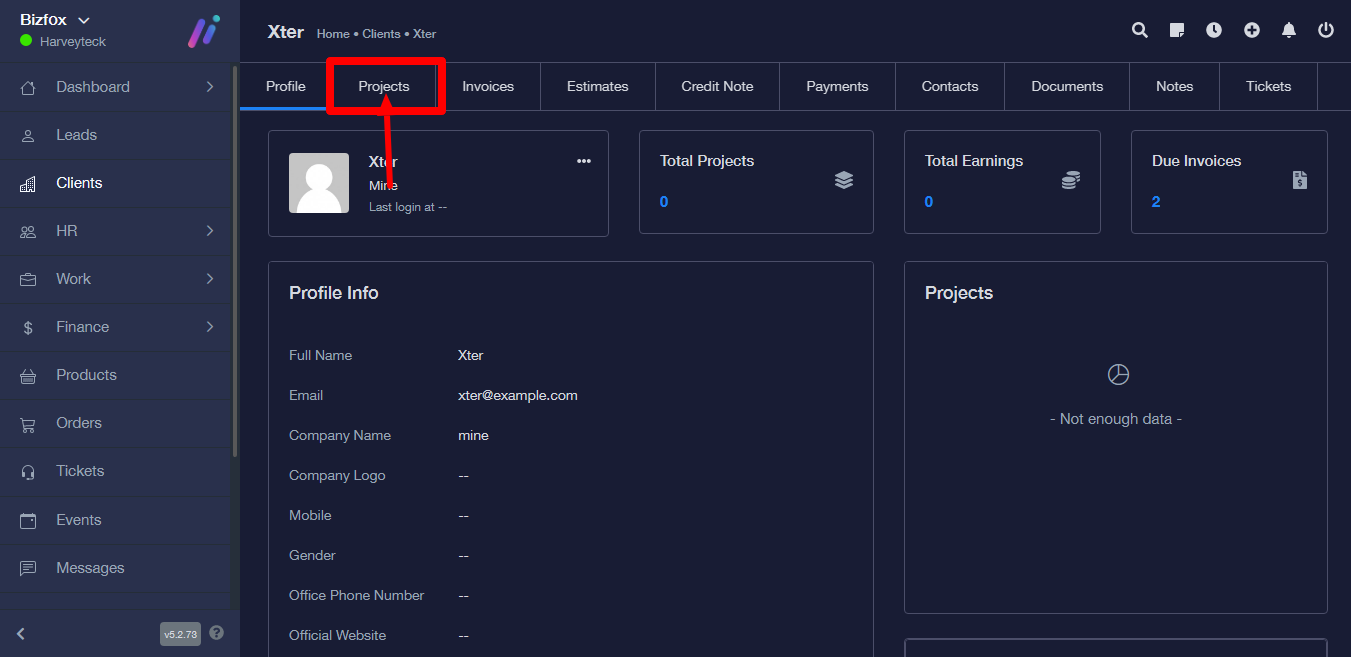
STEP 7: It will direct you to with table, to add project click on the Add Project button.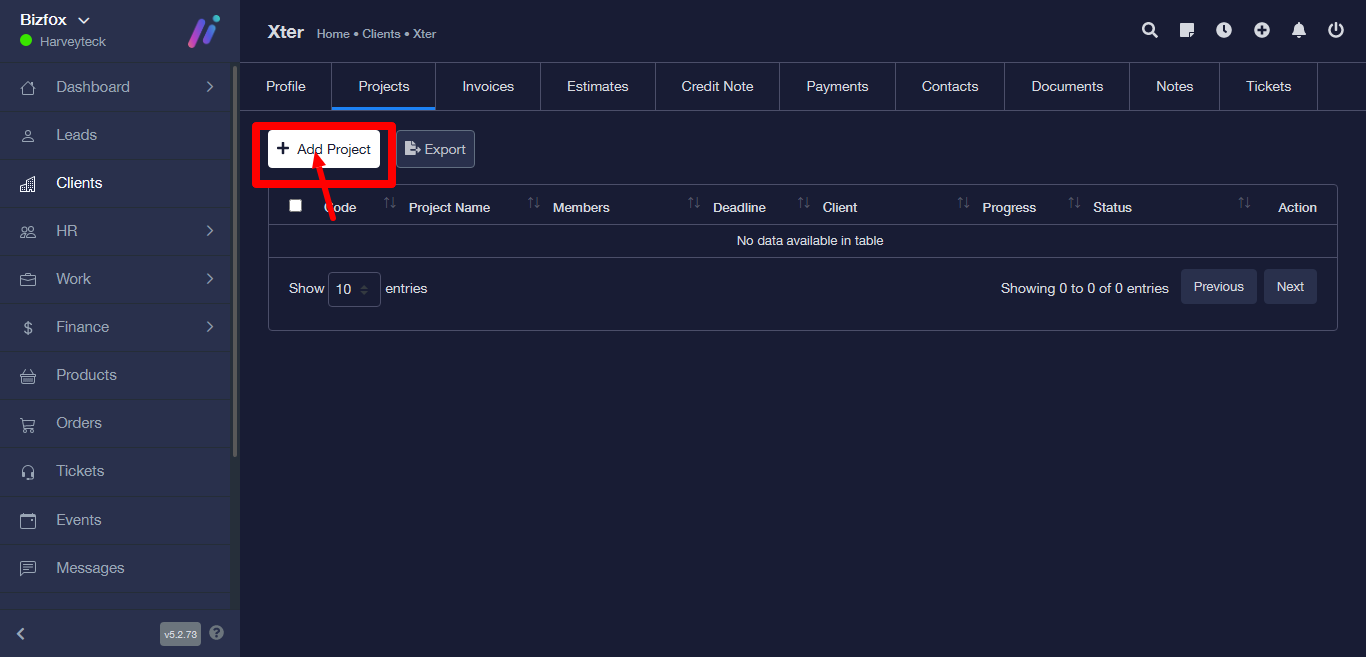
STEP 8: A new page titled Project details will appear.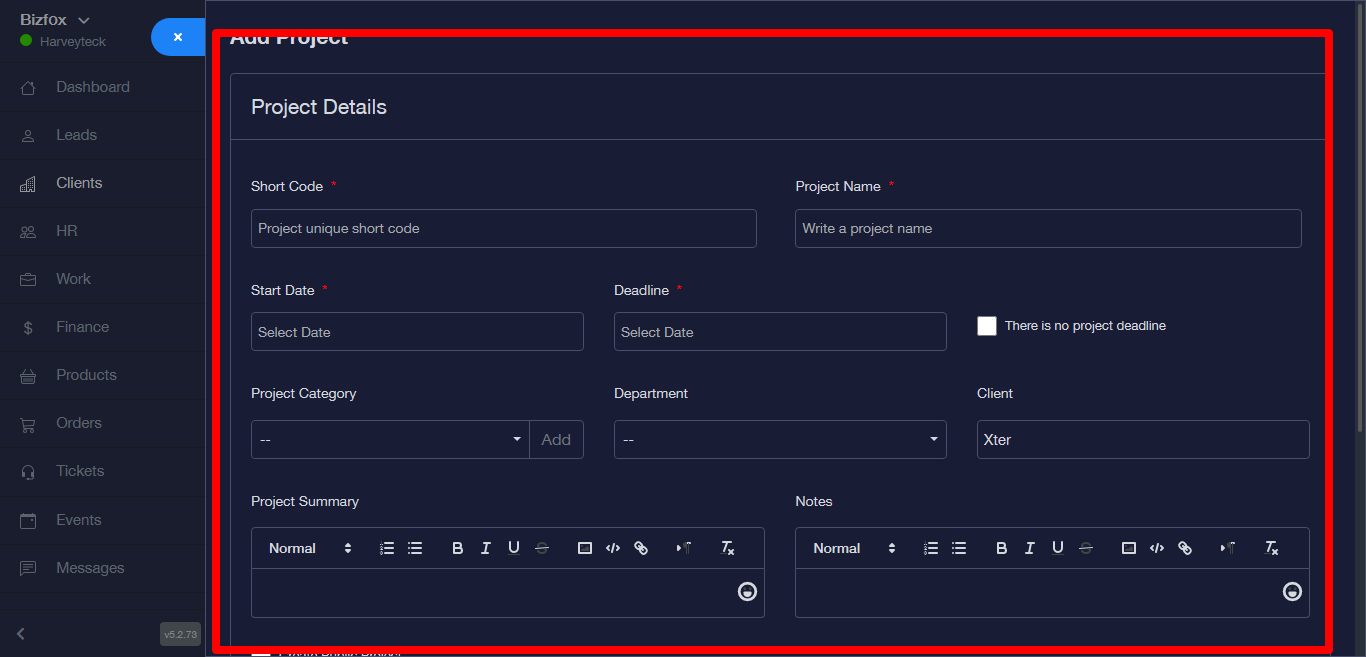
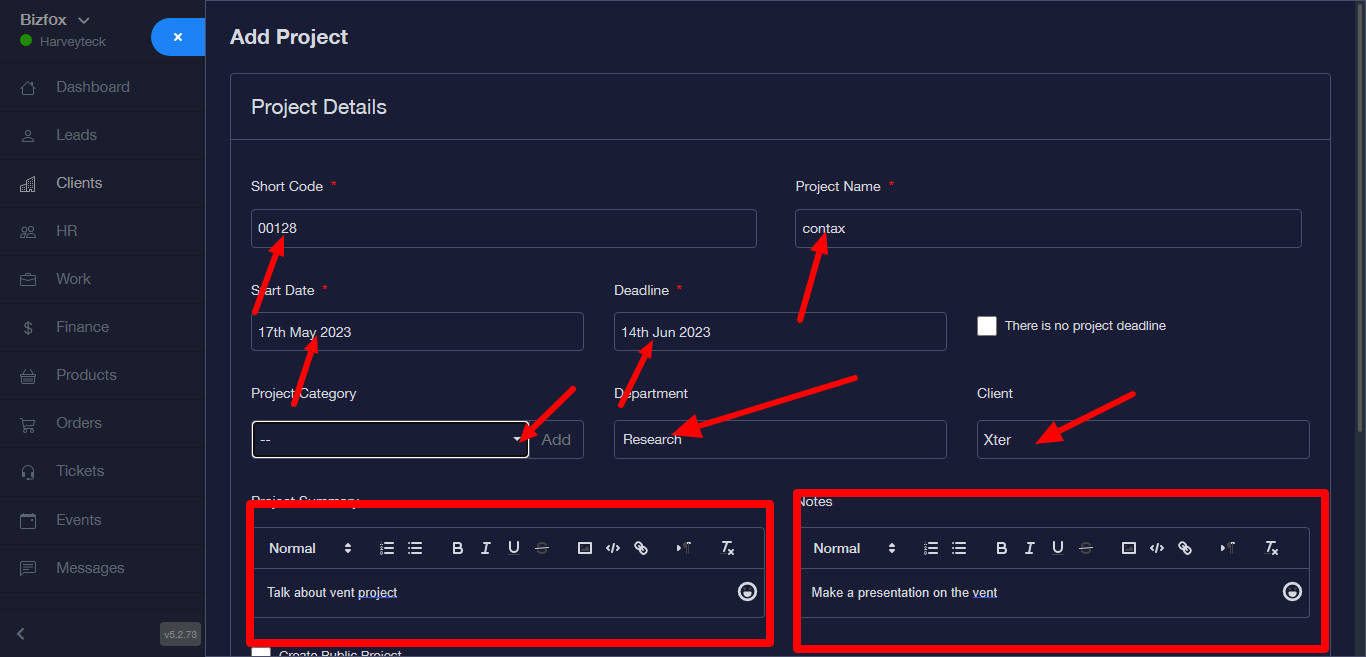
STEP 9: Fill in the details on the form. To add project category, if there is an existing data on project category you can click on the project category field to select from the previous ones.
STEP 10: To create new project category click on the add button.
STEP11: A modal form will appear, enter a name at the category input field then click on the save button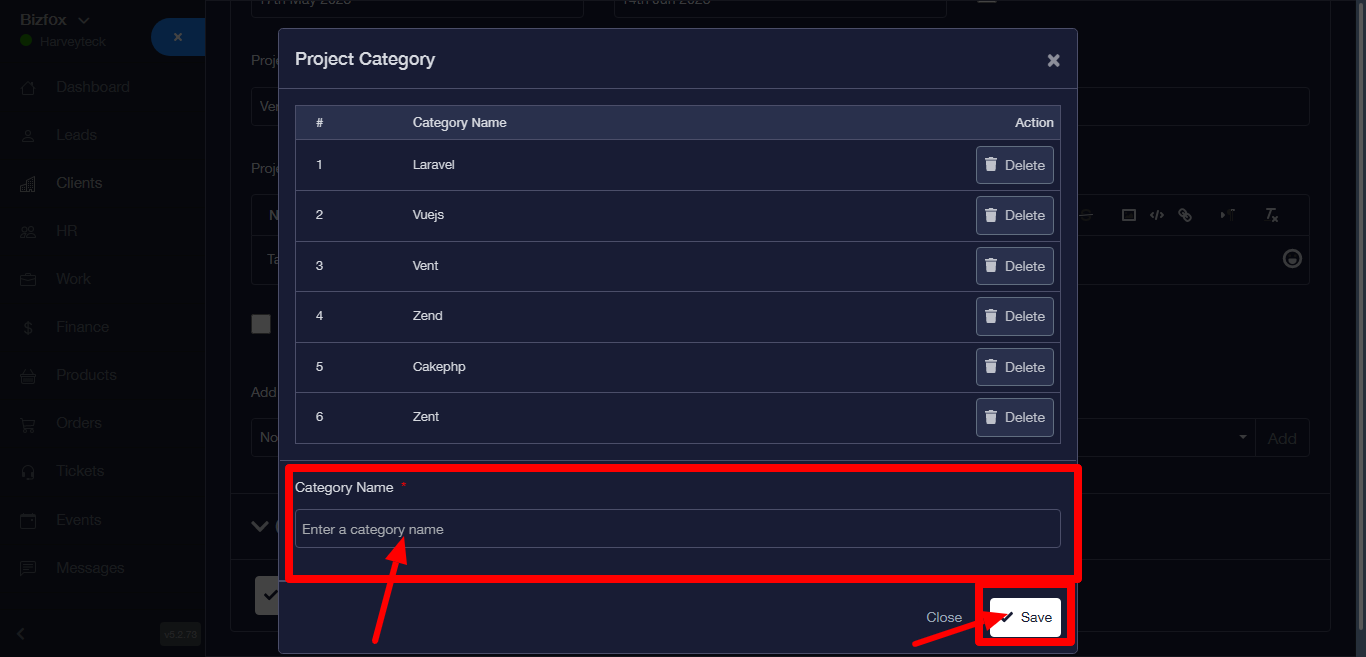
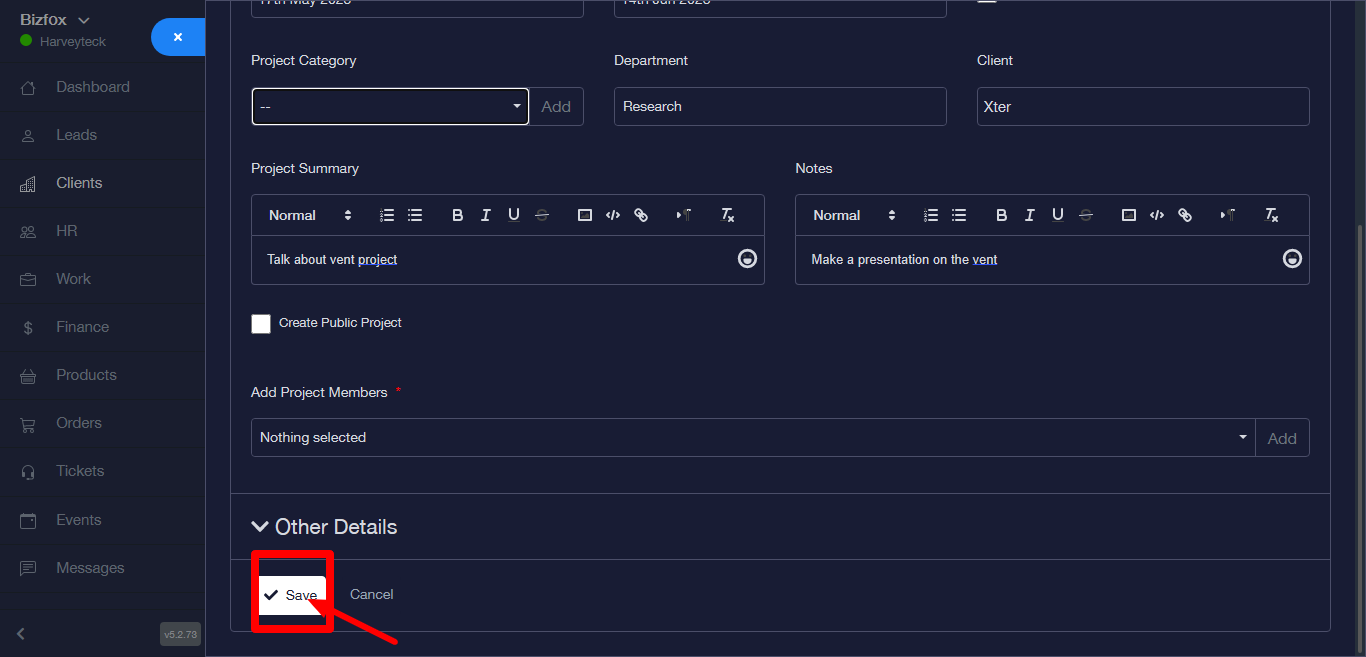
STEP 12: Fill in the rest of the form and then slick on the save button. A success message will appear at the top right corner. After saving the data a table will then appear in a new page.