You can add, reject, delete, view leave on calendar, use the filter options to sort leave, and export leave table on iCeleraite business manager dashboard by simply following the steps below;
Getting Started On Adding Leave
Log in to your iCeleraite Business Manager account.
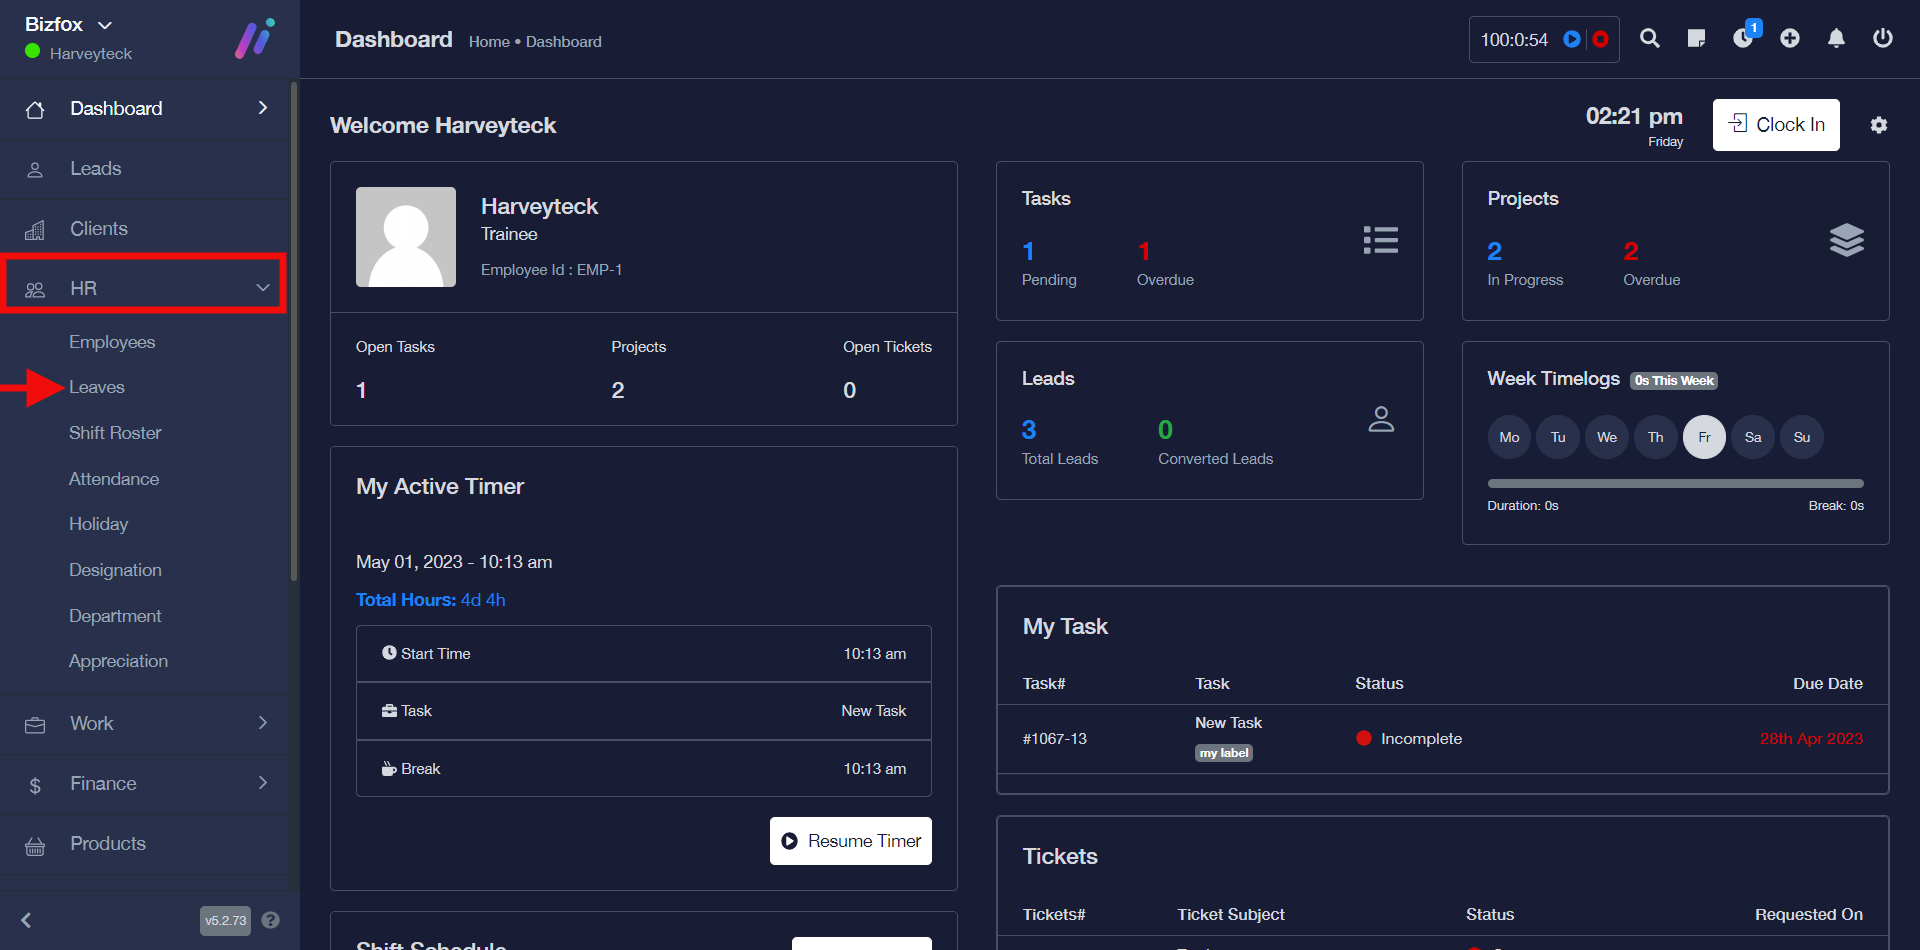
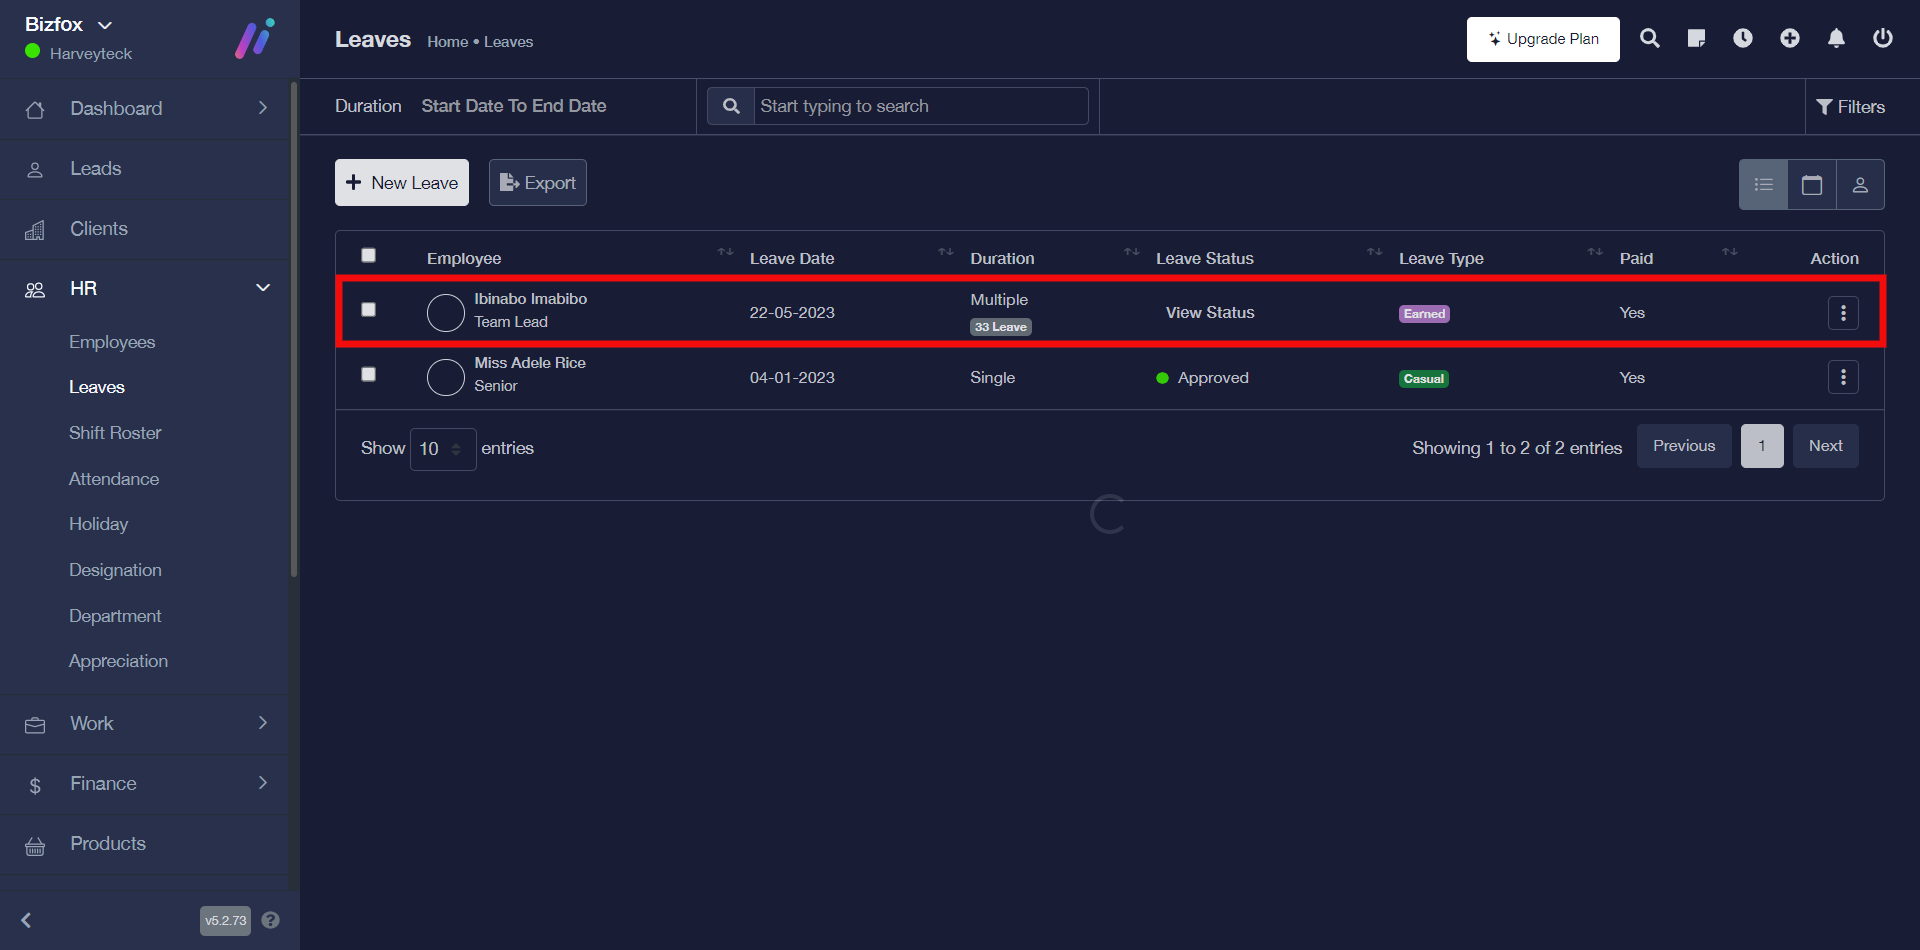
STEP 1: In the left-hand menu, click on “HR” and in the dropdown go ahead to click on “Leaves” as shown in the screenshot below;
STEP 2: Click on the “New Leave” button

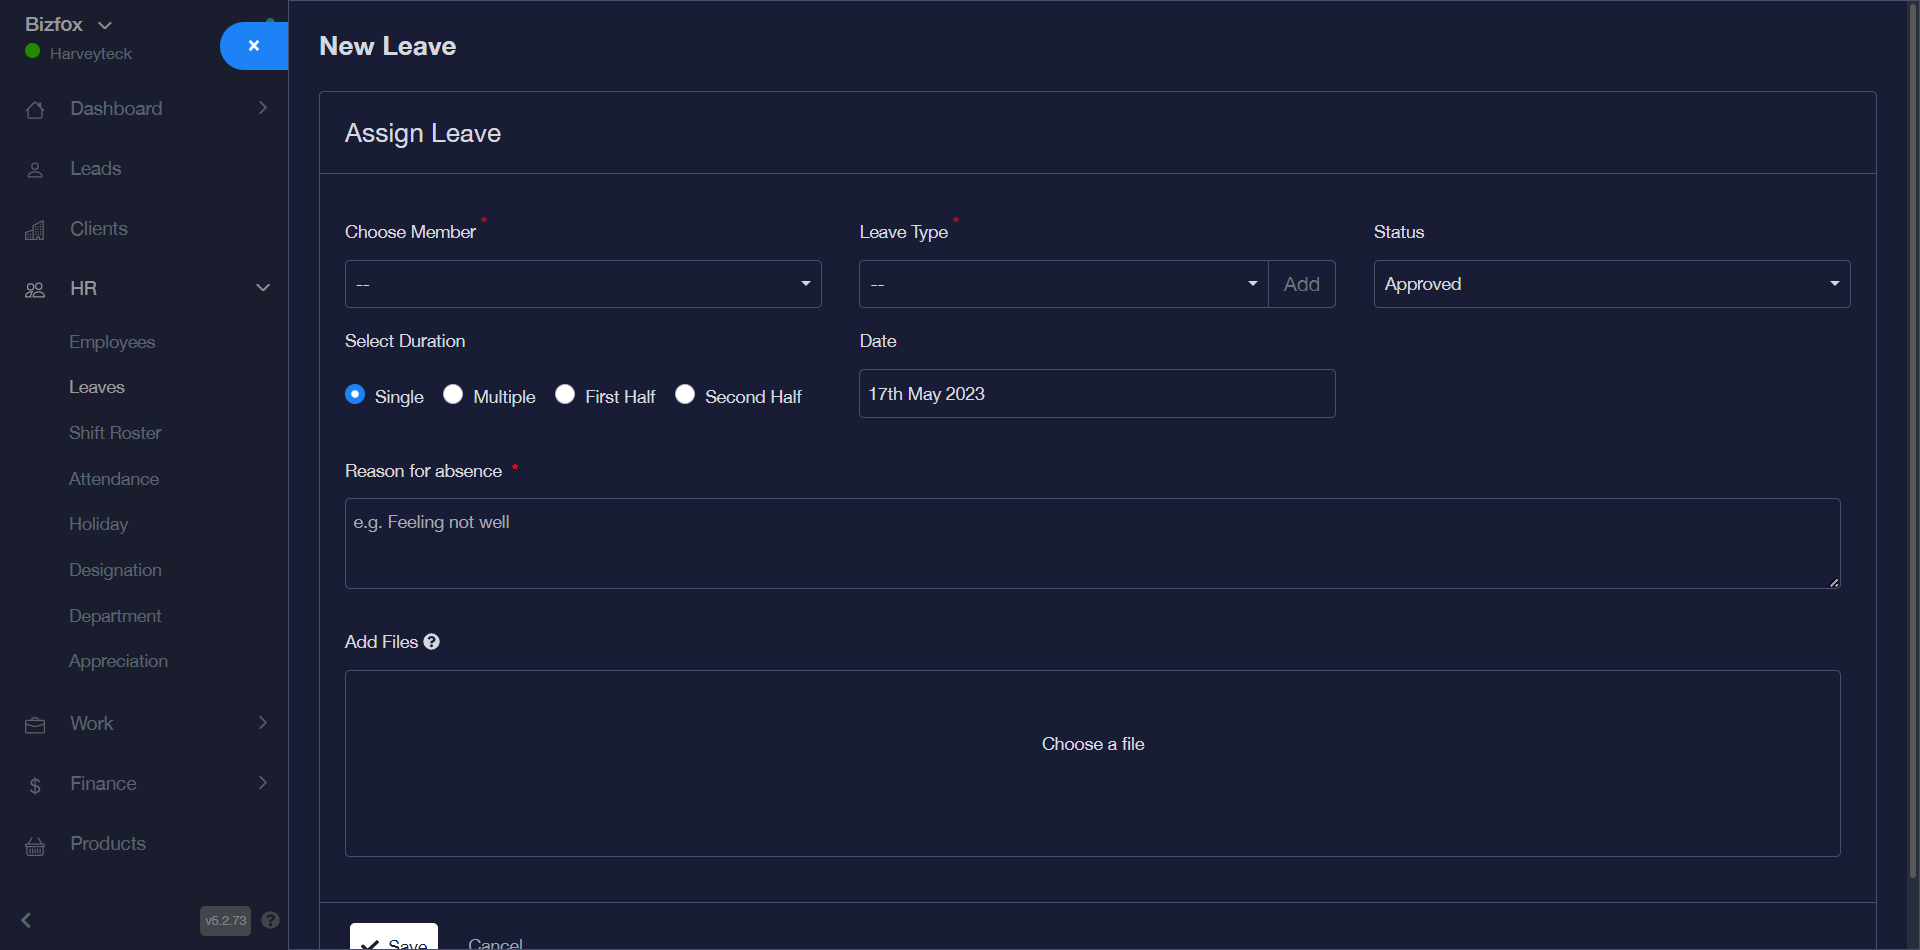
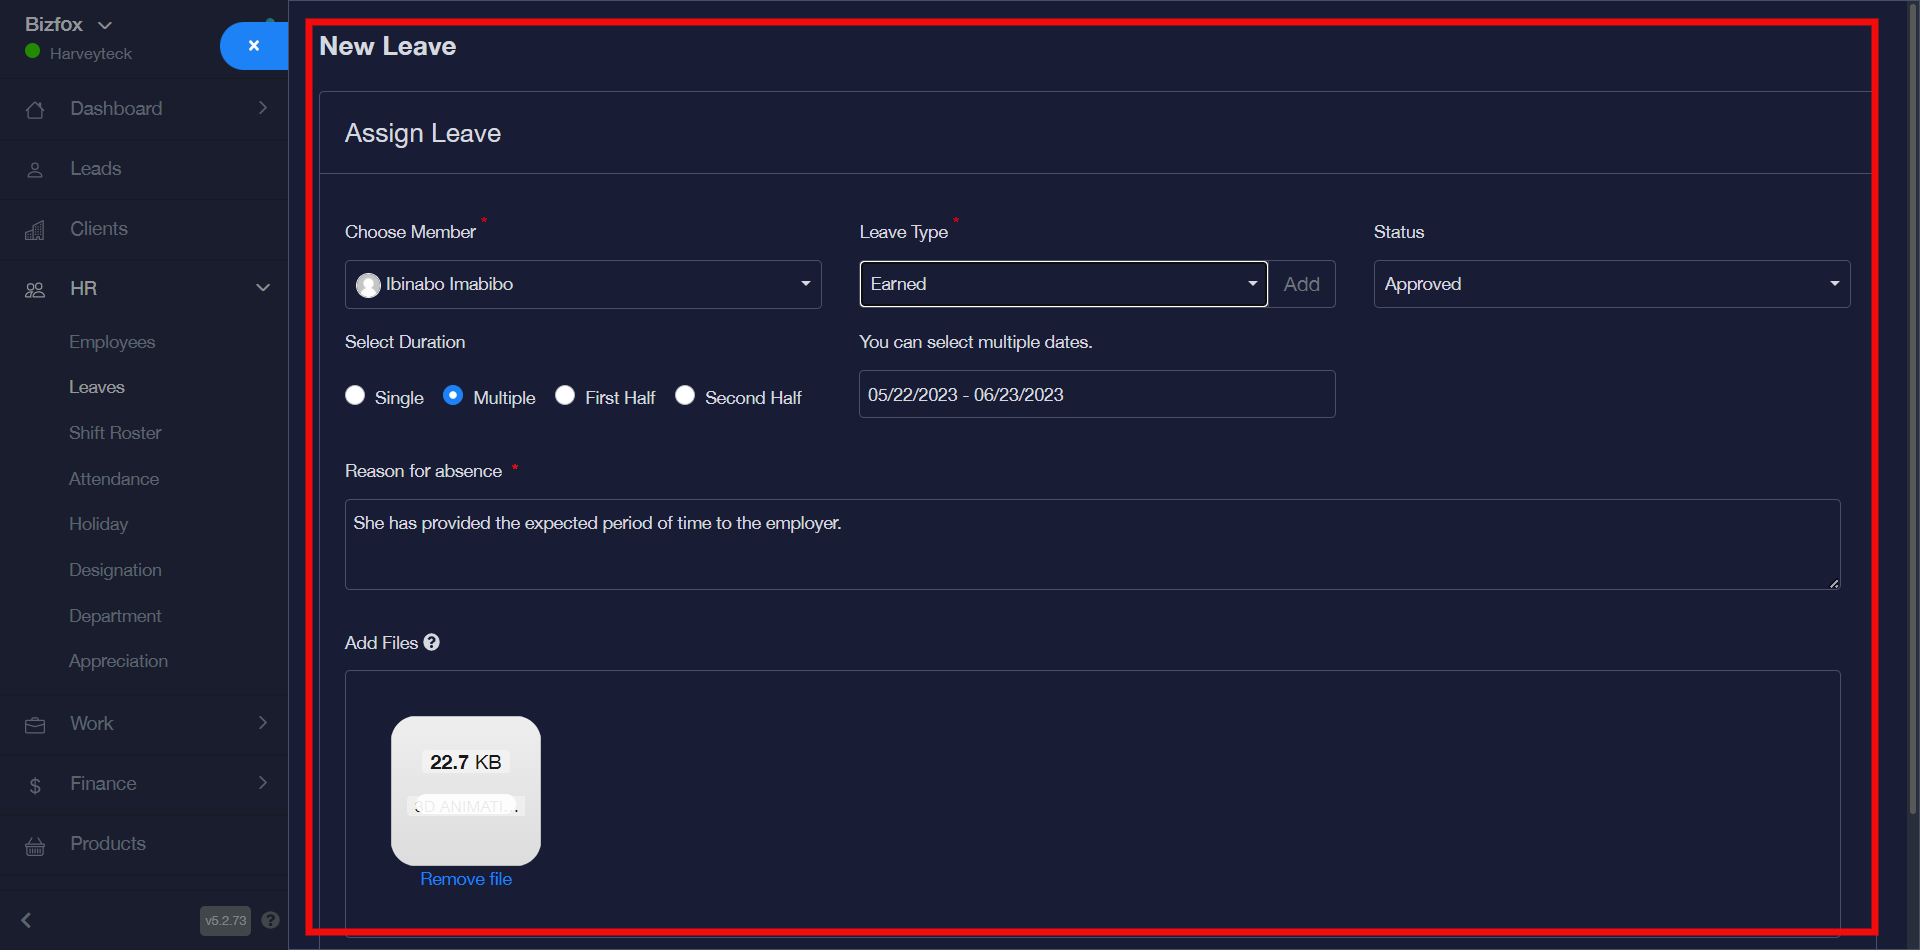
STEP 3: After clicking on the “new leave” button, you will see a pop-up like the one below.
Note: You can either select the “leave type” from the already existing ones or add a new one. If you would like to add a new one ensure you do that first before entering details for the other respective fields.
Go ahead to click on the “add” button as shown in the screenshot below;
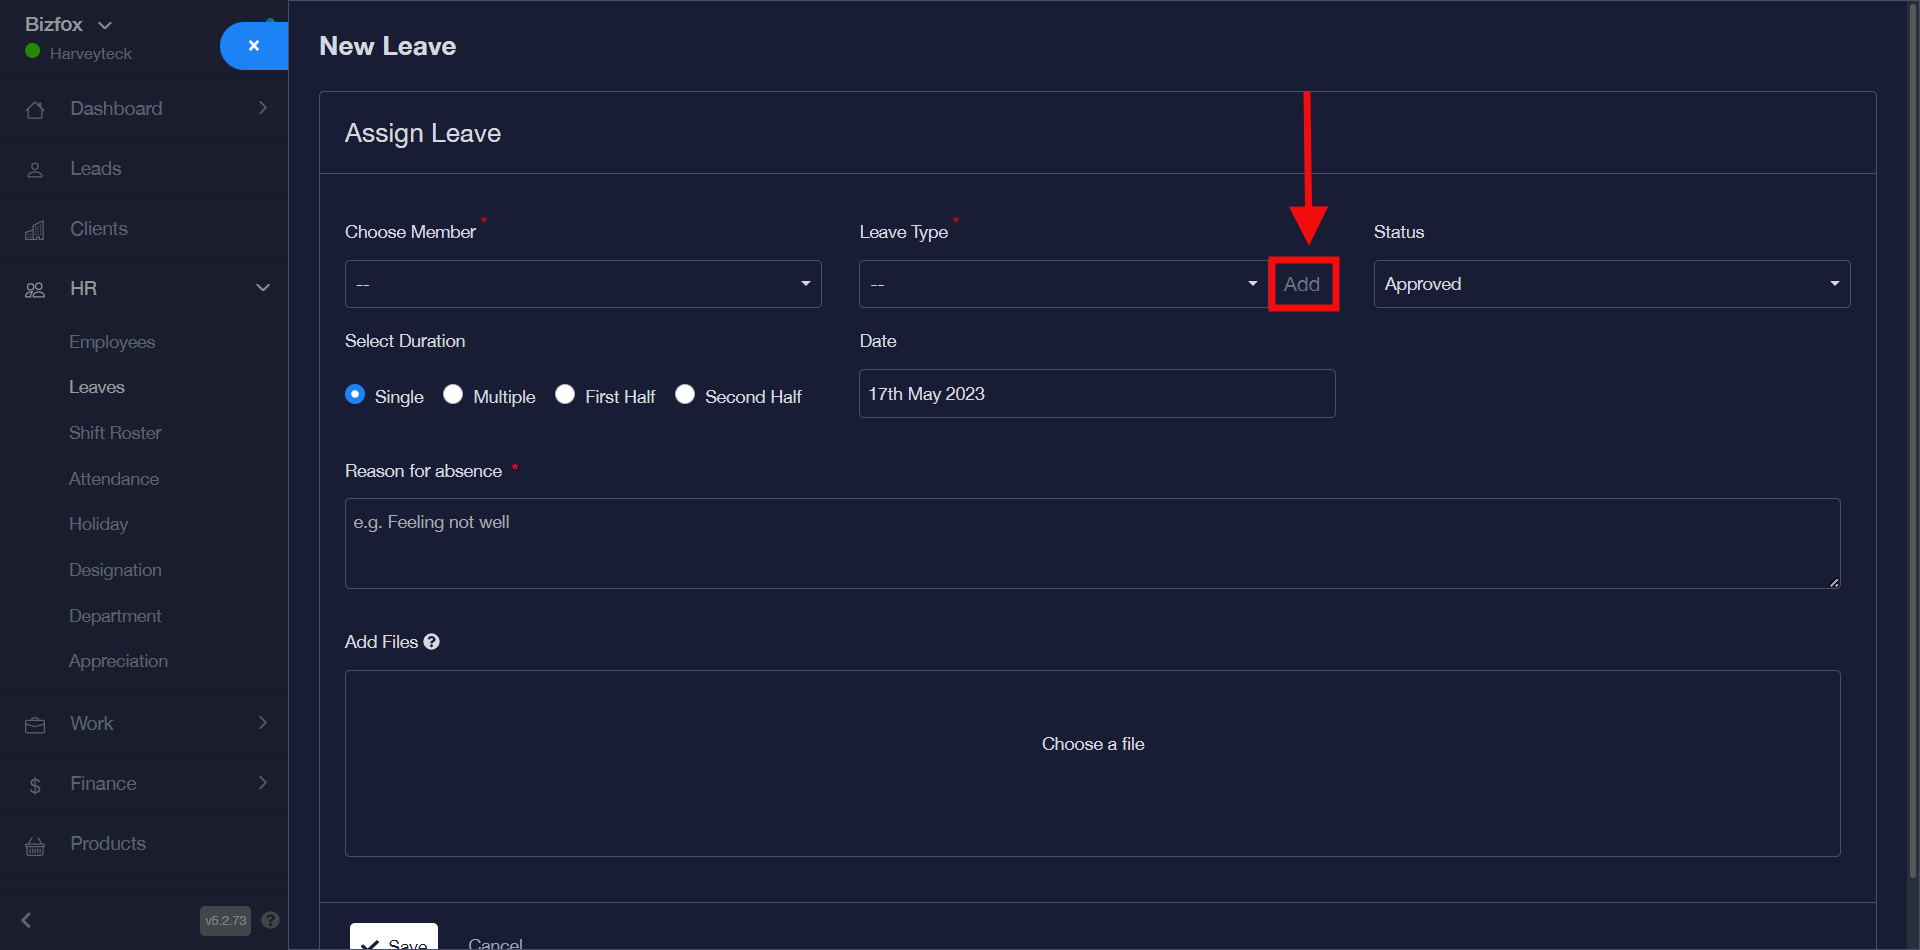
After clicking on the “add” button, you will see a pop-up, you can go ahead to enter “leave type” & “leave paid status” then you will enter the number of leaves and monthly limit however you can leave it at 0 if there are none. Choose the color code of your choice and click on assign to all employees and click the “save” button.

STEP 4: Perhaps you want to select leave type from the already existing ones you will just have to go ahead to select a particular member of existing employees, the already existing leave type of your choice, status, duration (single multiple, first half or second half) and date then enter the reason for absence as well as a file upload of a prescription or travel receipt as shown below in the screenshot;
You will see a pop-up message stating that leave was successfully added and it will appear in the row.
How To Reject Leave
You can reject leave by simply following the instructions below;
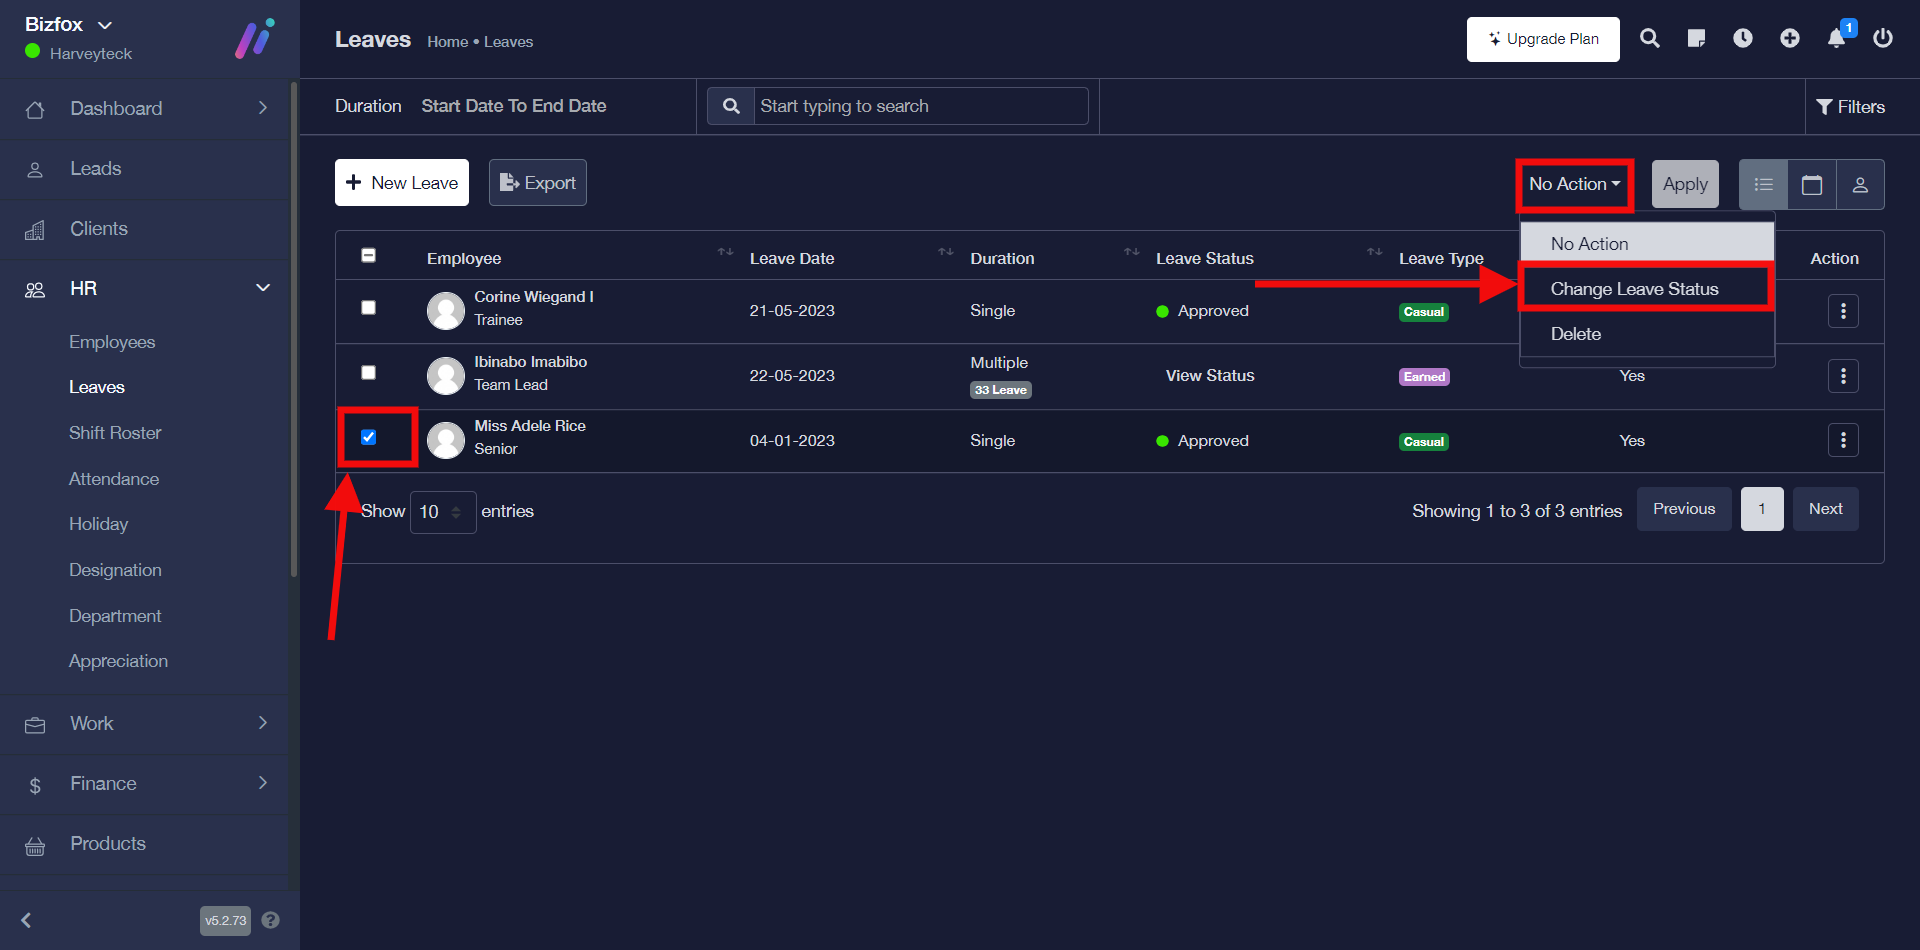
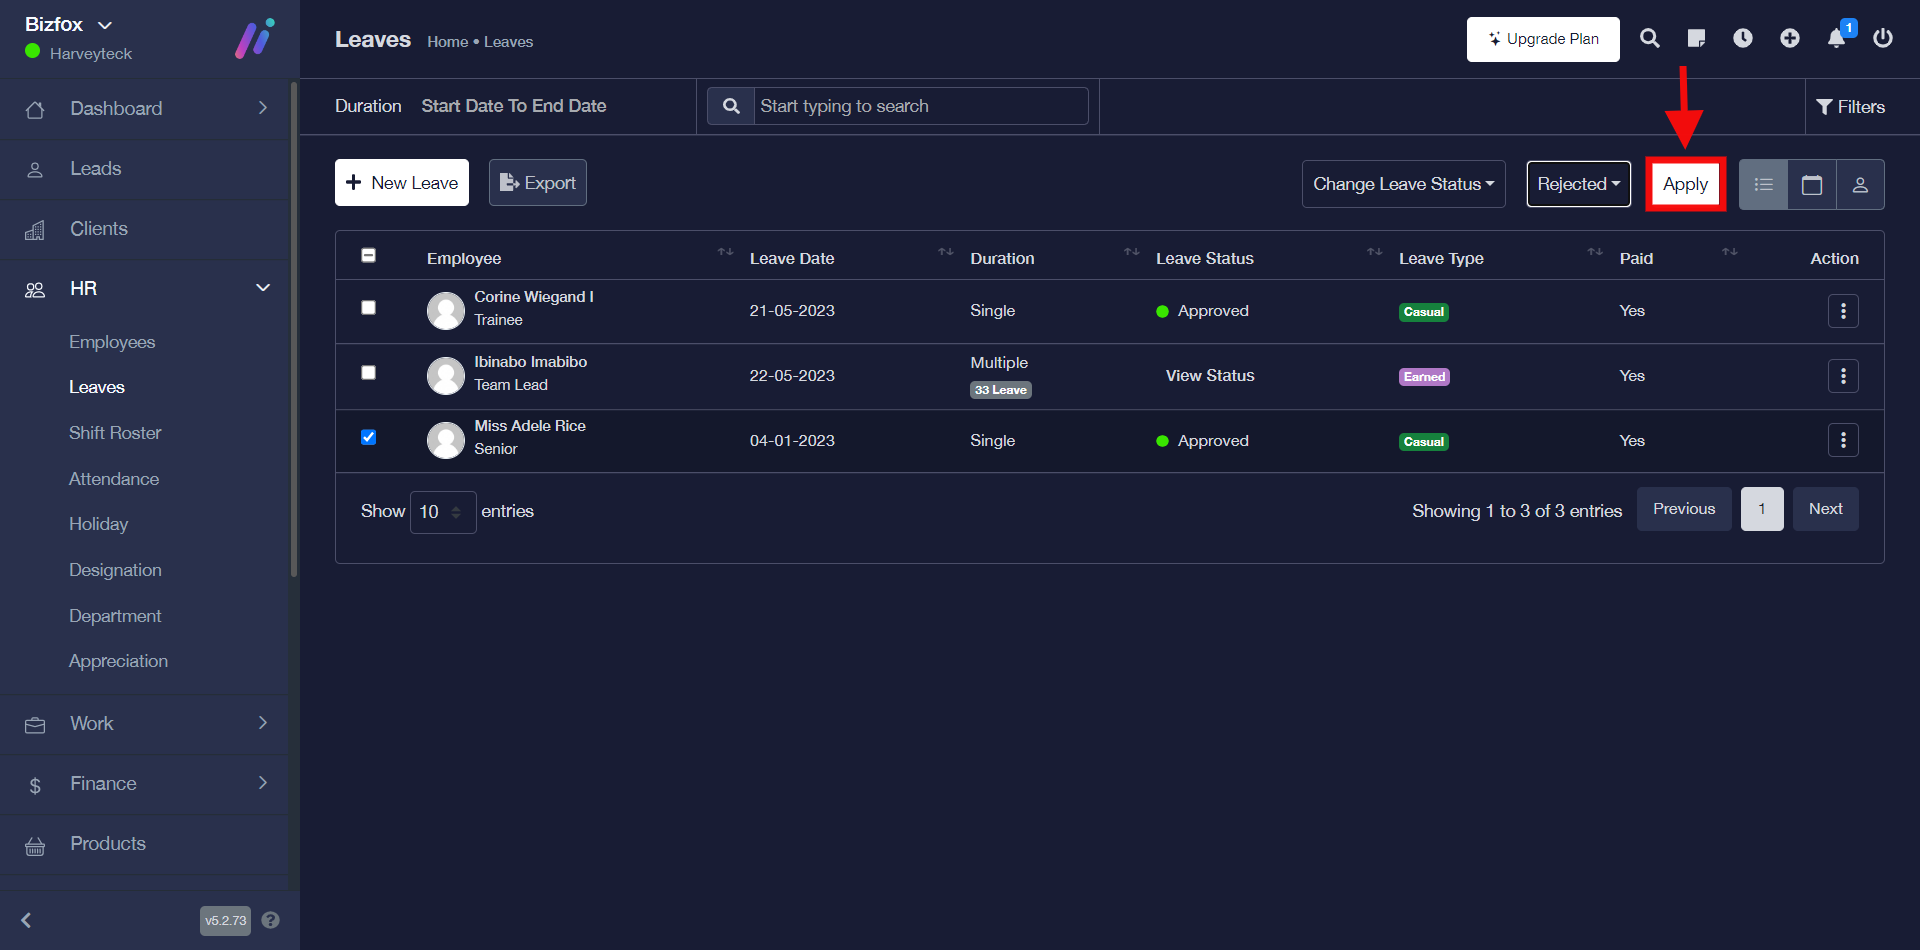
STEP 1: To reject leave, click on the “check box” on the particular employee leave record you would like to reject then go ahead to click the “no action tab” and in the drop-down options, select “change leave status”.
STEP 2: Go ahead to select “Rejected” perhaps you do not want to reject this employee’s leave immediately you can select the “Pending” option.
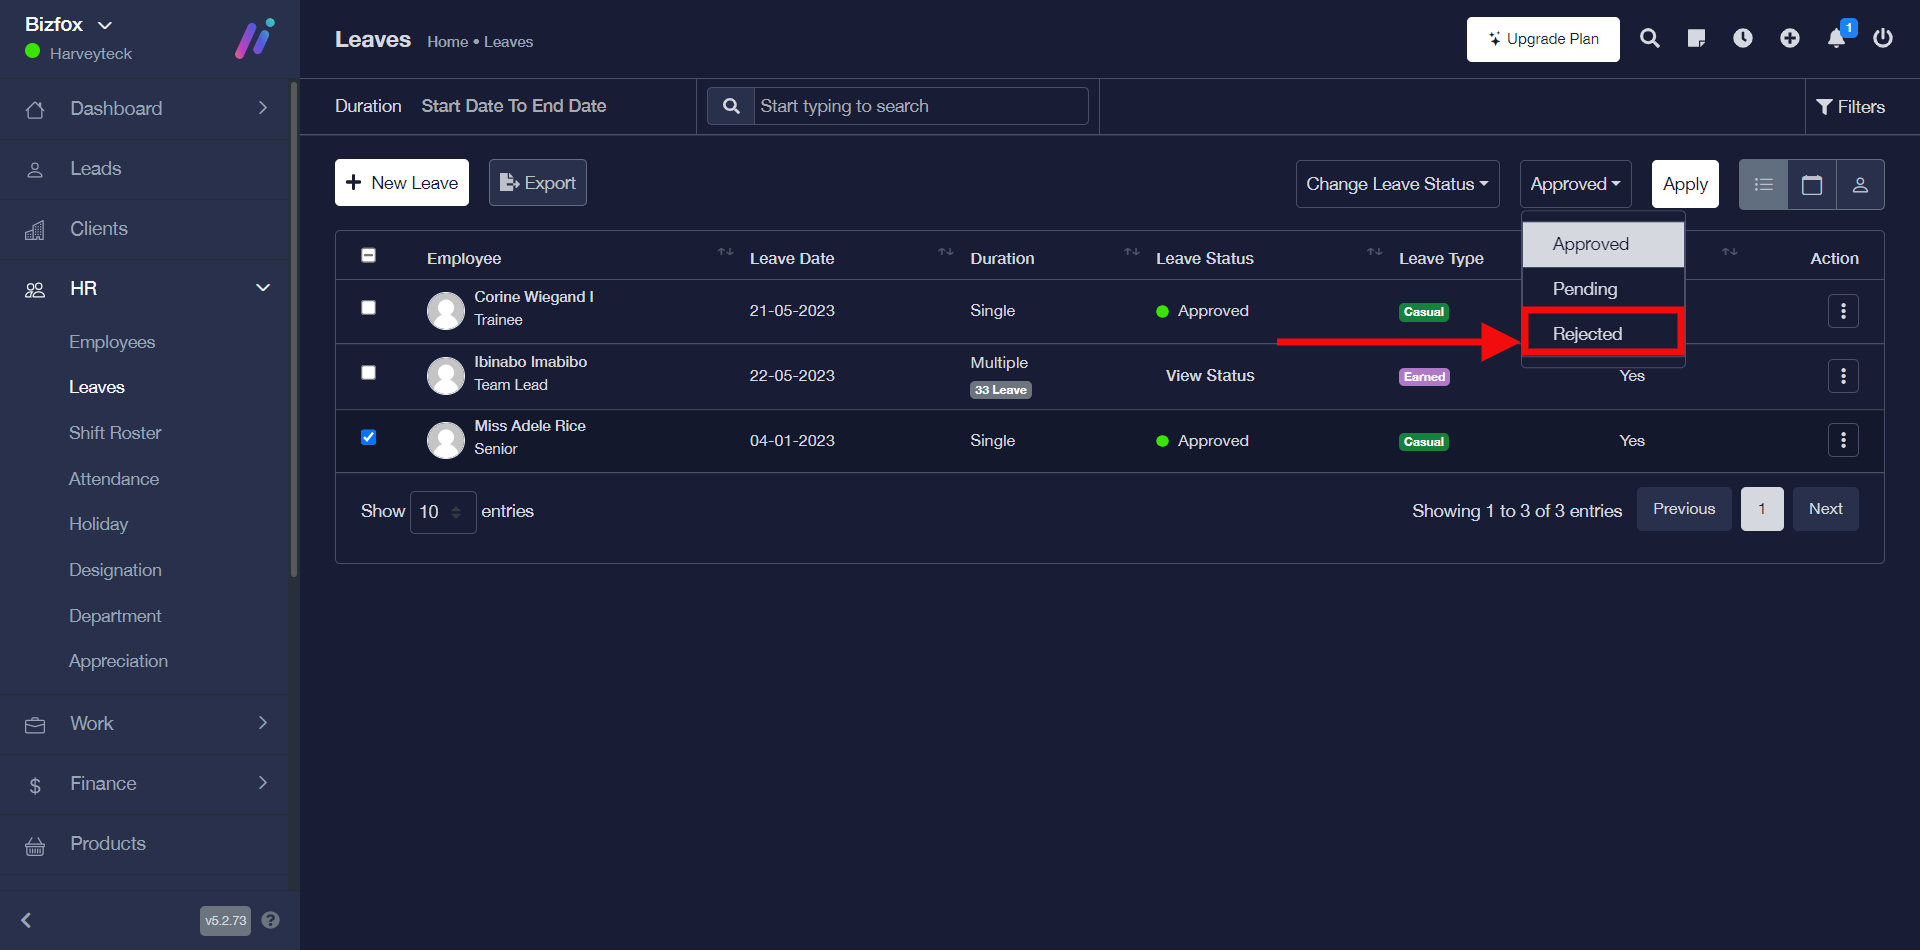
STEP 3: After selecting “Rejected” as shown in the previous screenshot you can go ahead to click the “Apply” button.
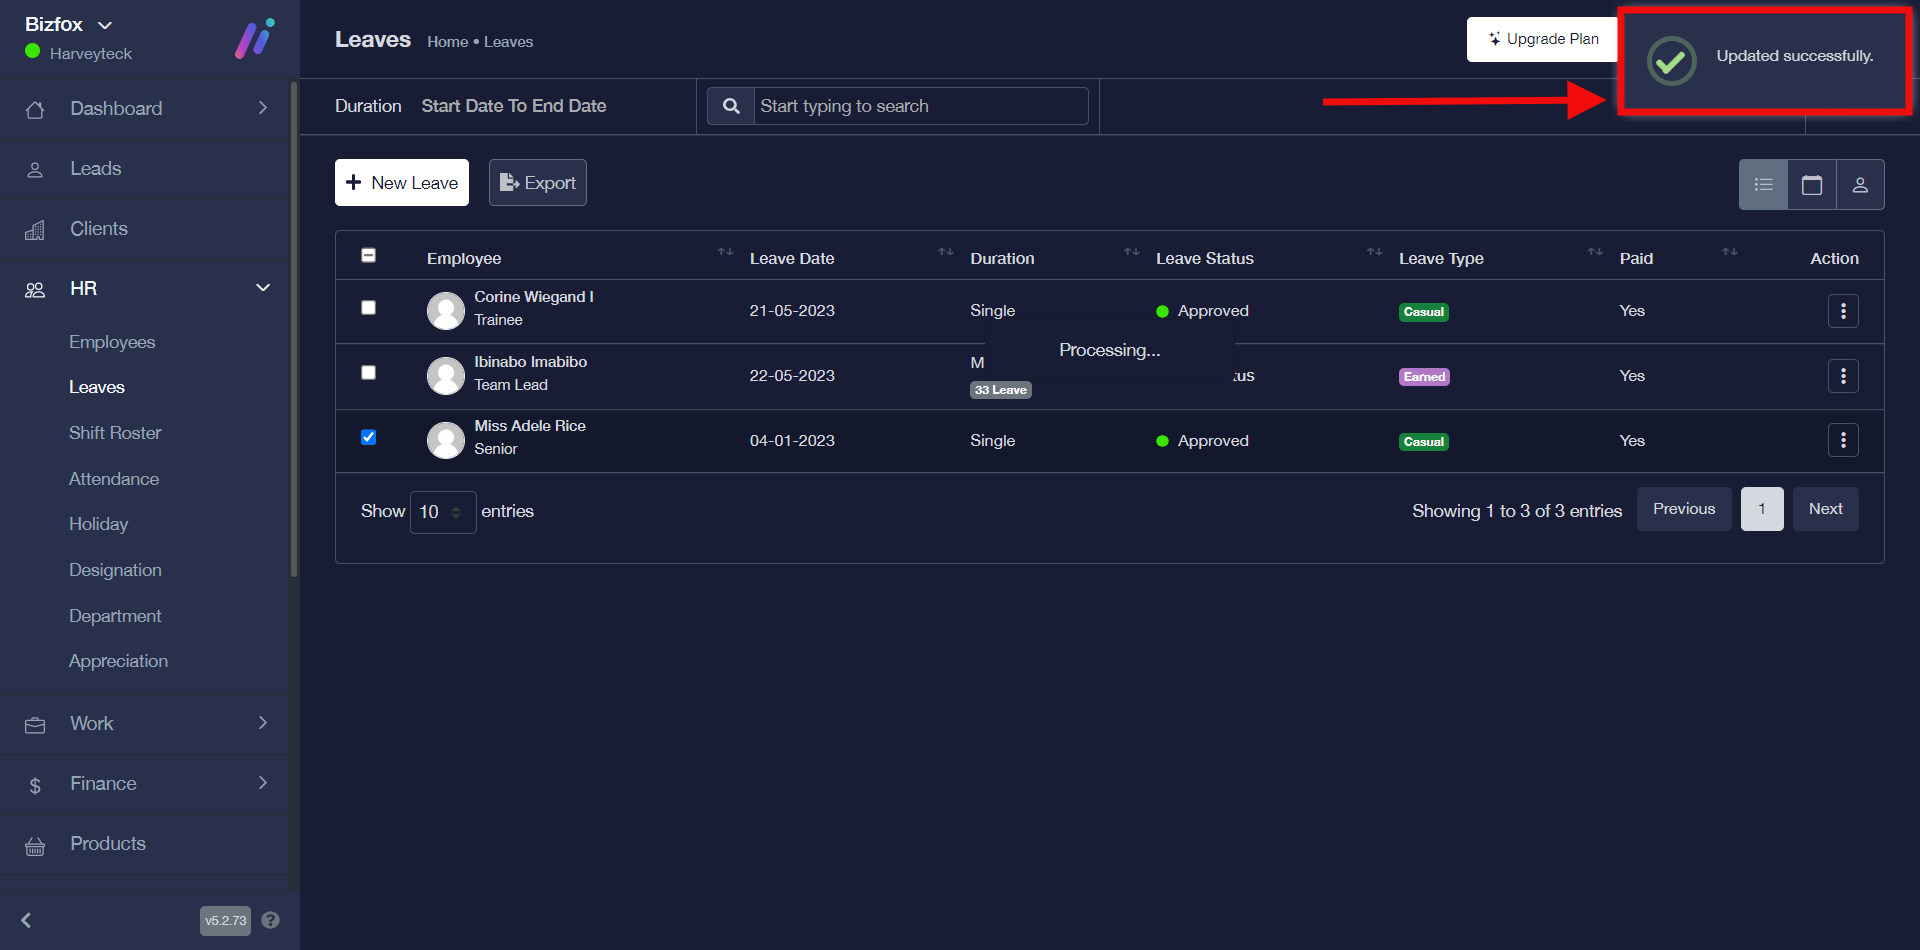
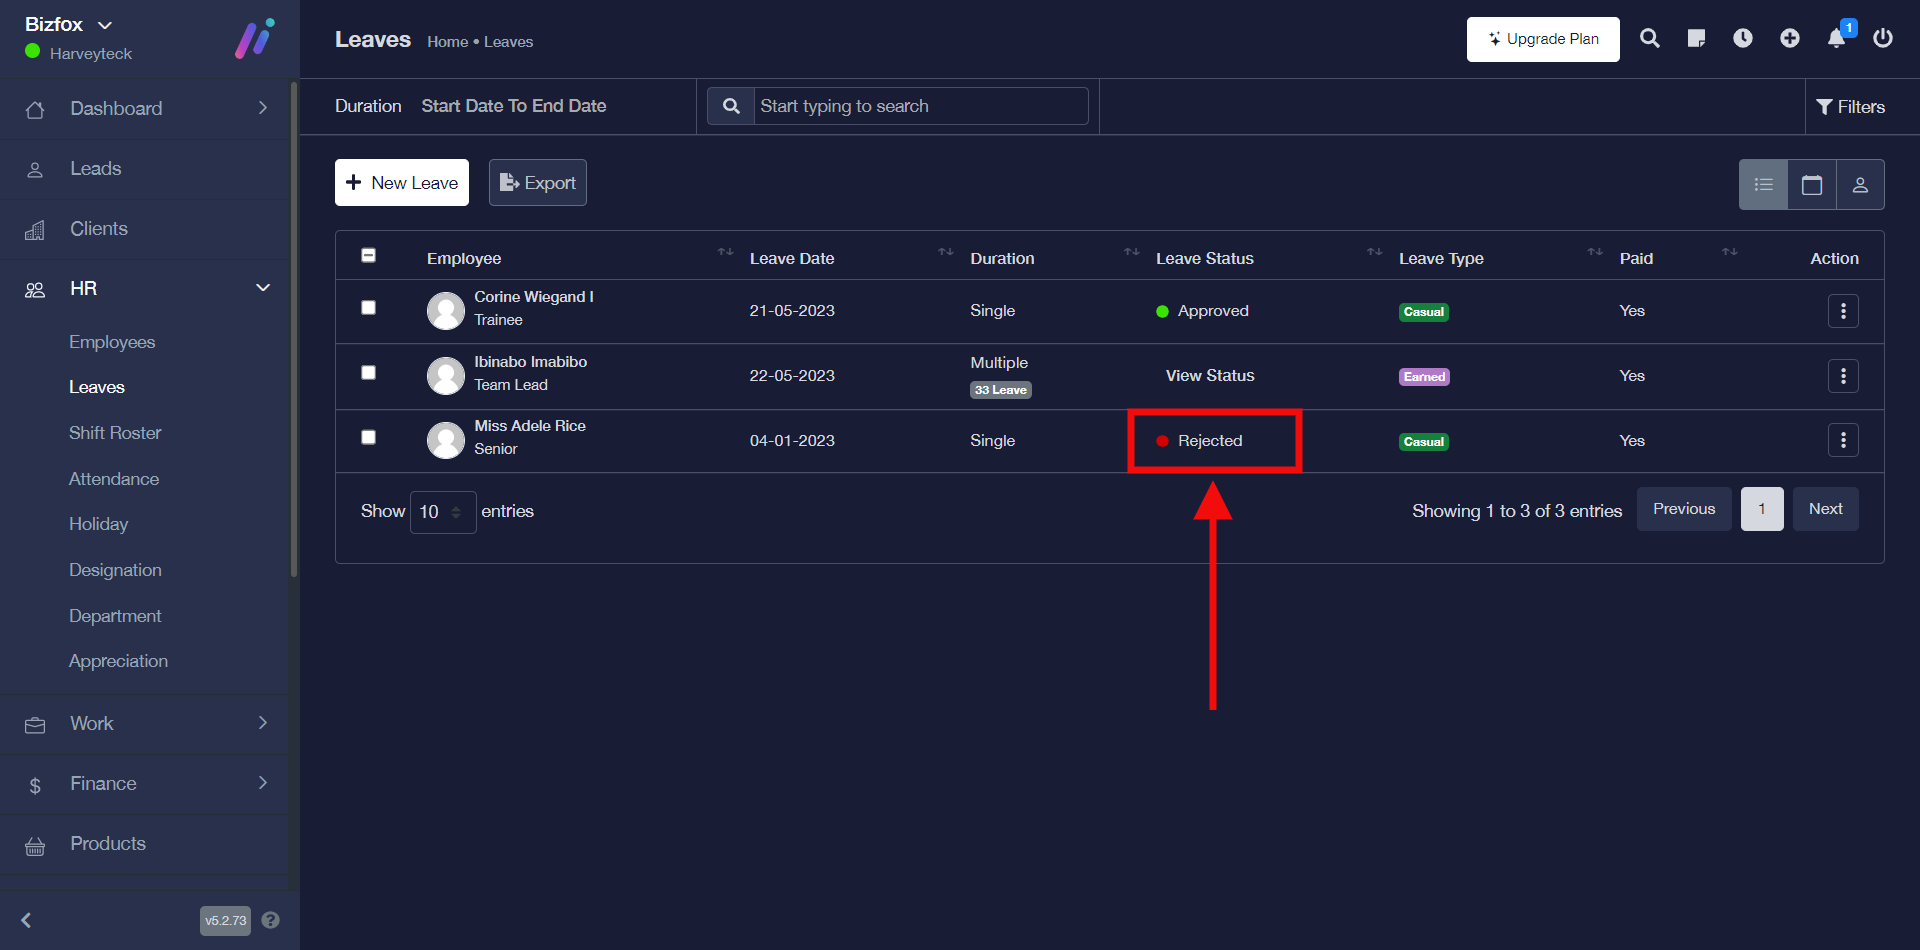
You will see a successful pop-up notification like the one below stating that the employee leave record has been updated successfully and the leave status will change to rejected.
How To Delete Leave
You can delete employee’s leave by simply following the instructions below;
STEP 1: To delete employee leave, click on the “triple dot action button” on the particular employee record you would like to remove then go ahead to click “delete” in the drop-down
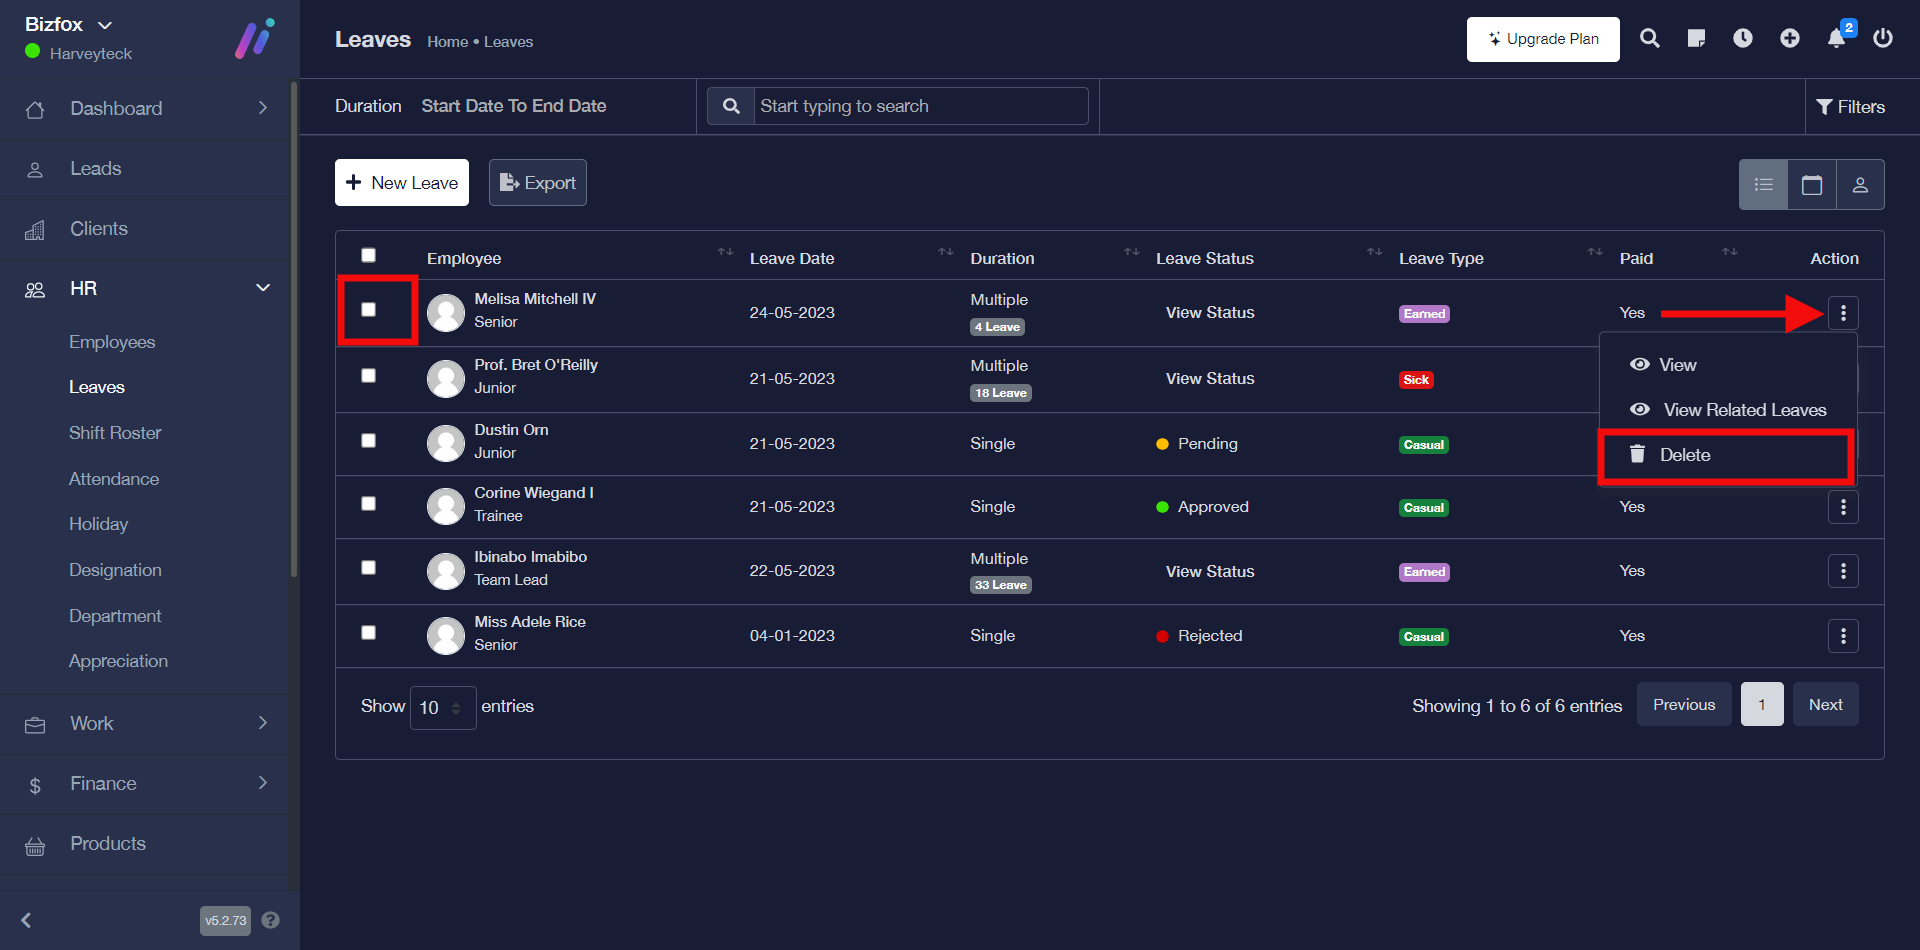
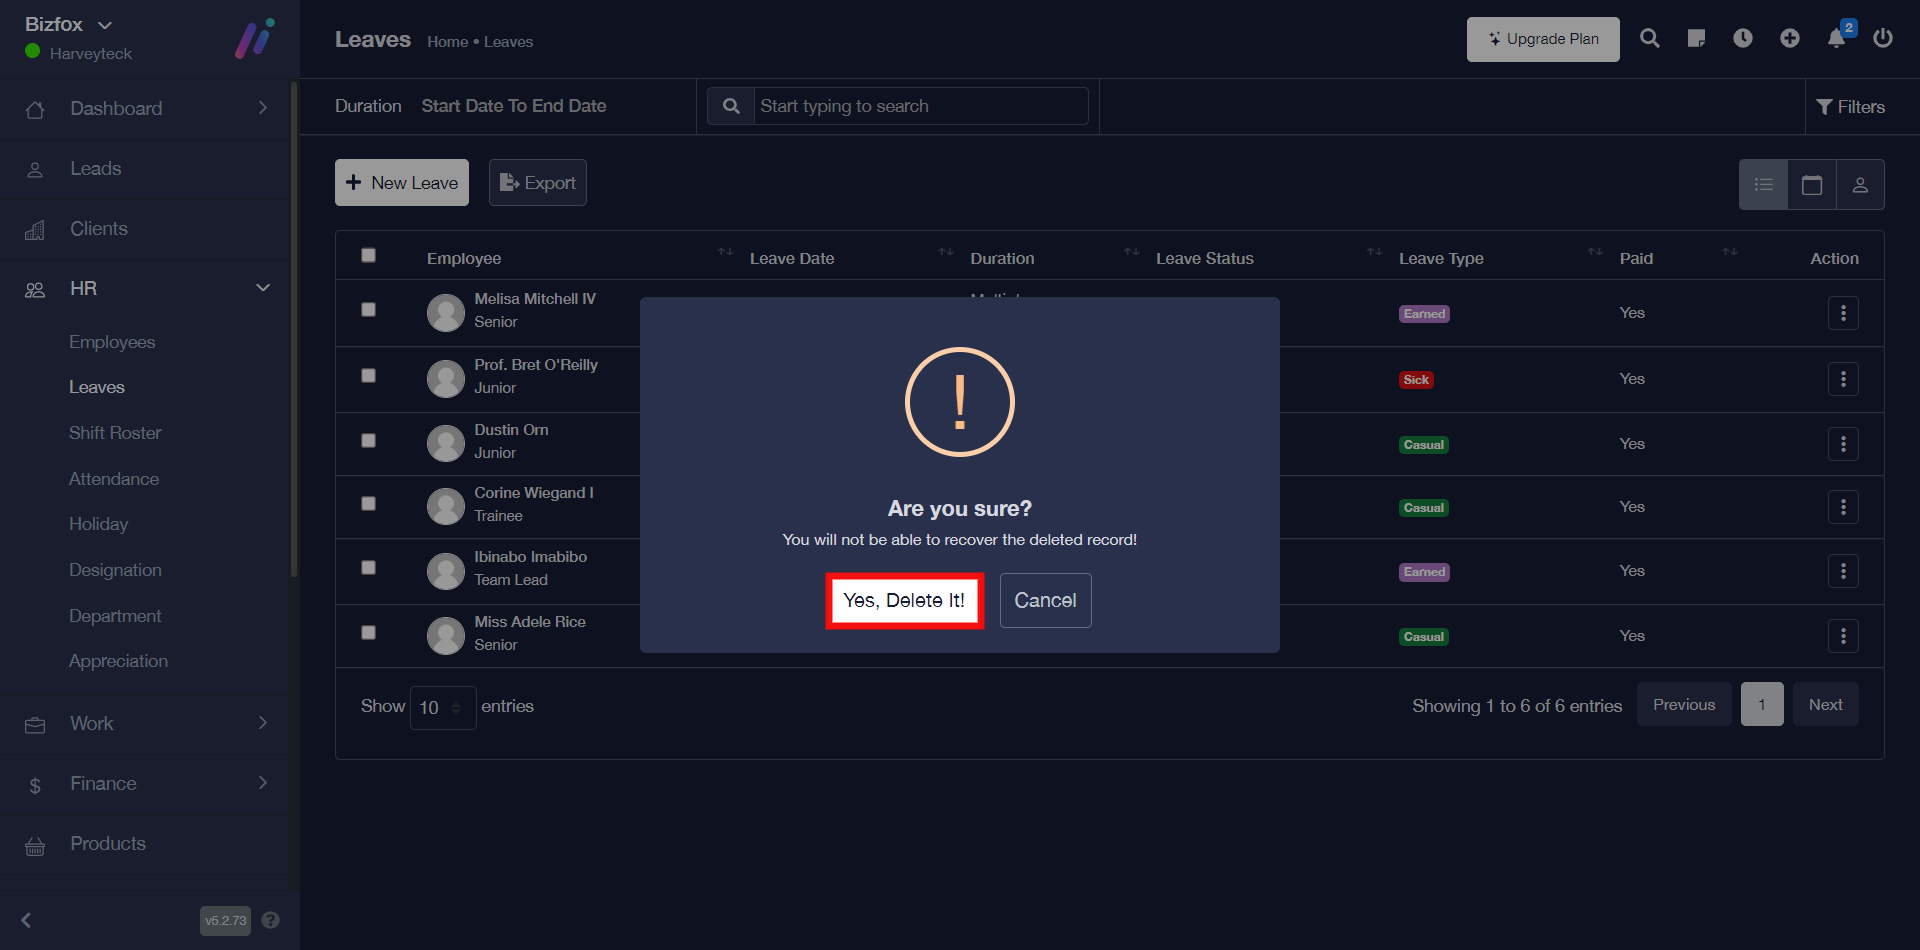
STEP 2: Go ahead to click either the “Yes, Delete It” button for confirmation or the “Cancel” button perhaps you no longer want to remove the employee leave record.
How To View Leave On Calendar
You can view employee leave on calendar by simply following the instructions below;
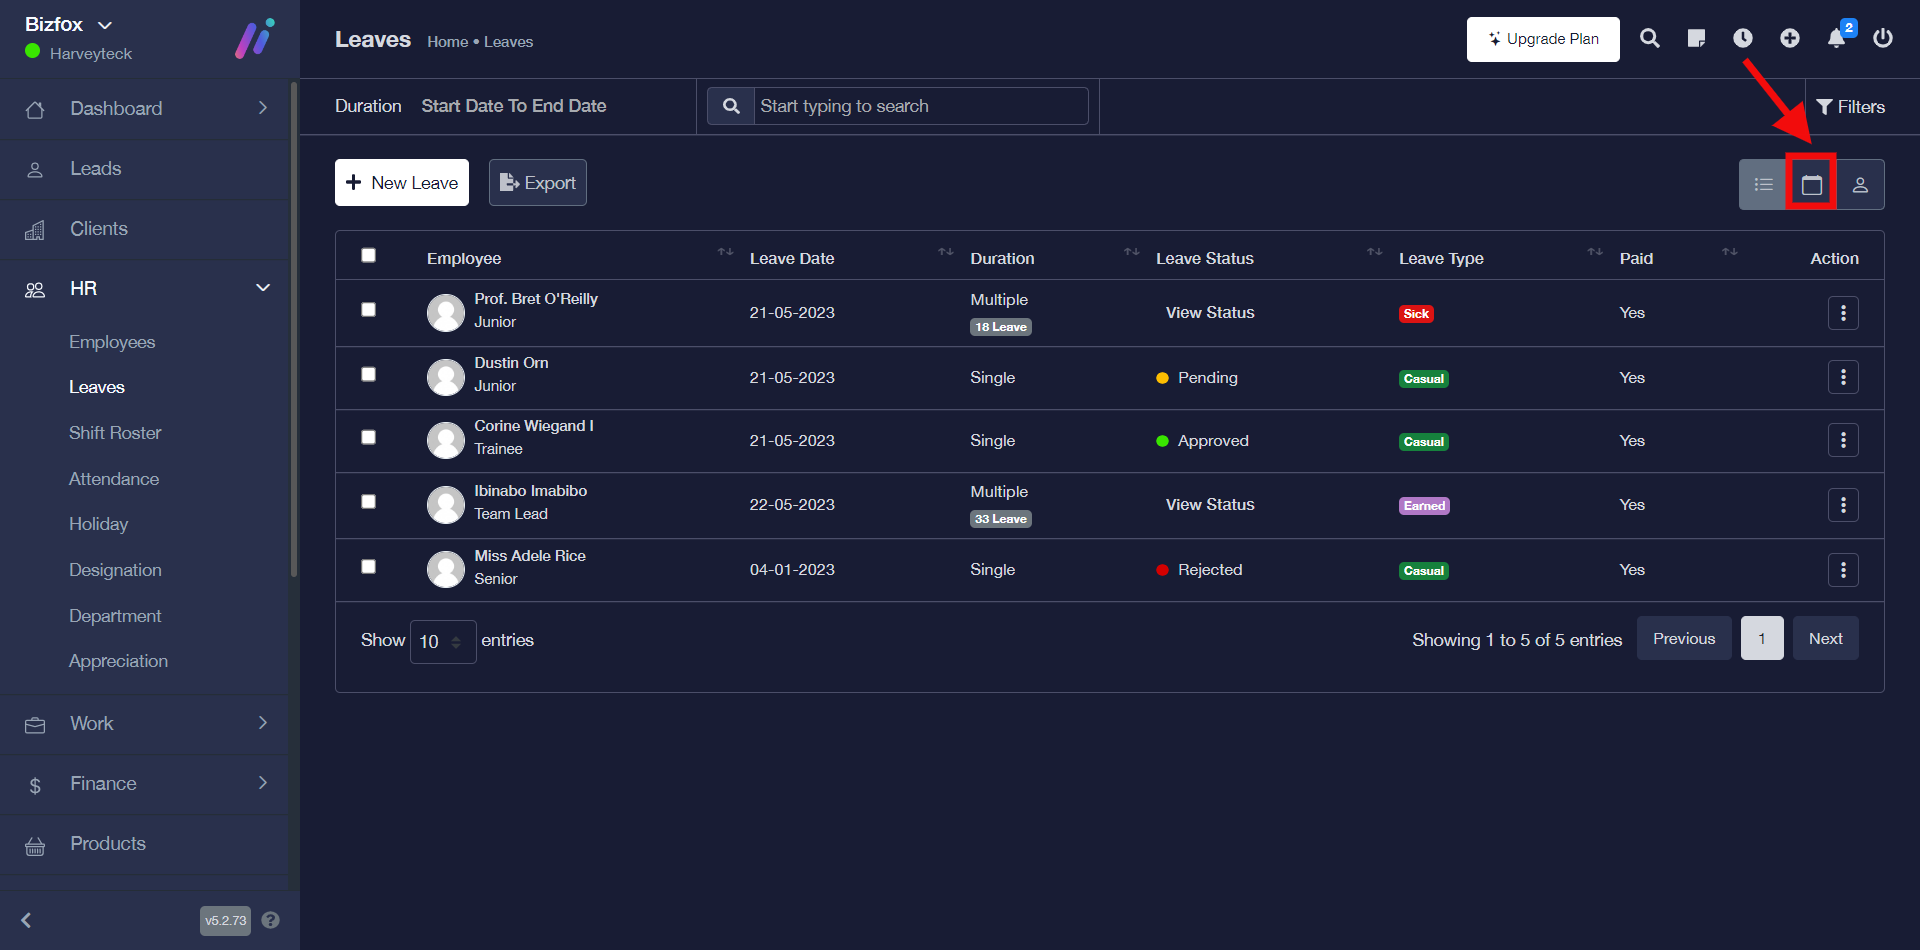
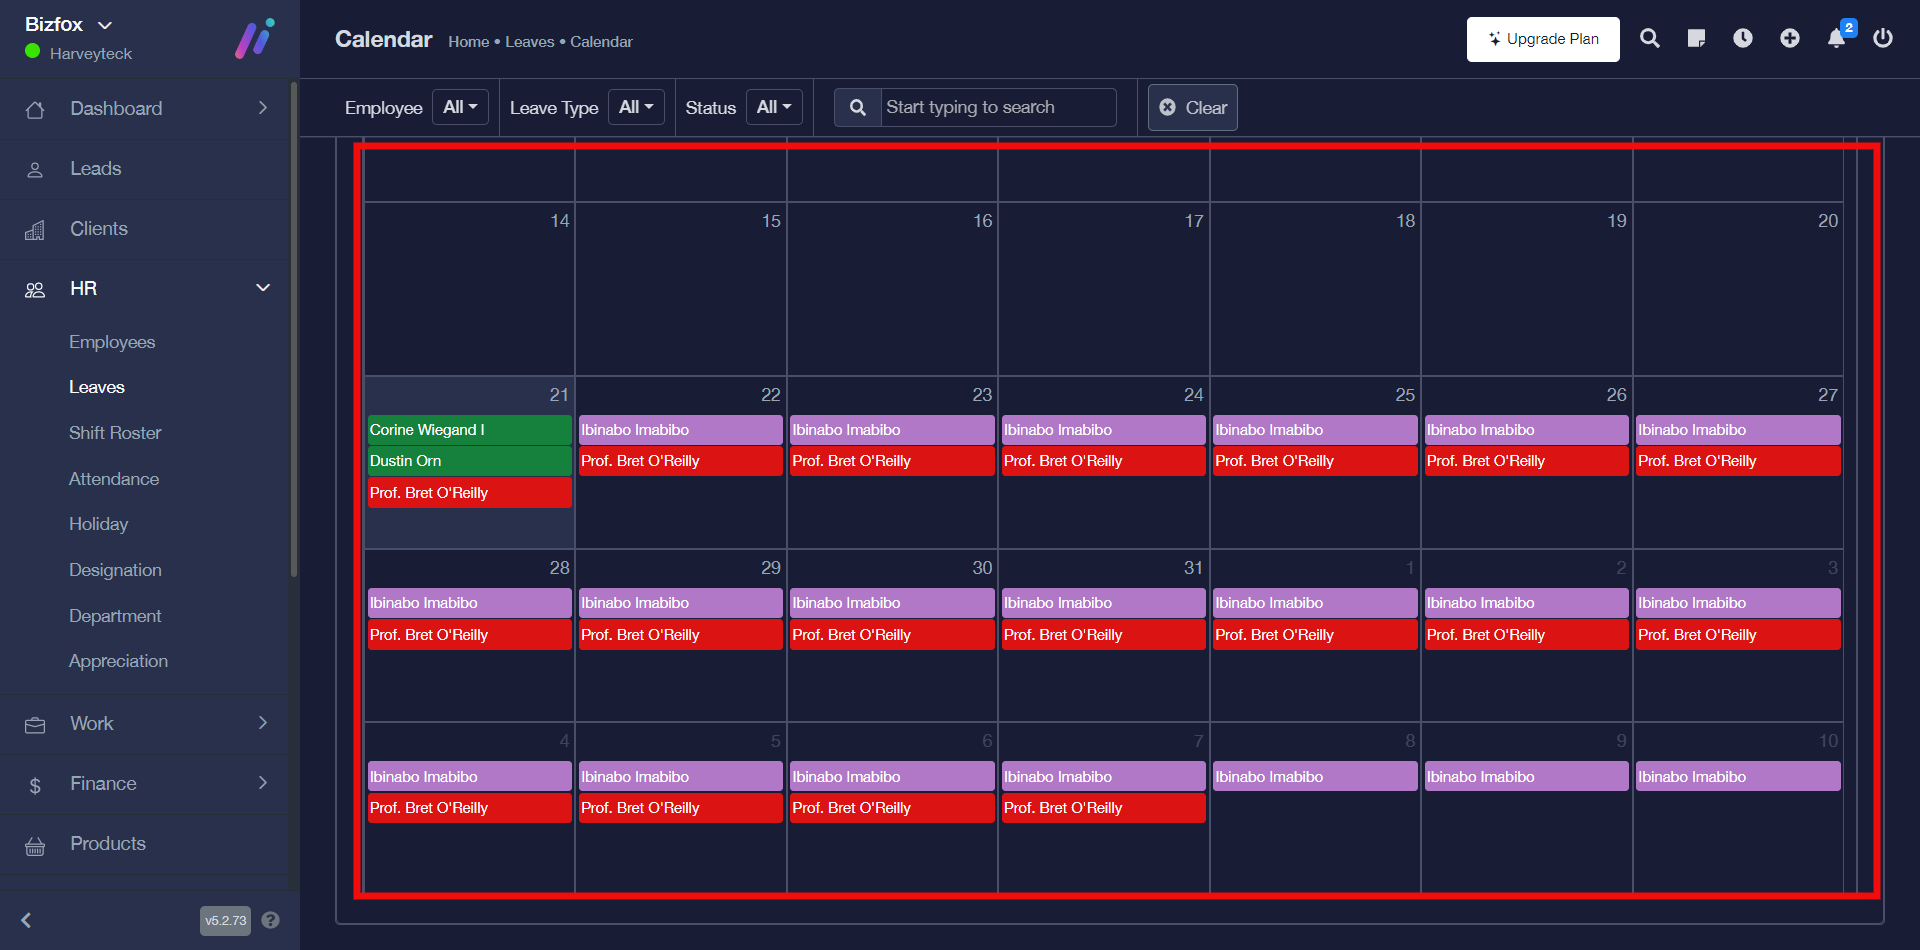
STEP 1: In order to view employee leave on calendar, click on the calendar icon as shown in the screenshot below;
STEP 2: You will see different tabs which include; month, week, day, and list. You can select your preferred view option.
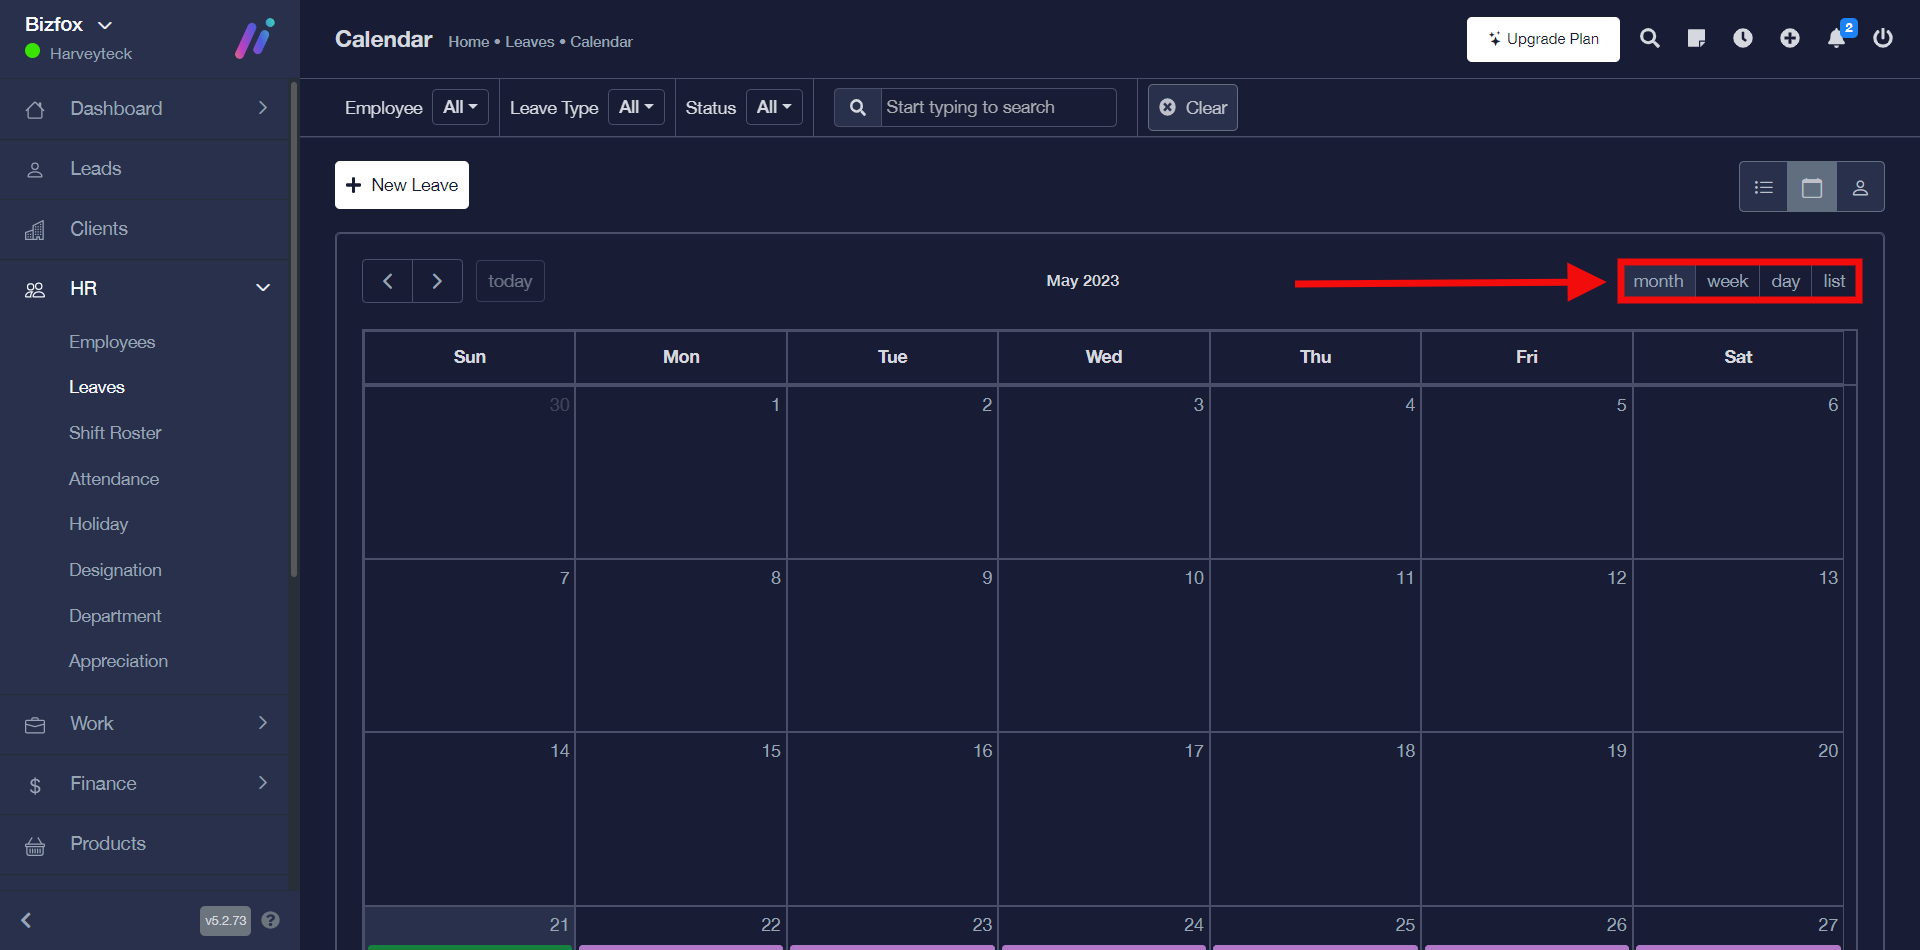
This is what the “month tab view” looks like with leave details of respective employees regardless of the duration.
How To Use The Filter Option To Sort Leave
You can use the filter option to sort leave by simply following the instructions below;
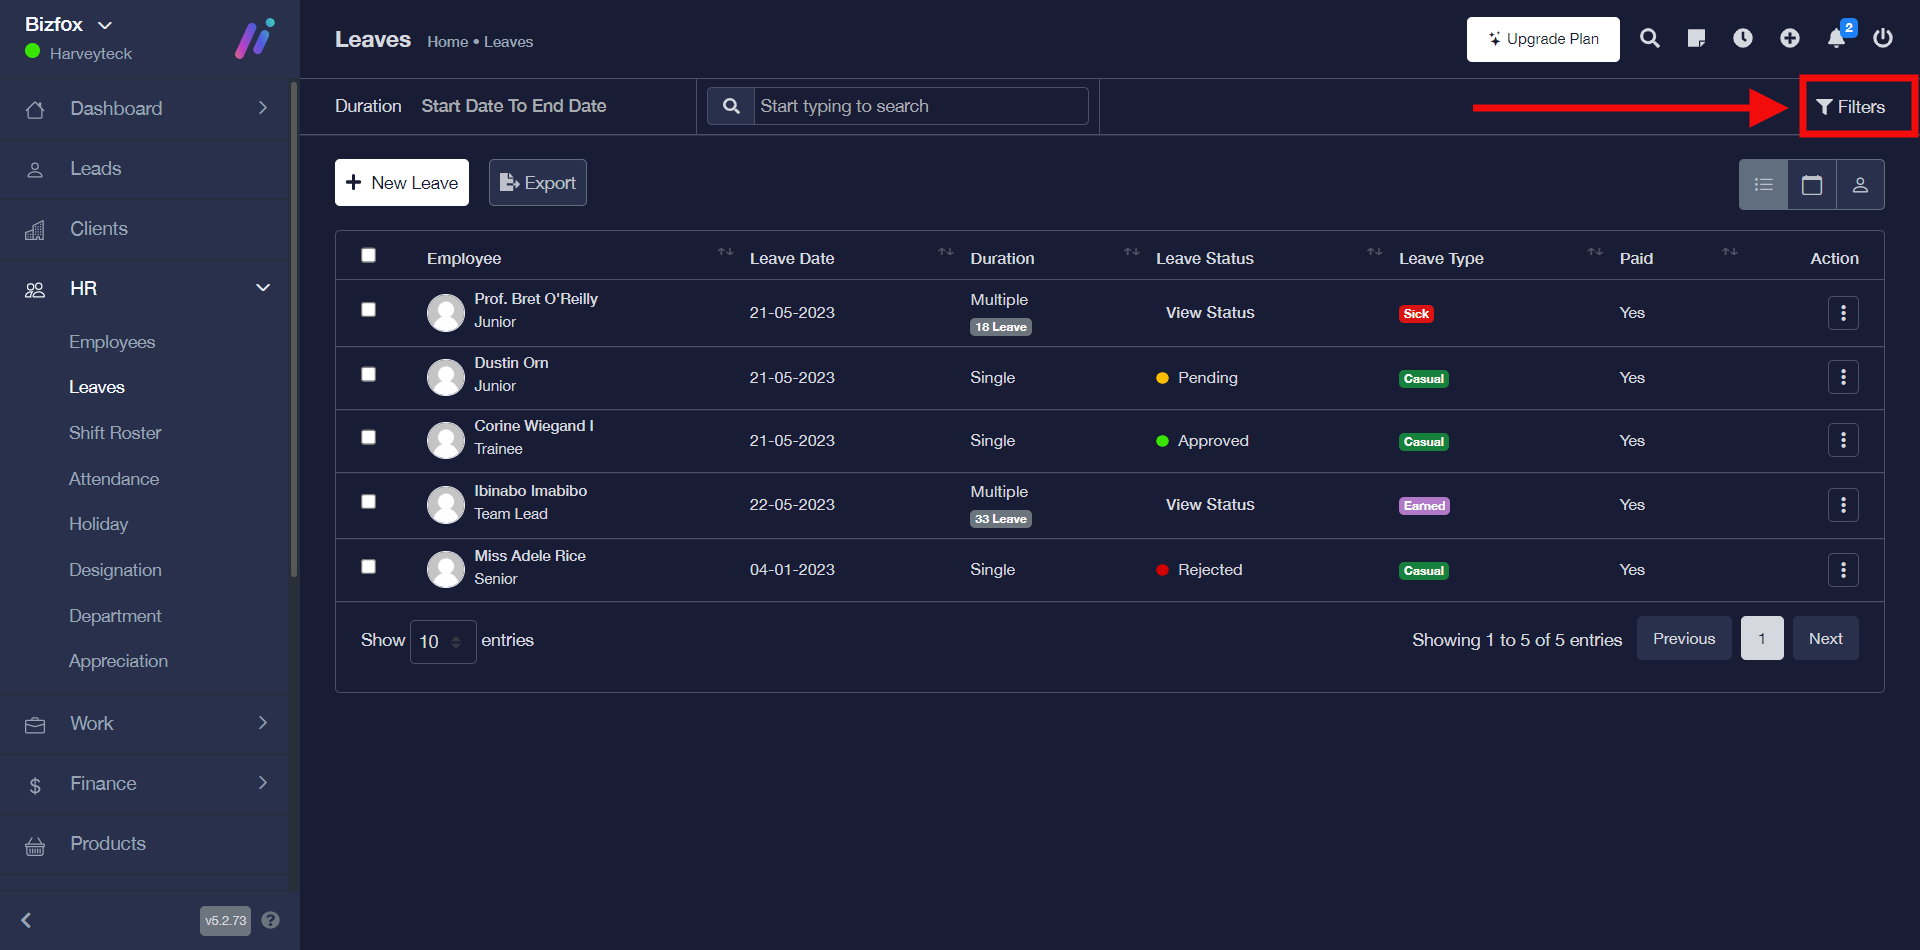
STEP 1: Click on the “filters” button, after which you will get an option to select the type of filter you will like to use.
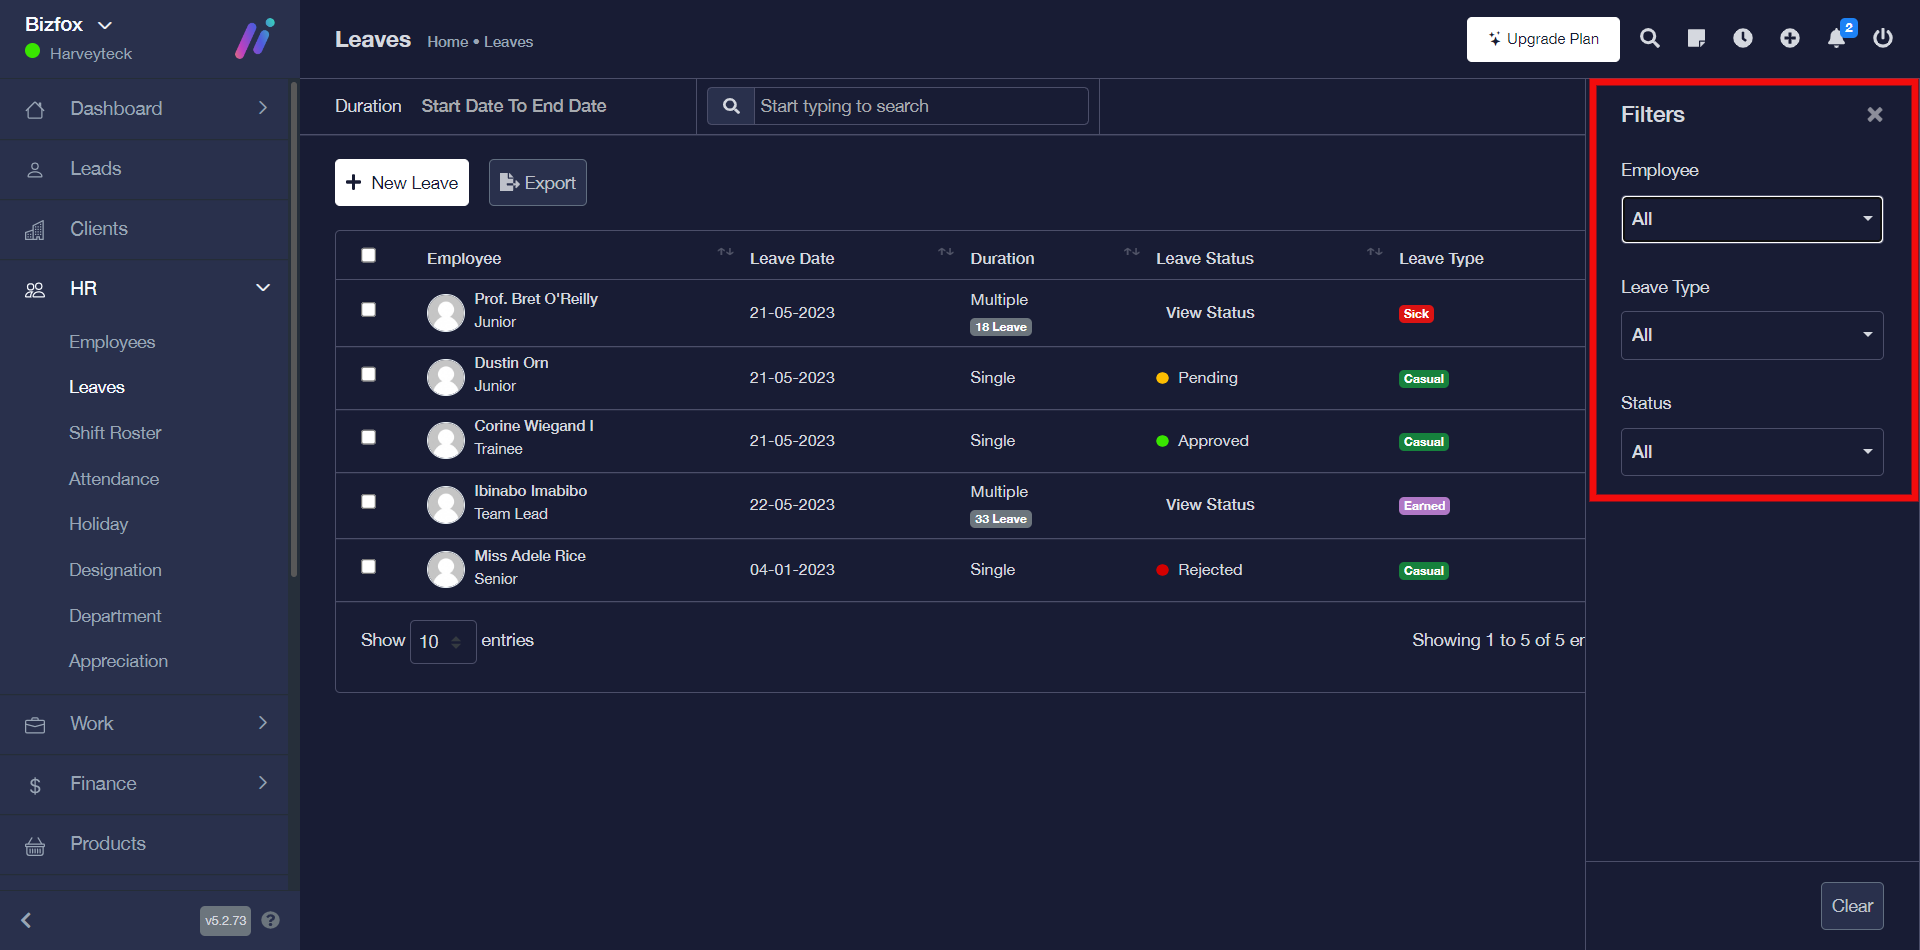
Note: You can decide to use the filter option of either employee, leave type or leave status.
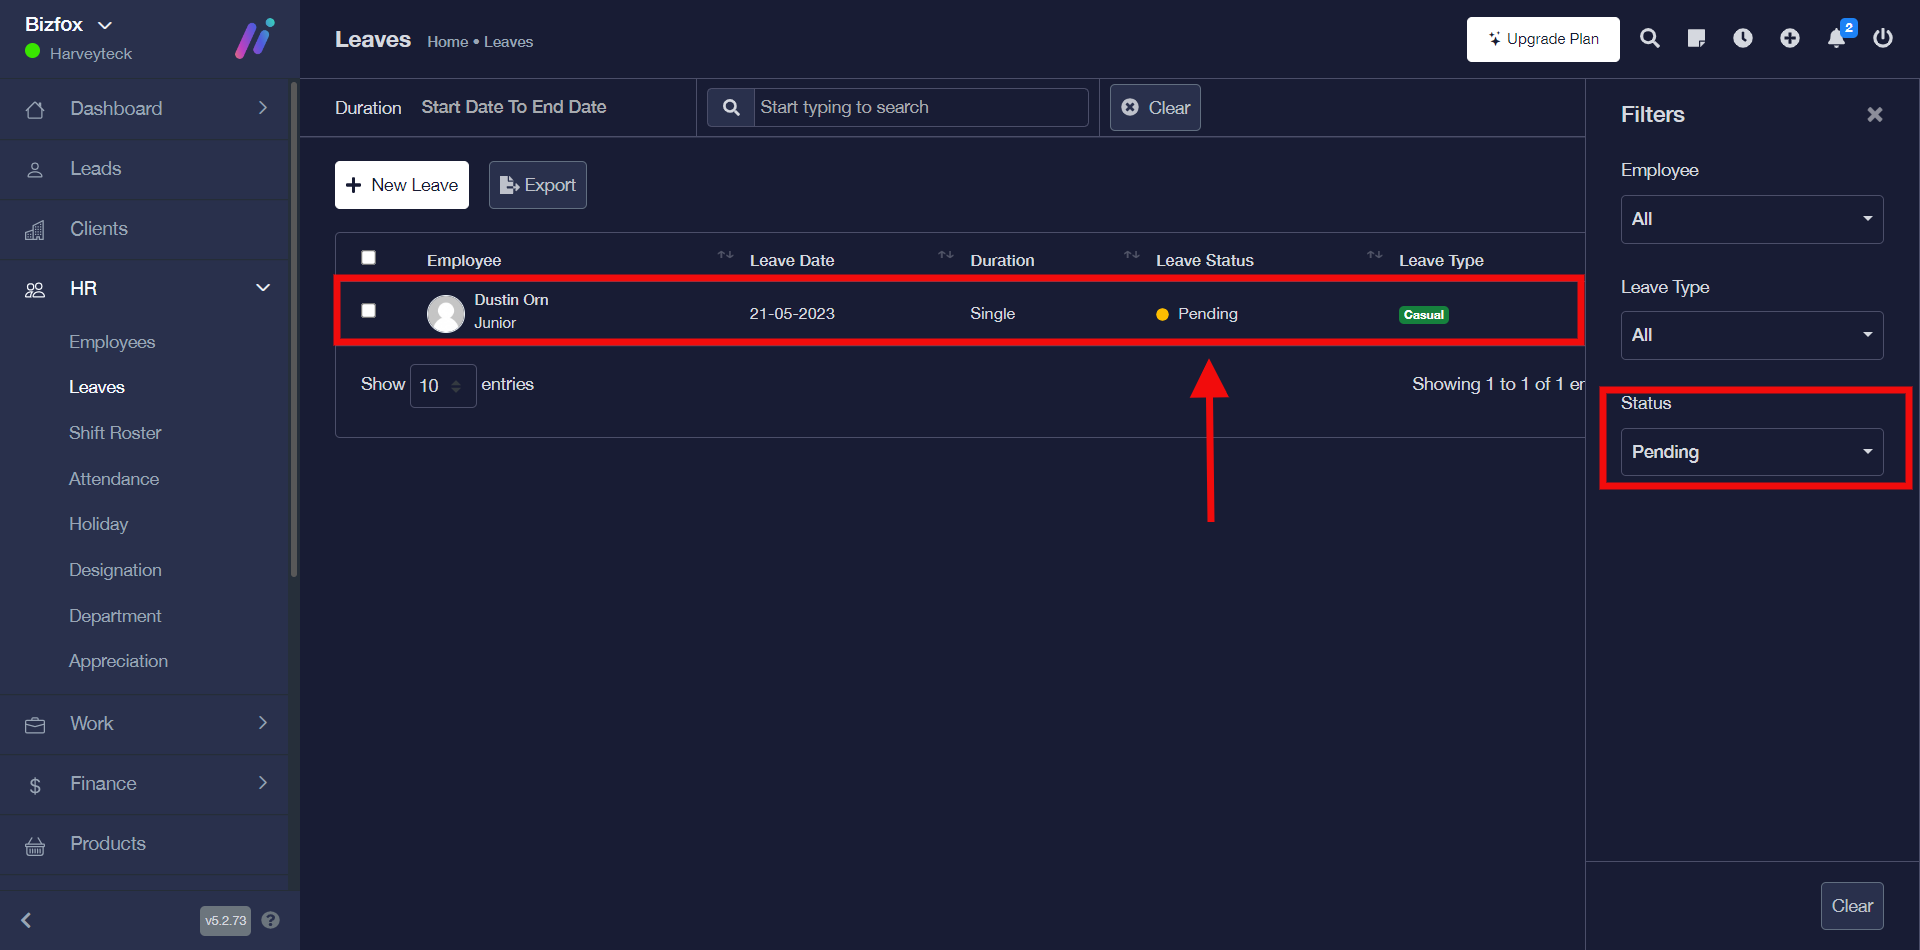
For the purpose of this tutorial, I made a filter search using the leave status “pending”
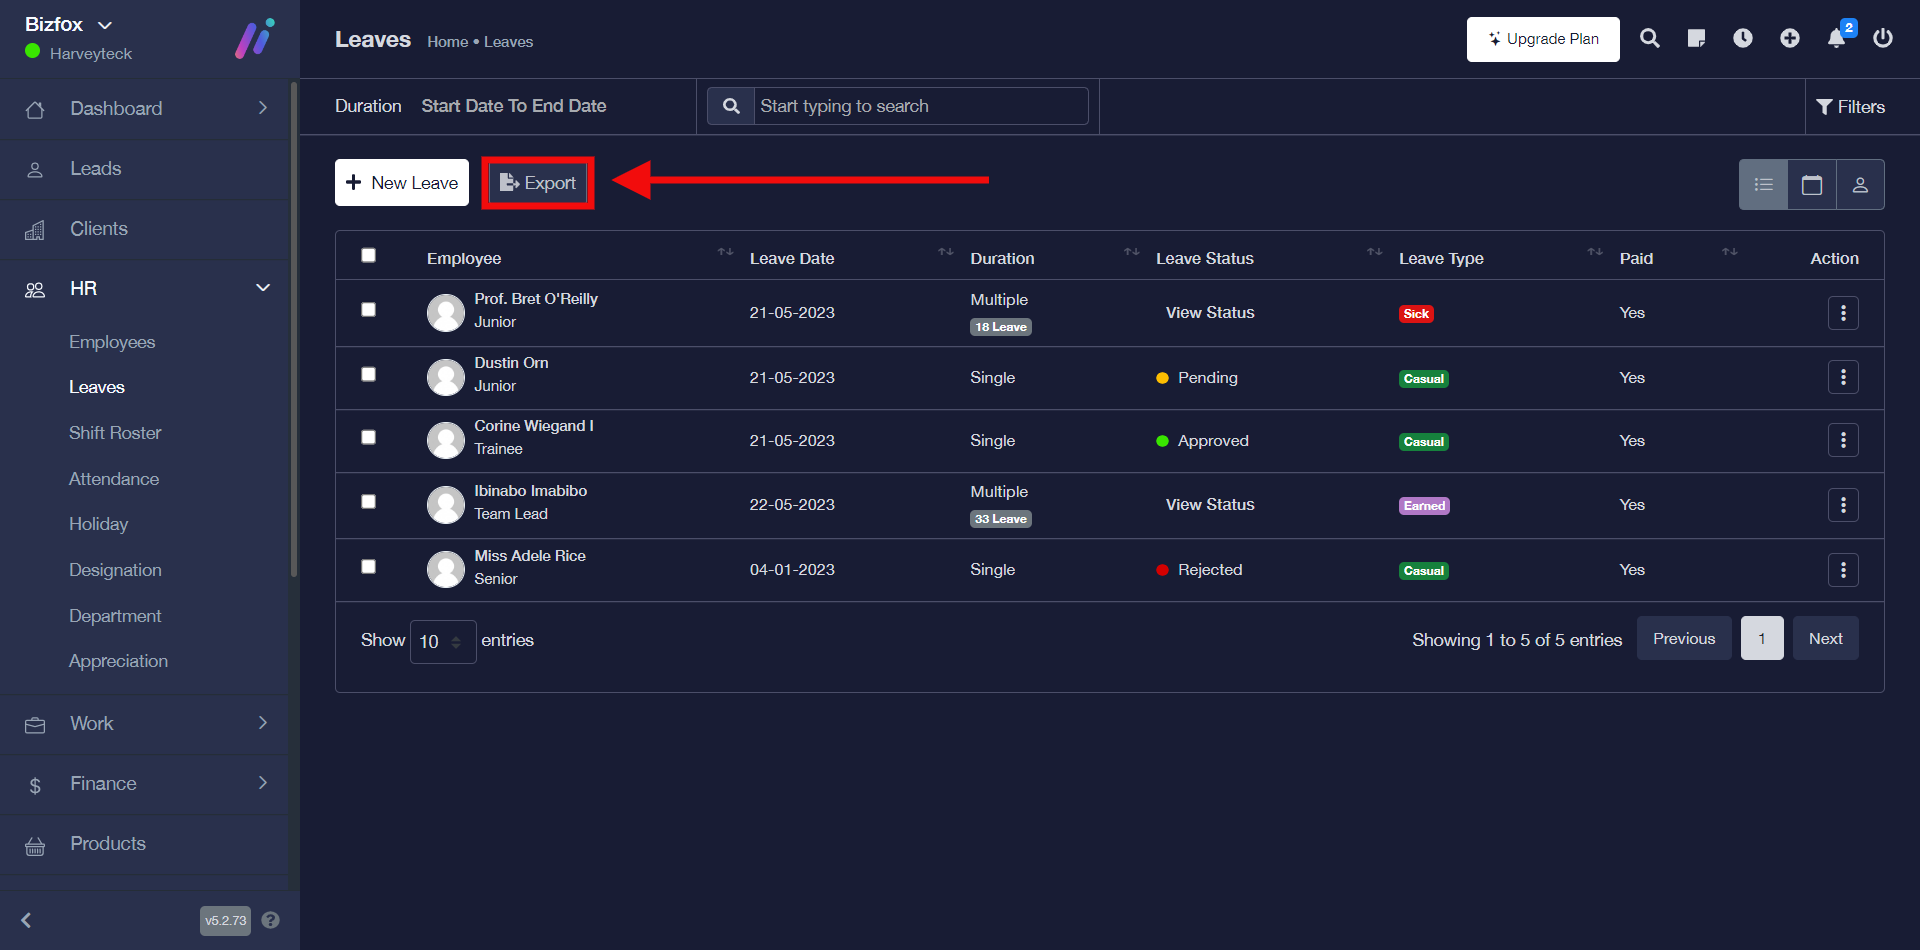
How To Export Leave List In Excel Format (xlsx)
You can export leave list by simply following the instructions below;
STEP 1: Click on the “export” button, after which you will get an option to save the xlsx file format on your computer.