STEP 1: Log in to your iceleraite account.

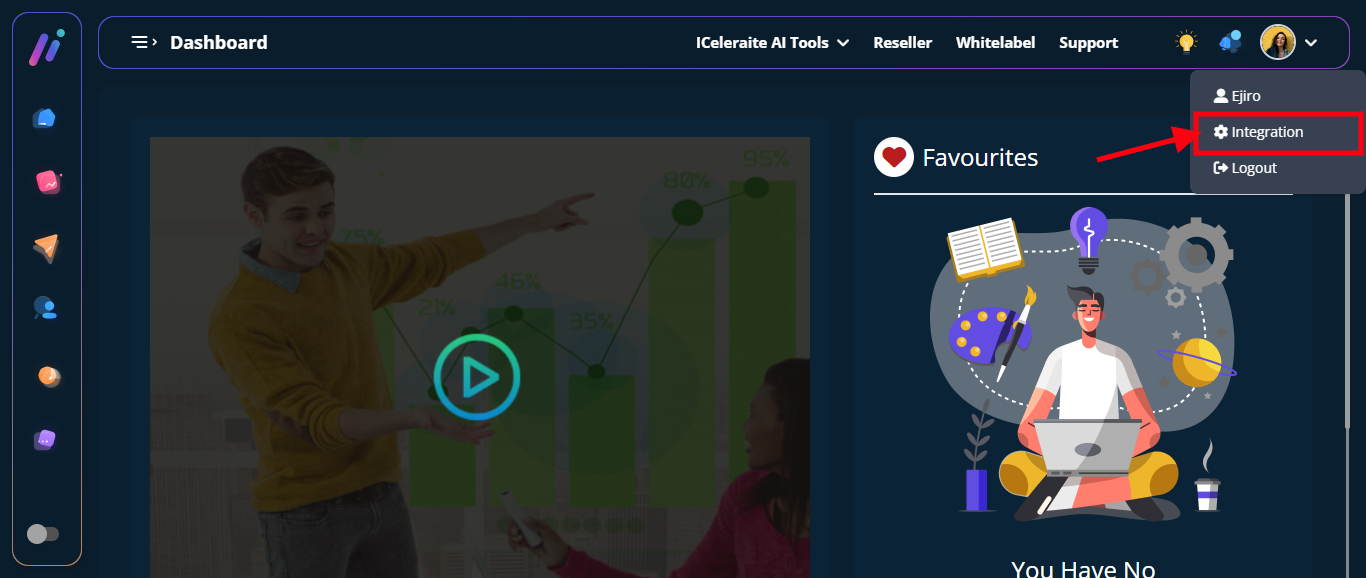
STEP 2: Click on the “Icon” at the top of your dashboard

STEP 3: Click on “Integration” from the drop-down options.
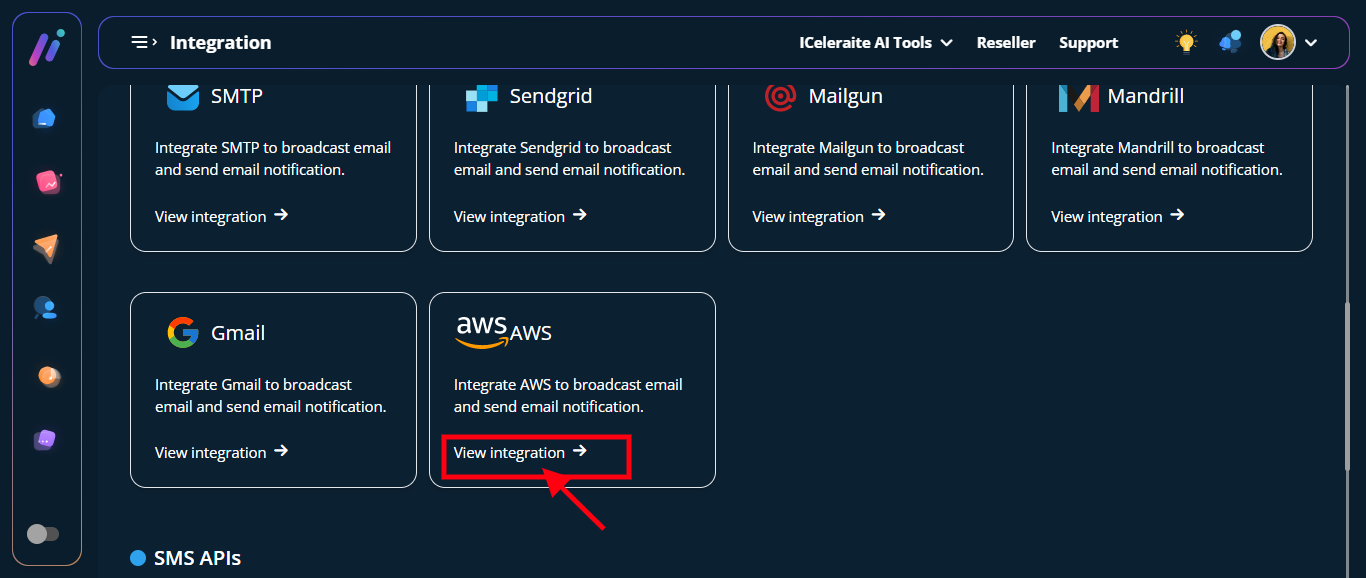
STEP 4: Click on “View Integration” in the AWS card
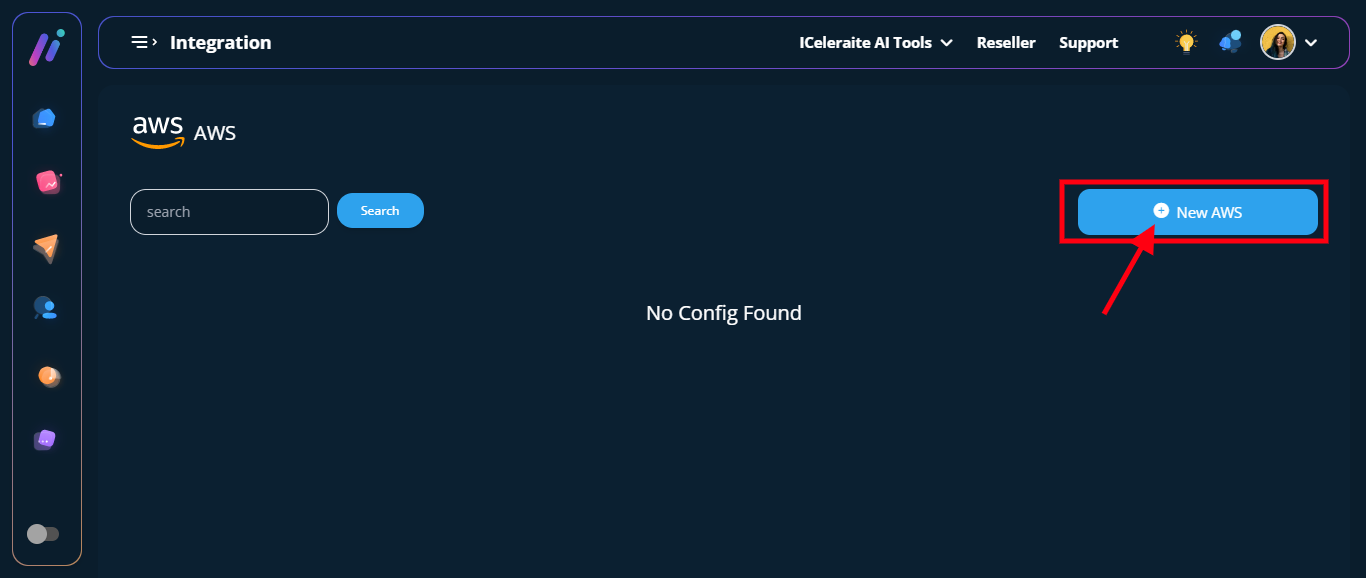
STEP 5: Click on the “New AWS” option
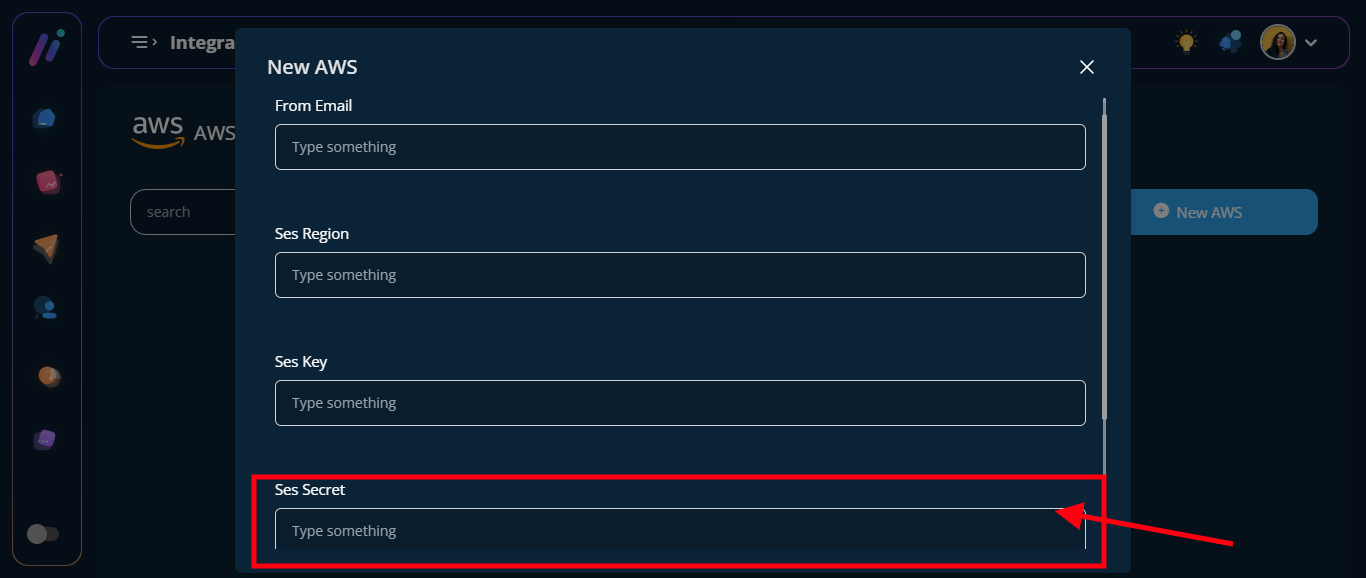
STEP 6: From the option below, enter the AWS information needed, as shown below.
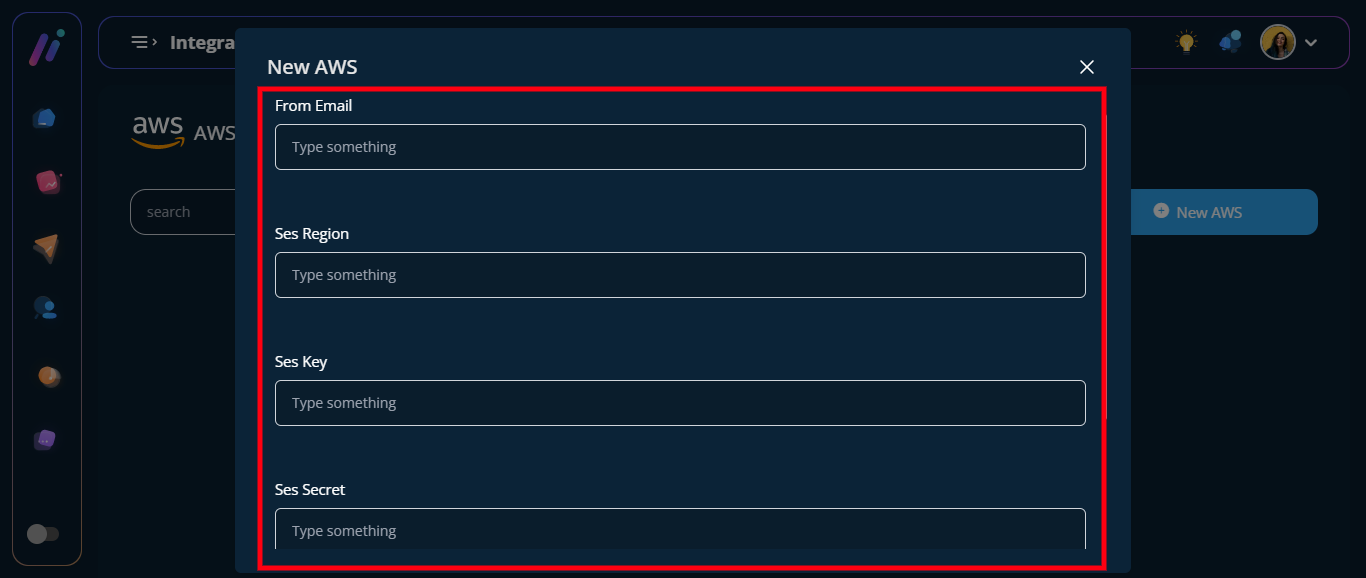
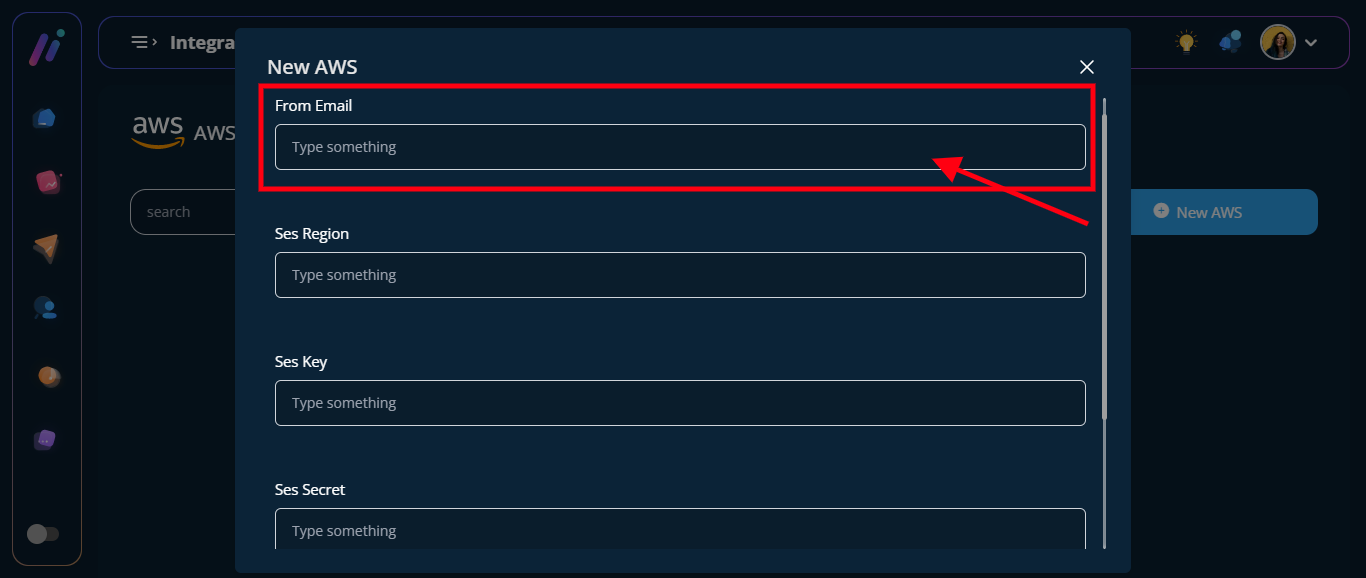
==> Email field: in the “Email ” field enter your Email address. Please note that the email must be a verified one. Kindly follow this link on How To Set Up AWS SES And Verify Identities.
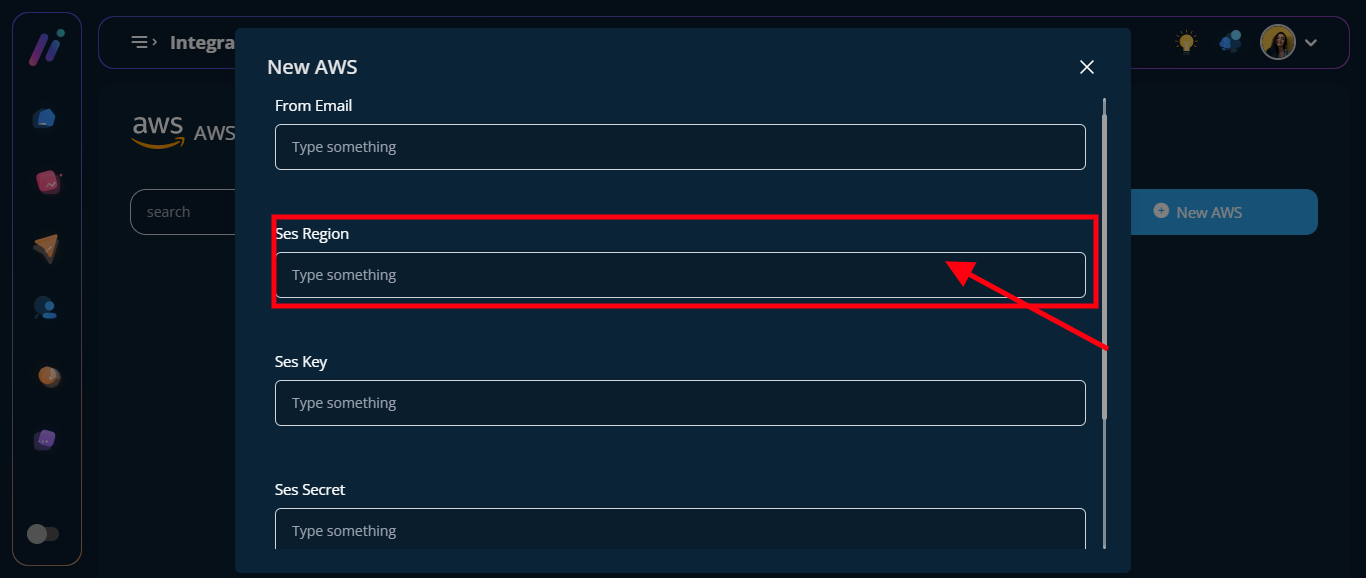
==> SES REGION: in the “SES REGION” field enter your Ses region.

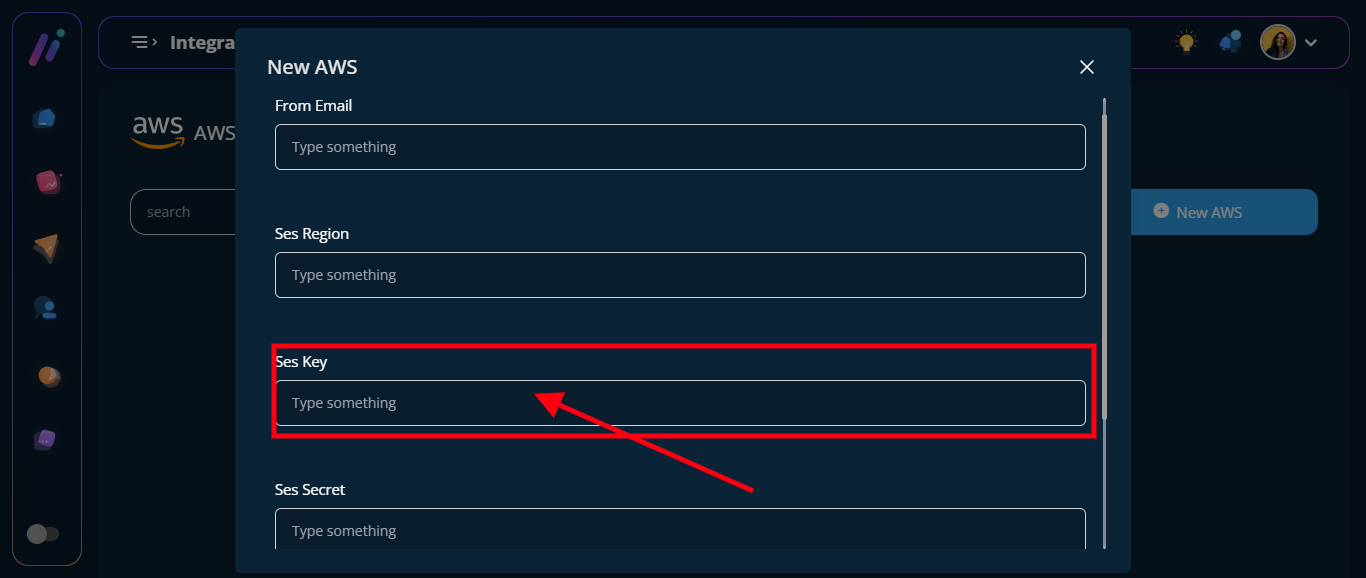
==> SES KEY: in the “SES KEY” field enter your Ses Key. See below how to Get AWS SES Key
==> SES SECRET KEY: in the “SES SECRET KEY” field enter your Ses secret key. See below how to get SES Secret Key
Kindly Follow The Steps Below on How To Get Your AWS SES Key And SES Secret:
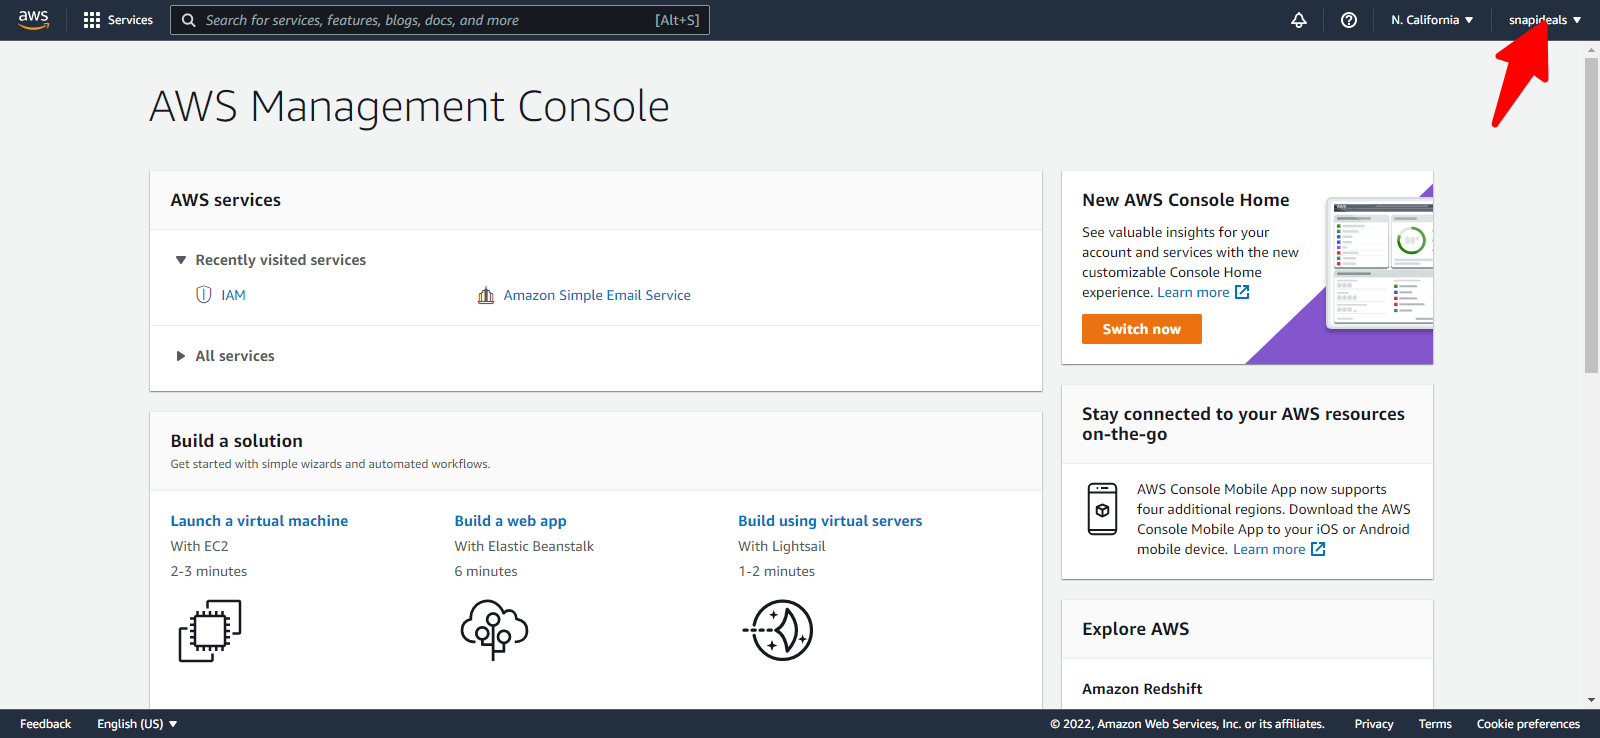
From your AWS SES dashboard, click on your “account name” at the top right corner.
Click on the “Secret Credential” option for the drop-down menus
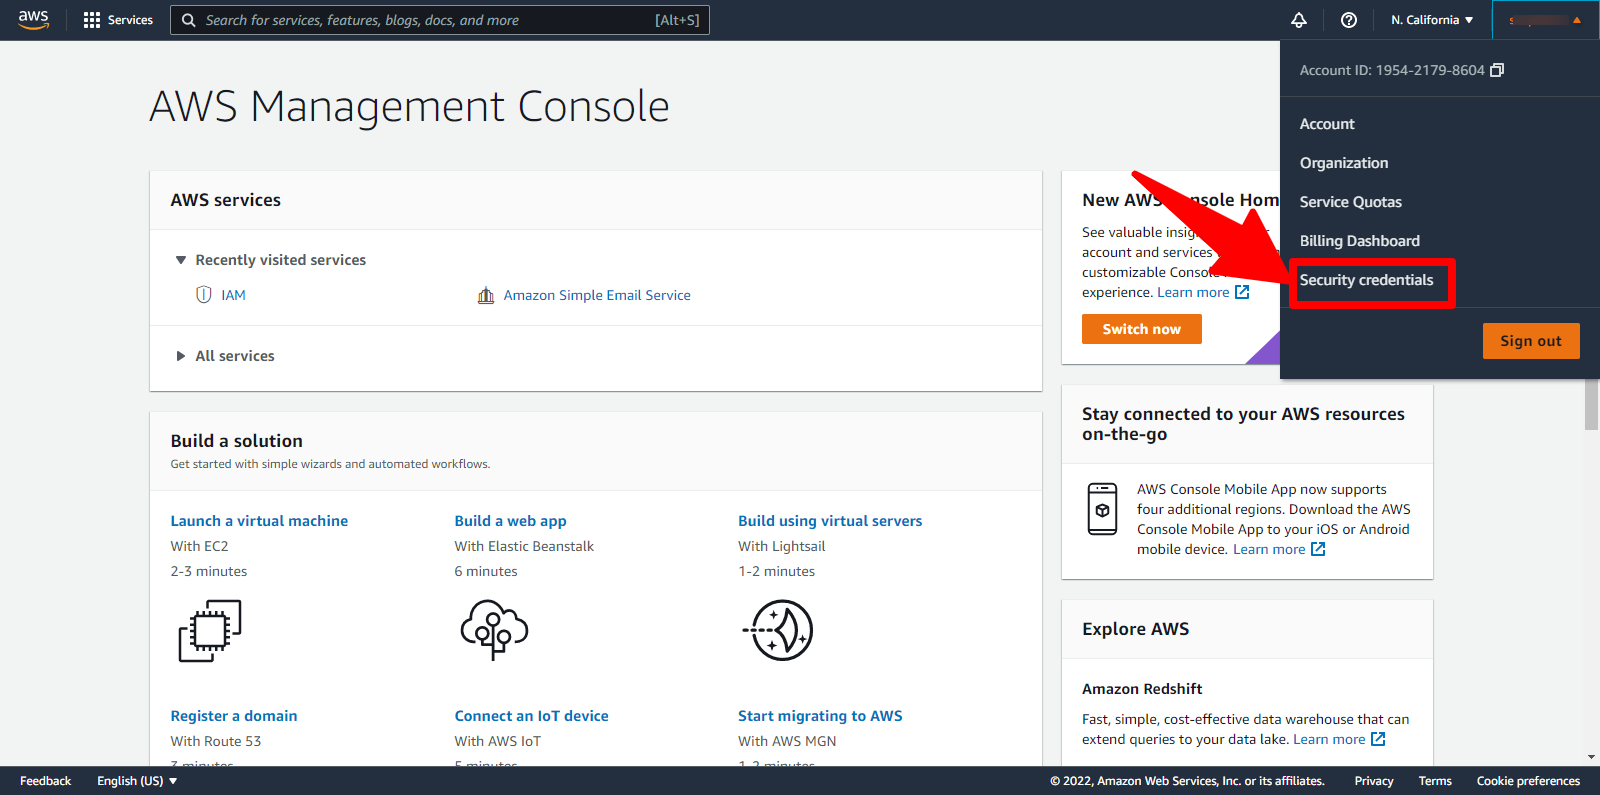
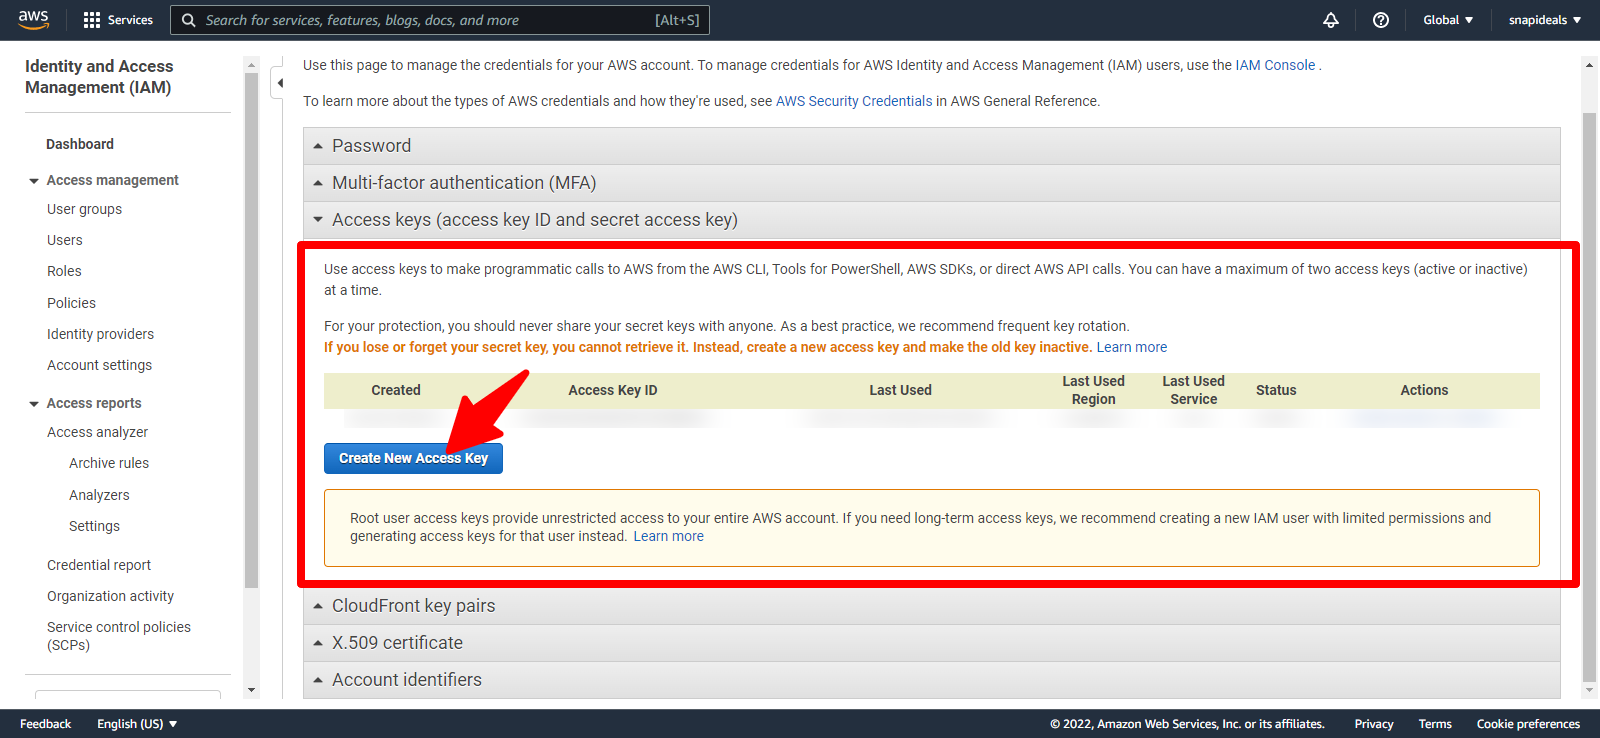
click on “access keys”
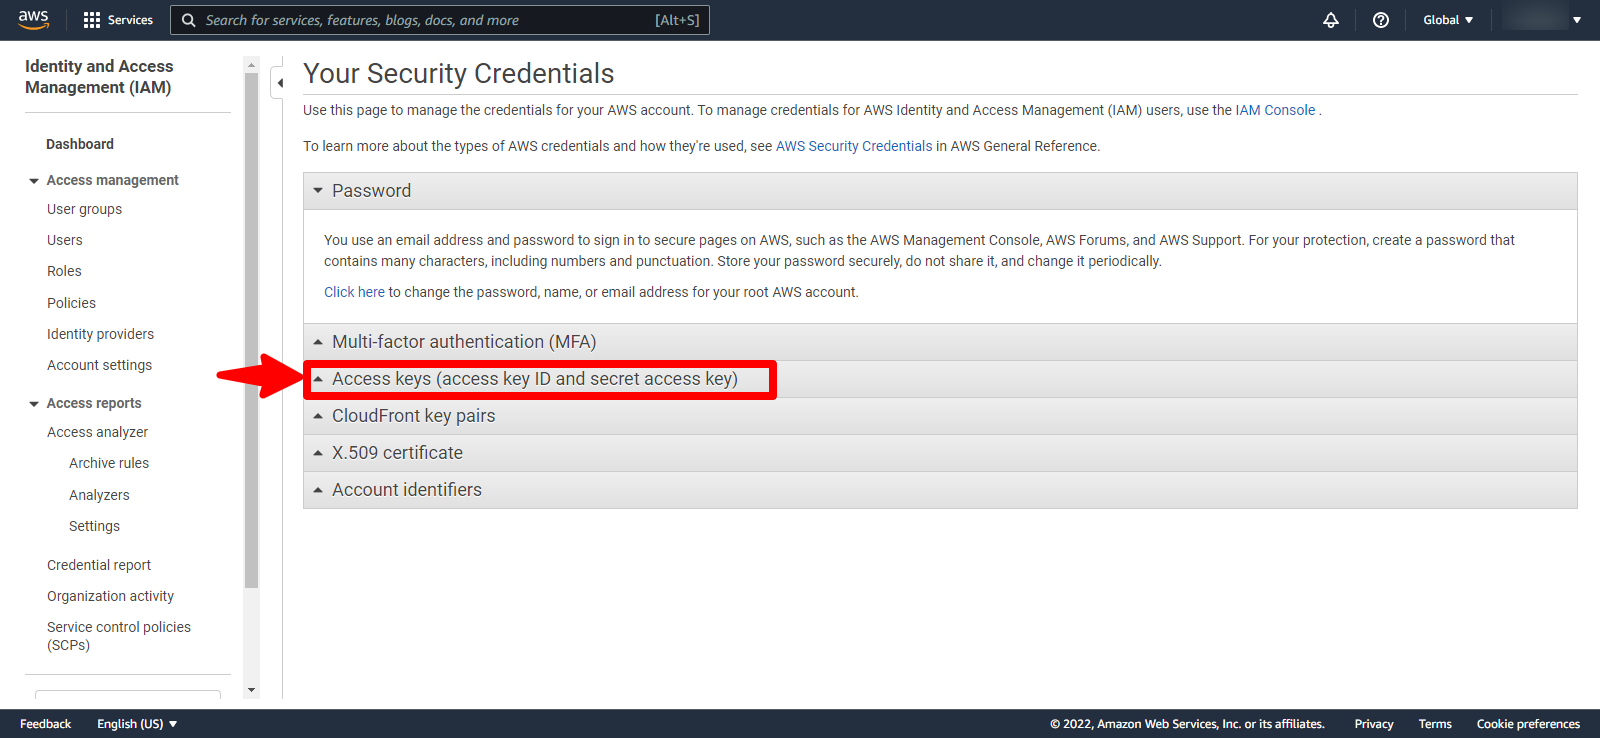
Click on the “Create New Acess Key” button in the access key section
Access key is generated. Click the “show access key”
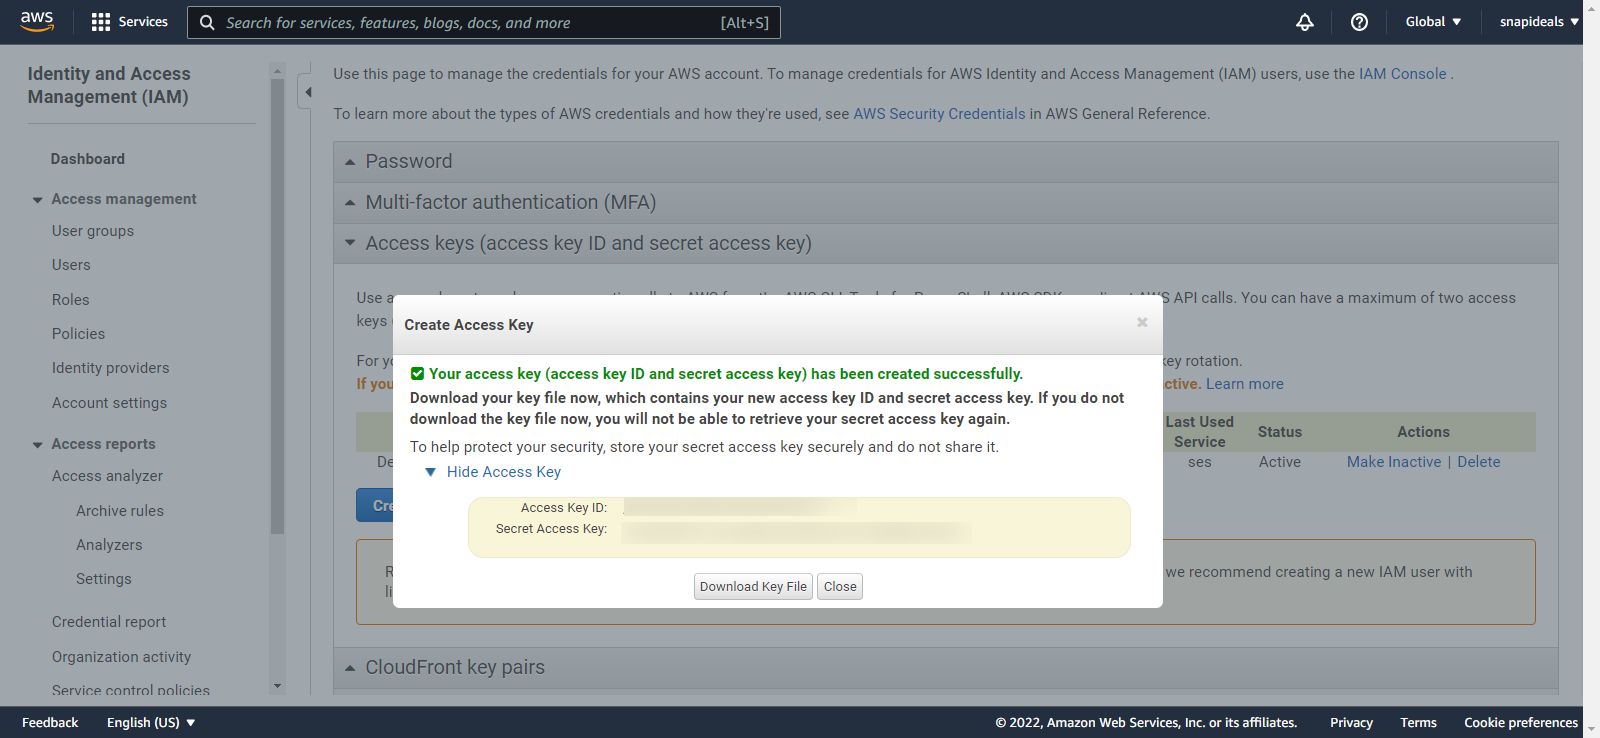
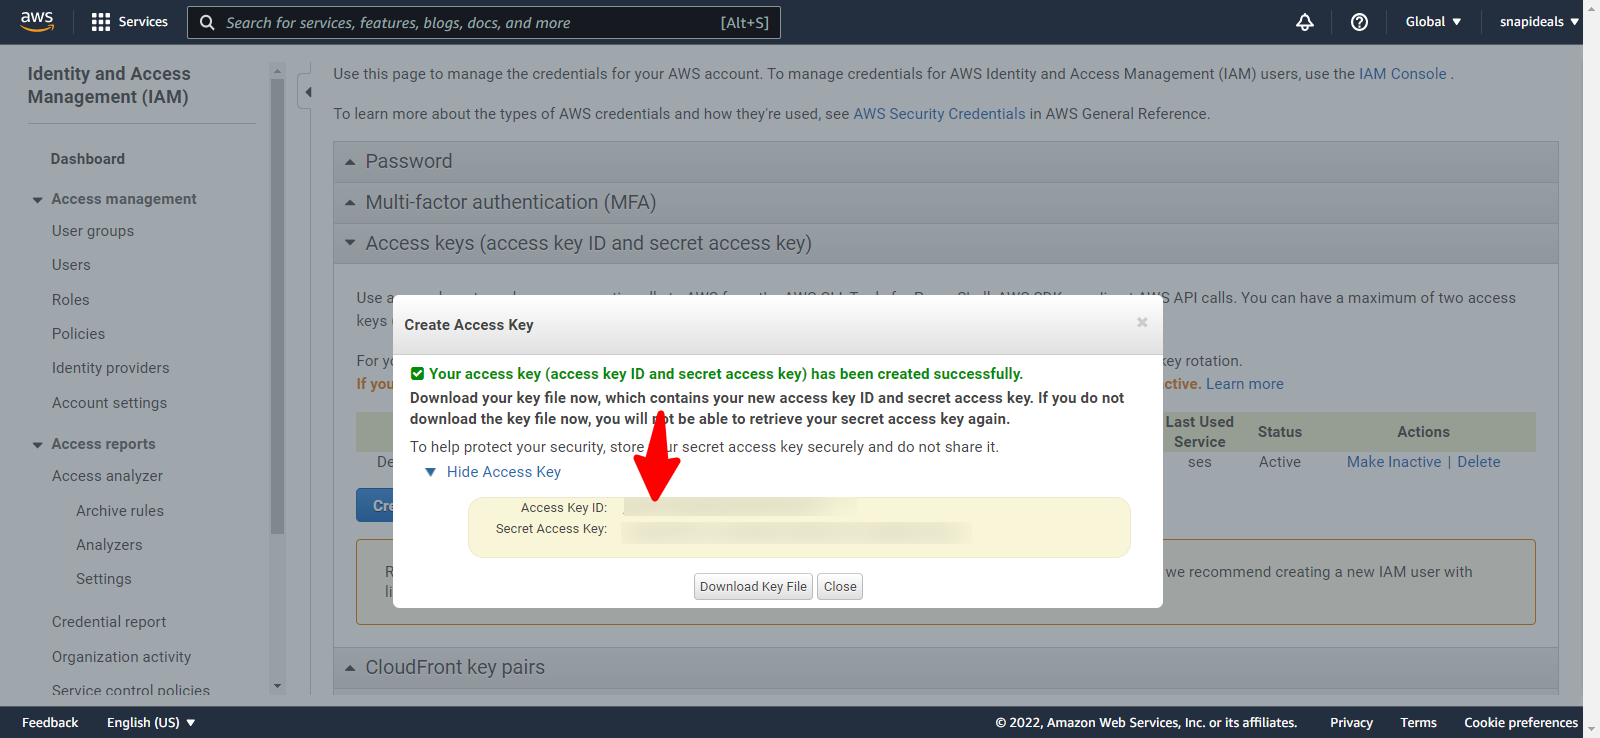
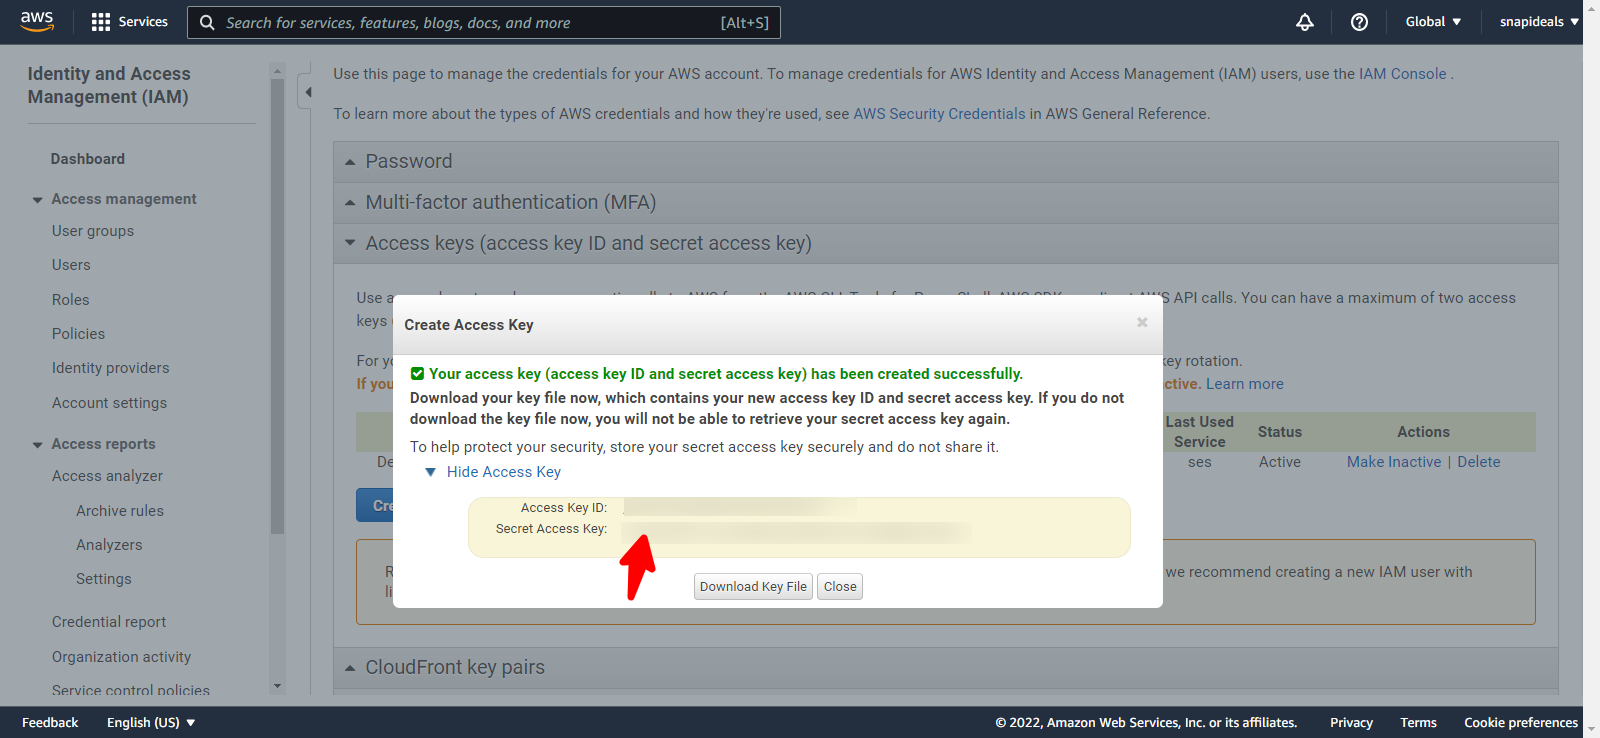
Here you will find your Access Key ID and Secret Acess Key.
- The access key ID is your SES Key.
- The Secret Acess Key is your SES Secret.
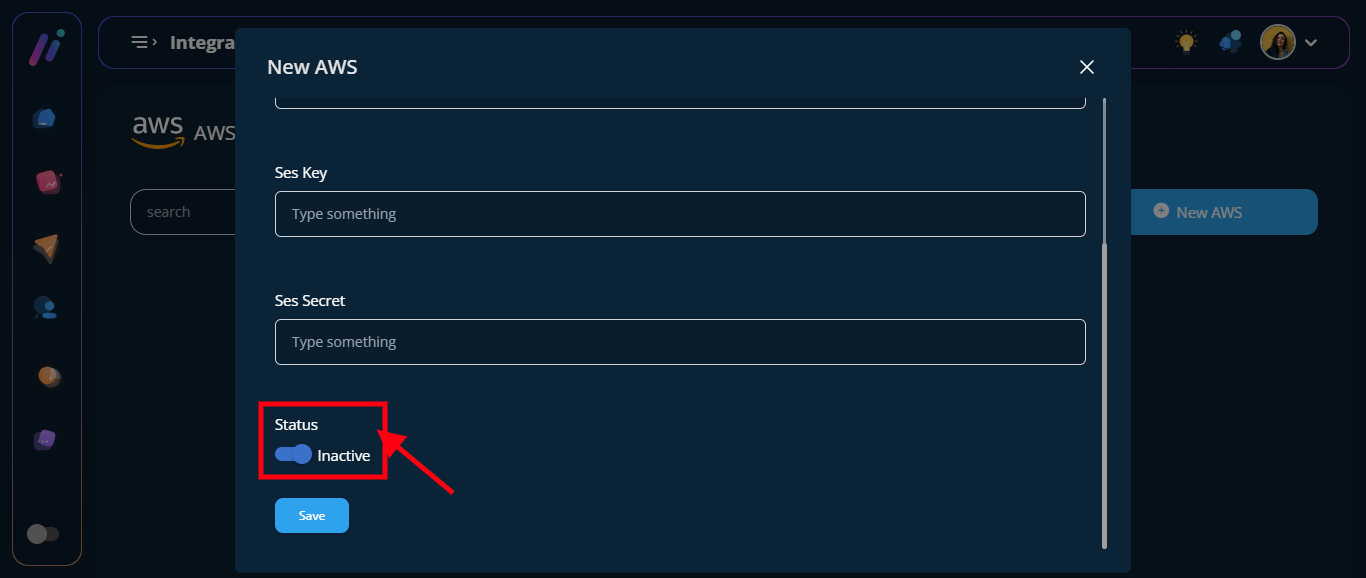
==> Turn on the “Status Toggle Button”
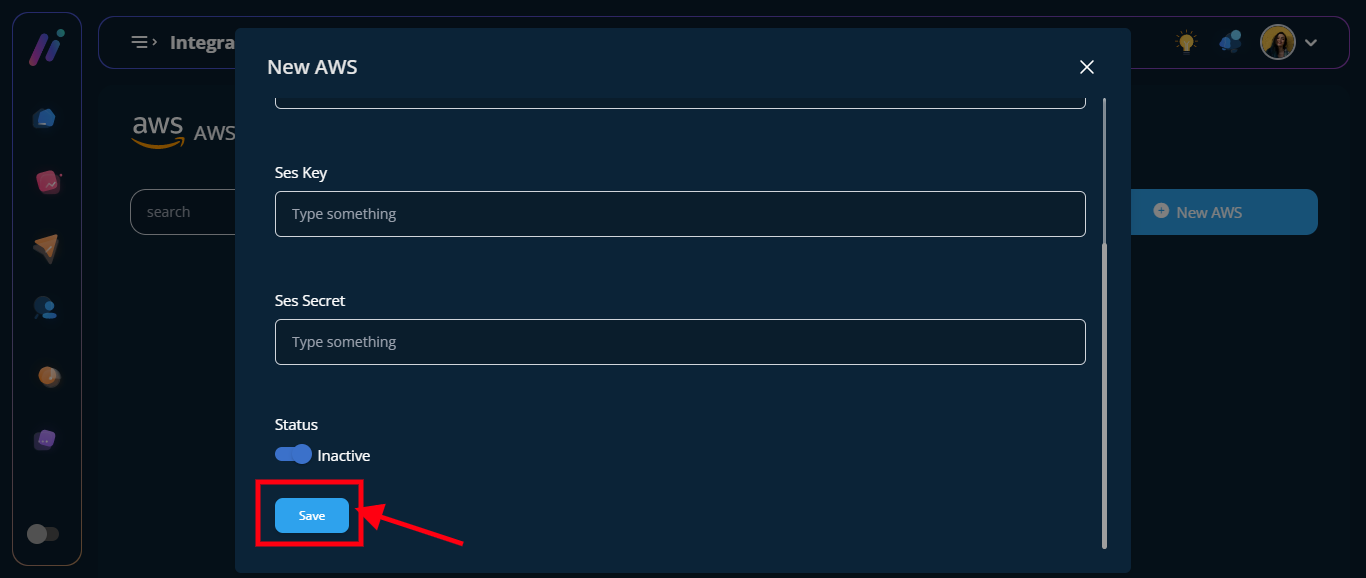
STEP 7: Click the “Blue Save Button”
STEP 8: Configuration was saved successfully
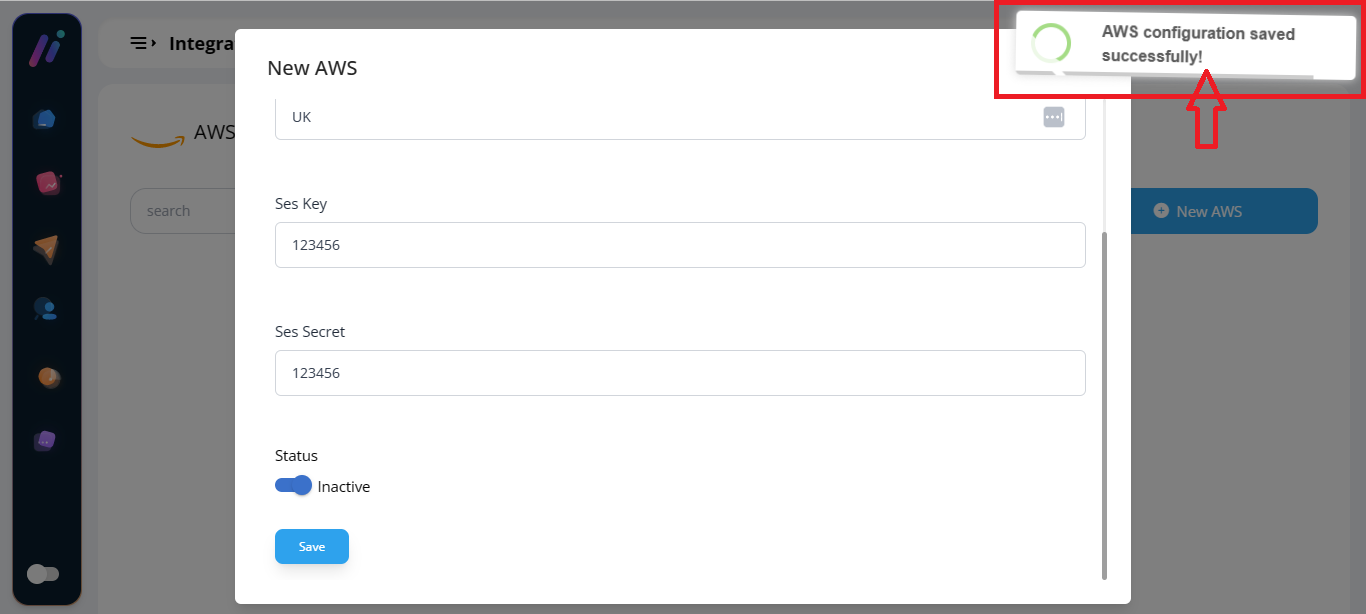
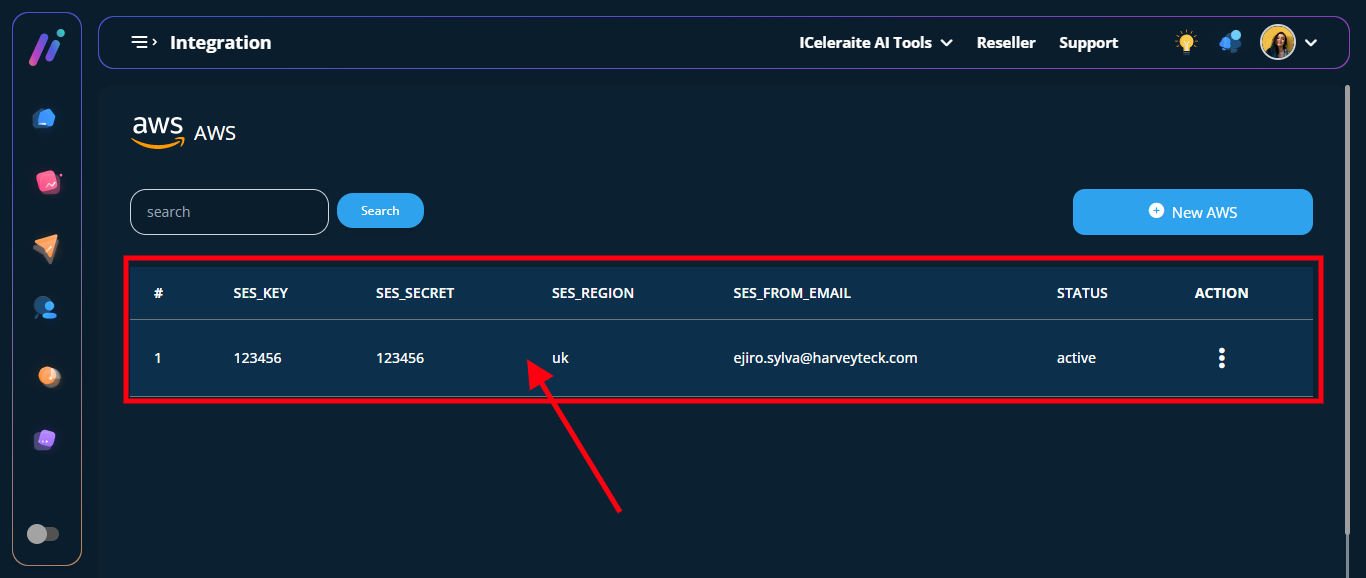
See AWS credentials added