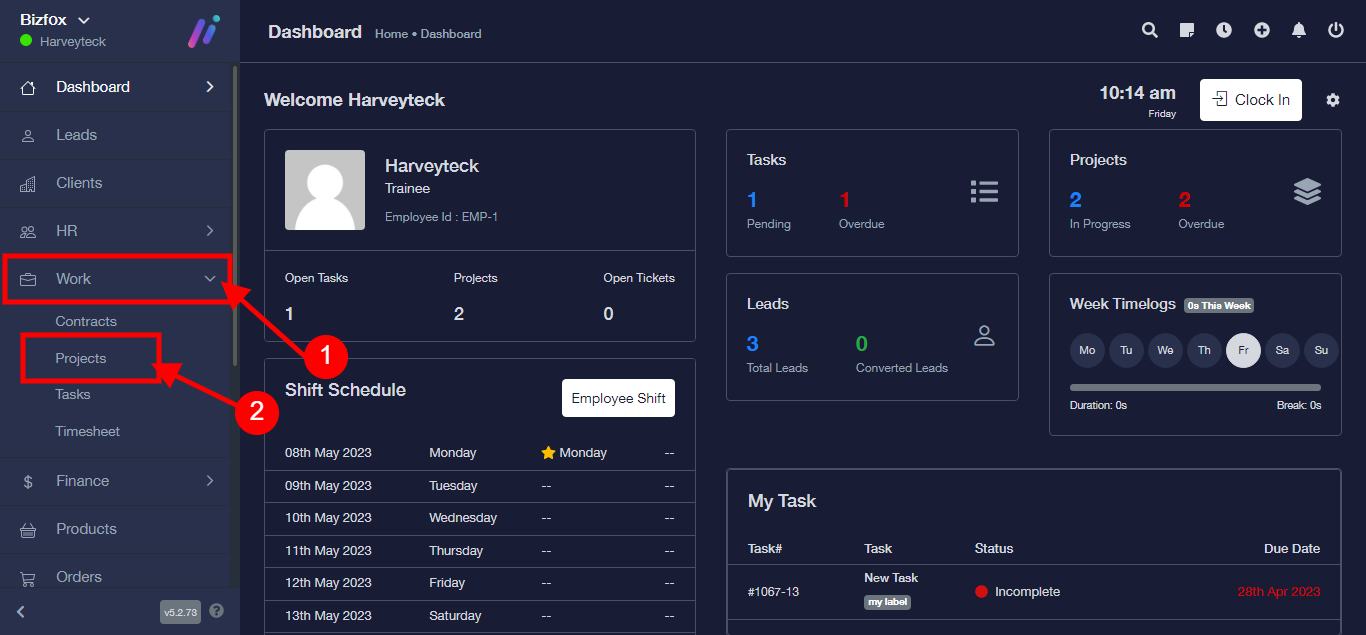
Step 1: After you’ve logged into your Business manager account, it leads you to the dashboard and there you get to see the left nav-bar and a table. On the left-nav bar click on “WORK” dropdown, It takes you to “PROJECT” Click on “PROJECT”
Step 2:
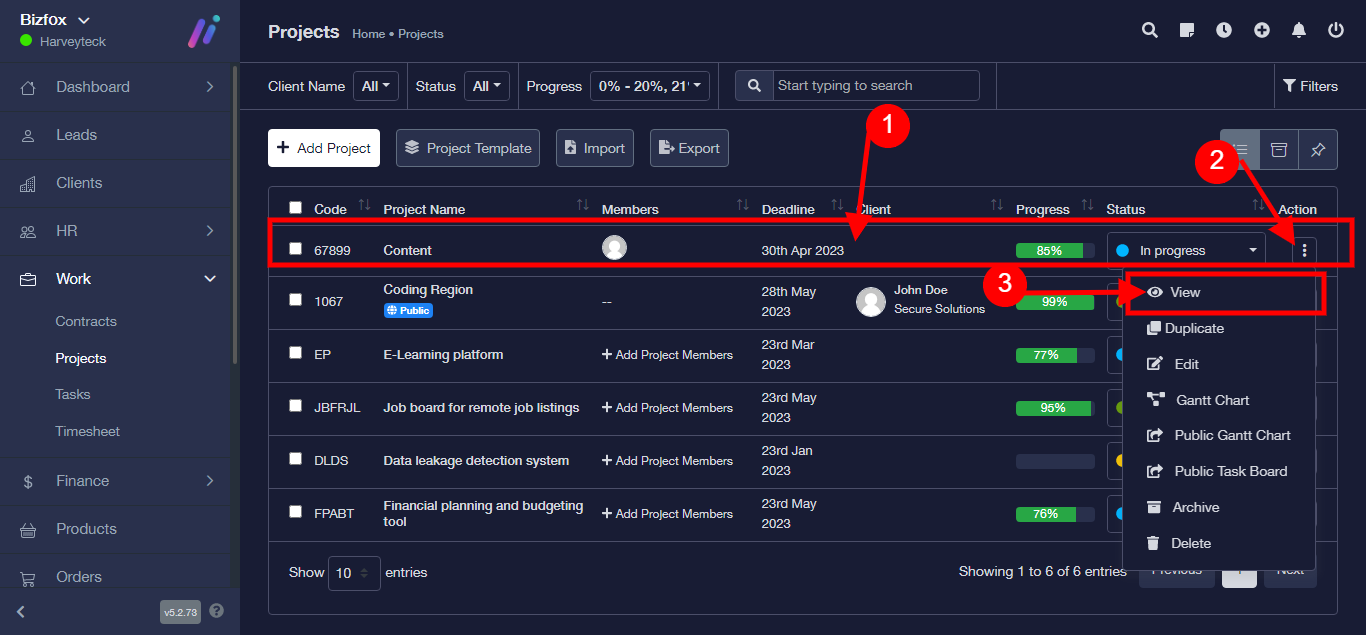
1) Select an already existing project
2) Click on the three toggle button
3) Select View
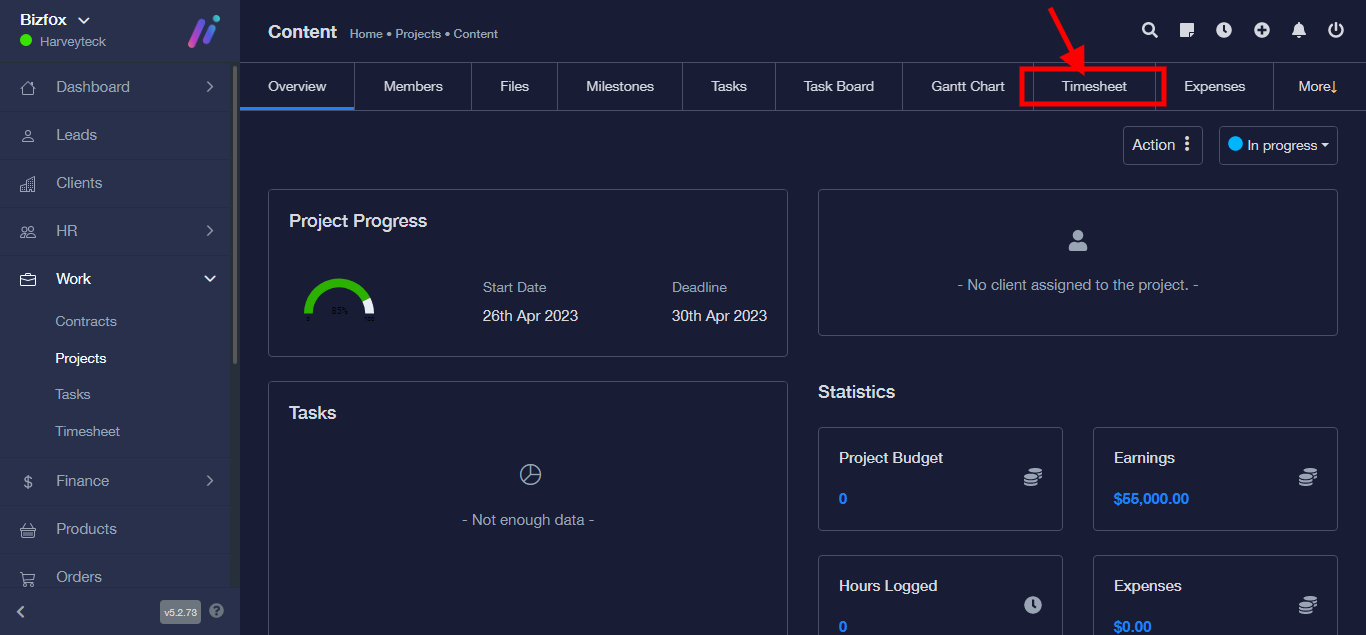
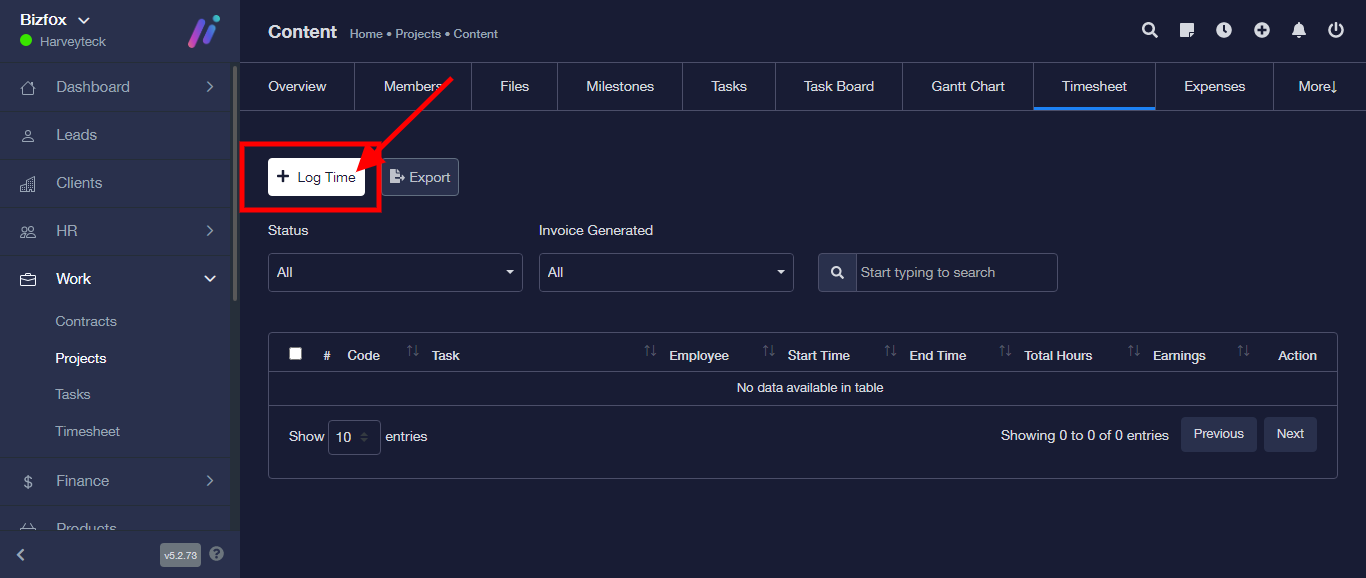
Step 3: Click “Timesheet”
Step 4: Click “Log Time”
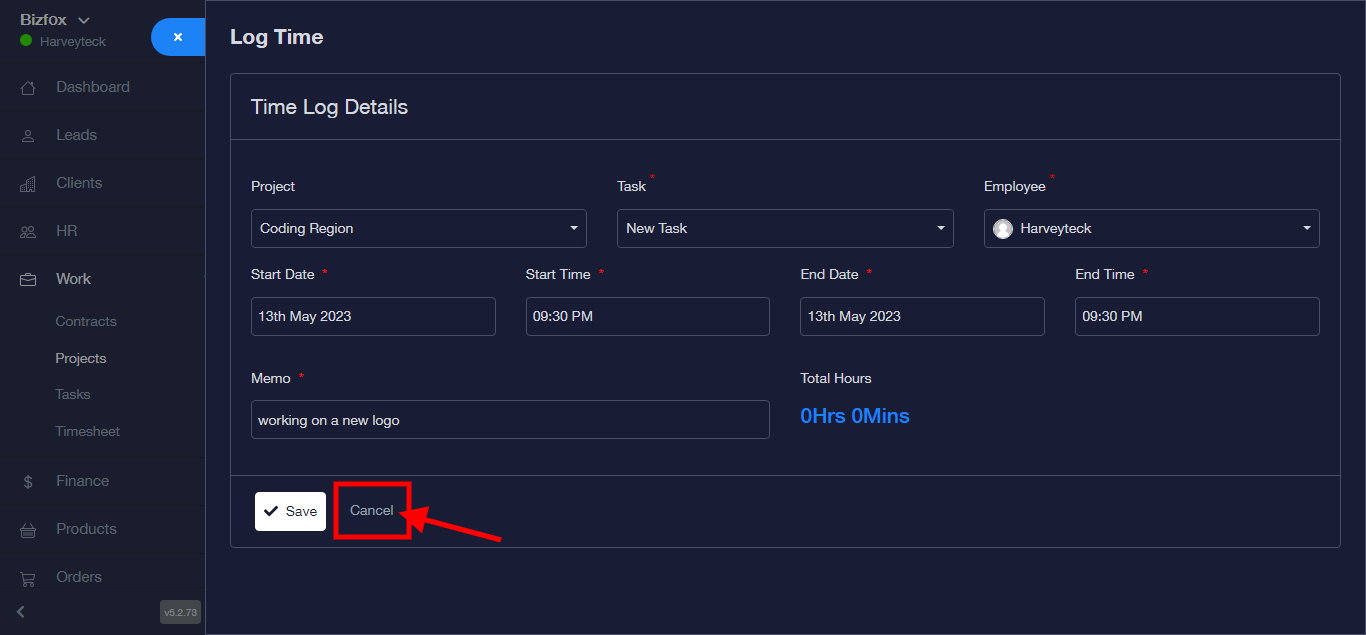
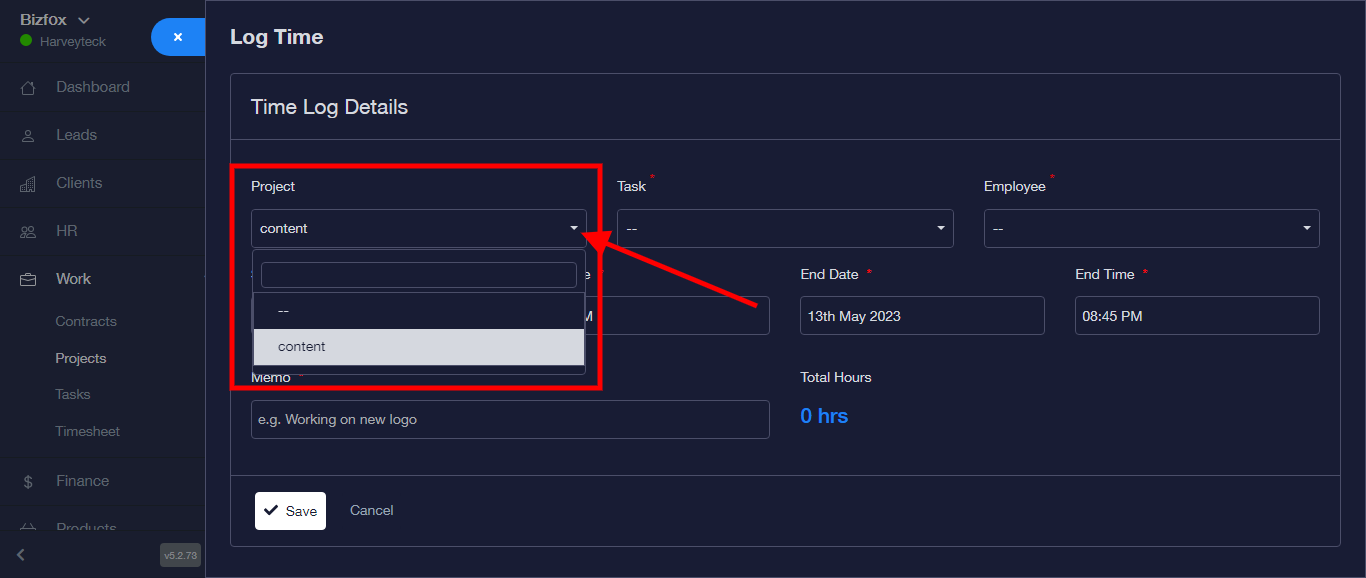
Step 5: Select “Project” from the dropdown
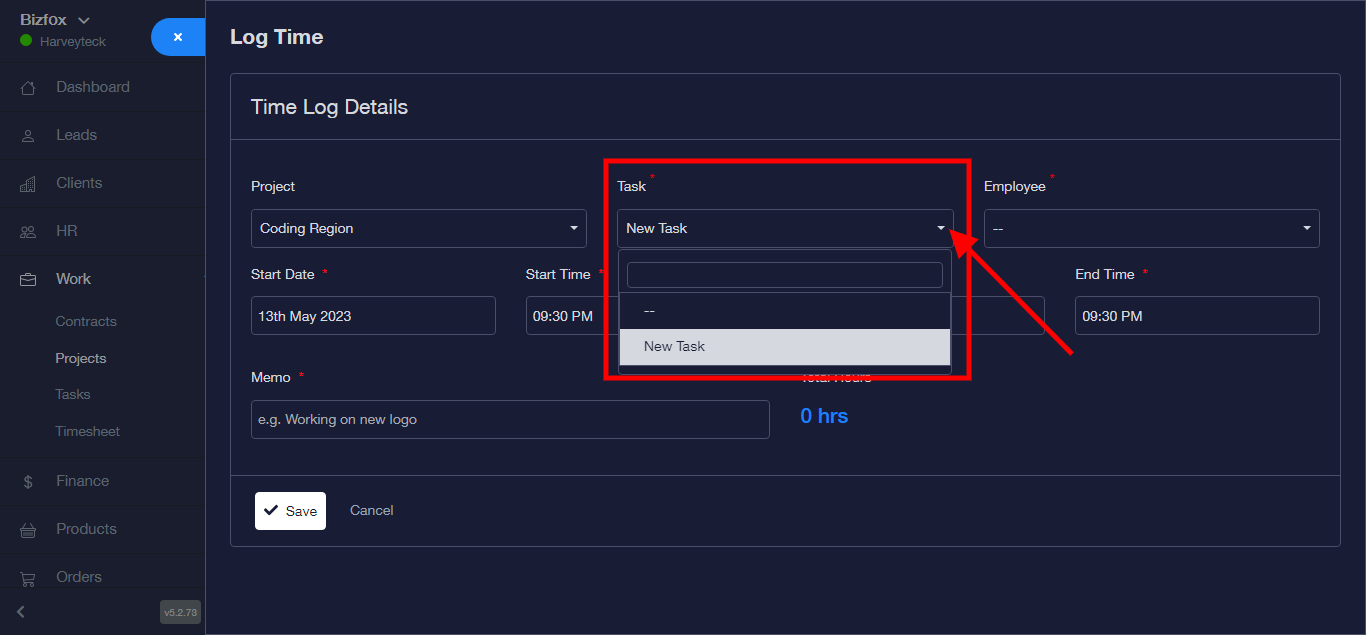
Step 6: Select “Task” from the dropdown
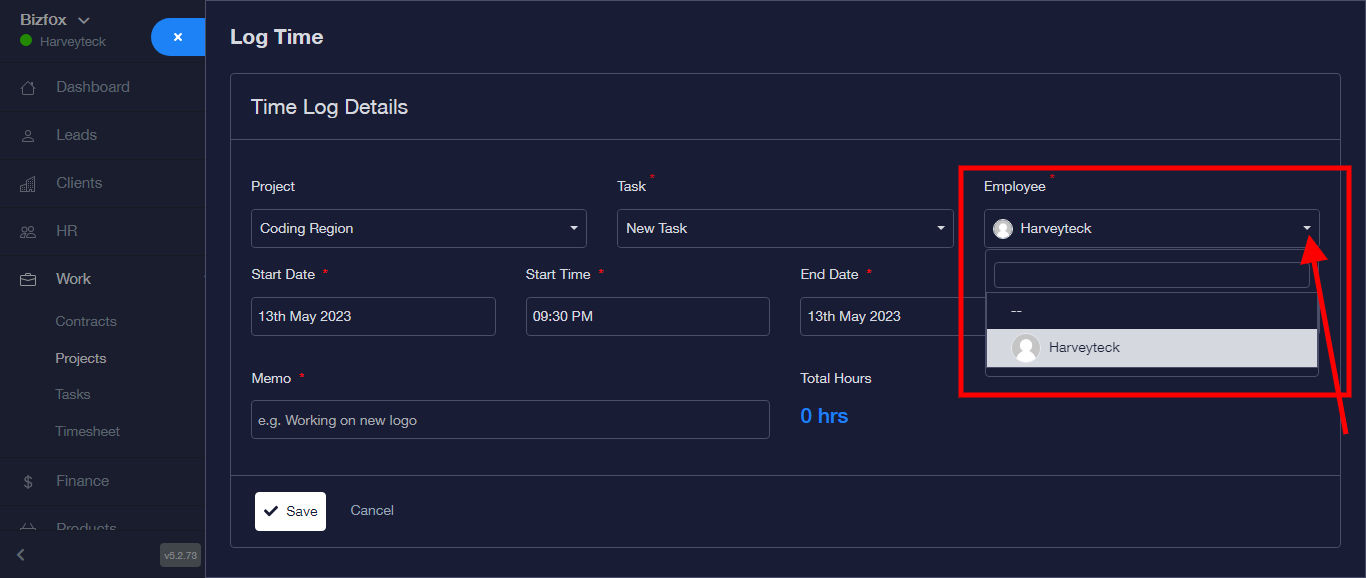
Step 7: Select “Employee” from the dropdown
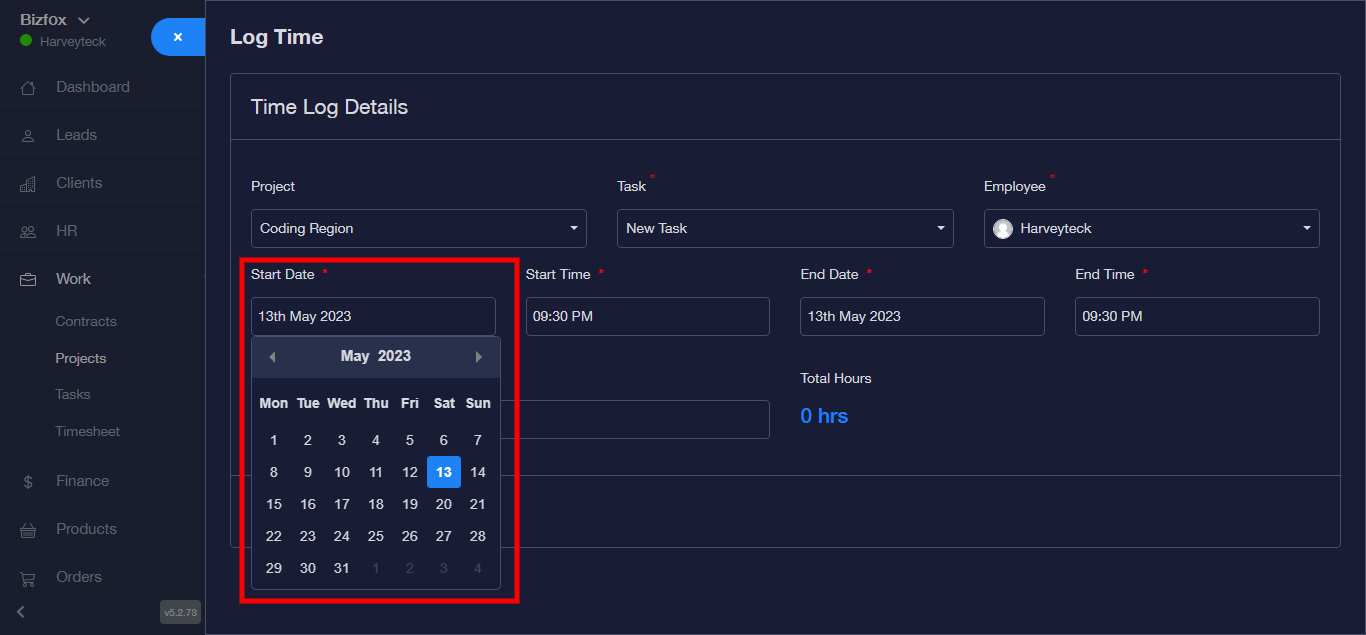
Step 8: Select “Start Date” from the dropdown
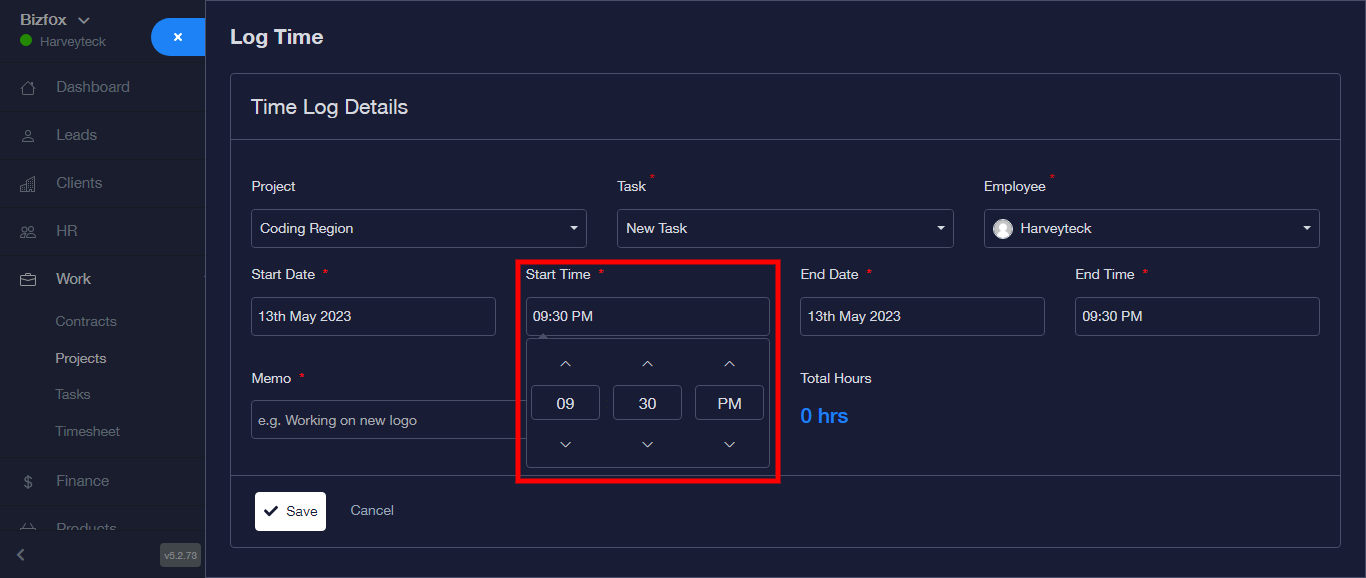
Step 9: Select “Start Time” from the dropdown
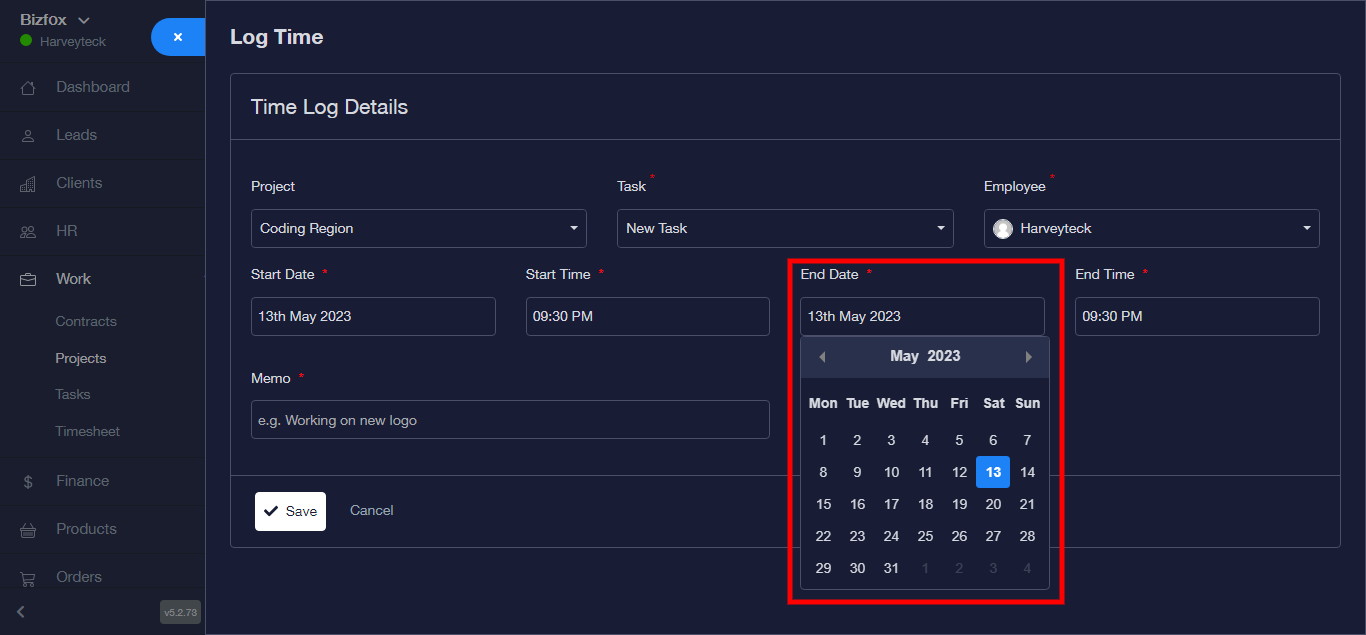
Step 10: Select “End Date” from the dropdown
Step 11: Select “End Time” from the dropdown

Step 12: Select “Memo” and Click “Save”
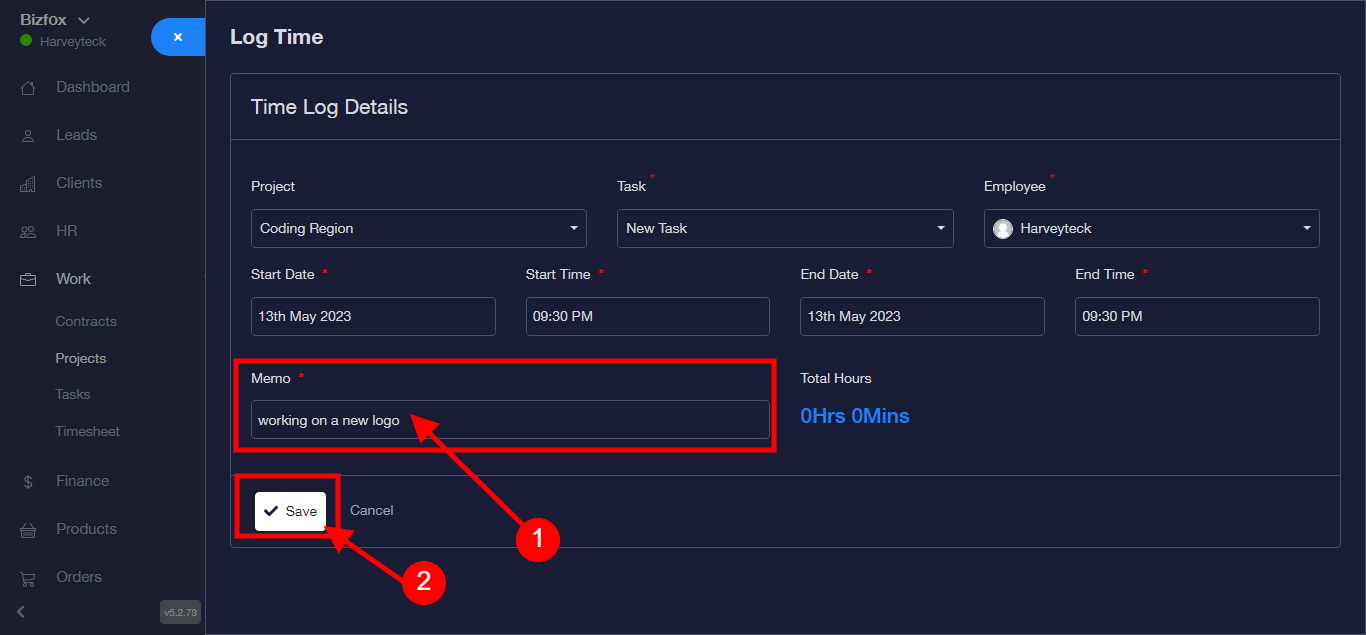
N/B: Use the “Cancel” button to cancel the process if need be.